
How to Plant a Wildlife Garden
Preparing the Site & Planting Your Plants

When I went looking for information about HOW to plant a wildlife garden, honestly, there isn’t a lot of useful information out there. And I think this is because it’s not something most people do more than once. You plant it — and then you wait. And you watch. And hopefully it takes. And those who do this for a living — the garden designers — often don’t do the installation, so they don’t write about the HOW. They may talk about what to plant and where, but the actual installation part is a bit of a mystery. So, I’m going to share what I did, what I wish I had done, and what I used to make it all happen.
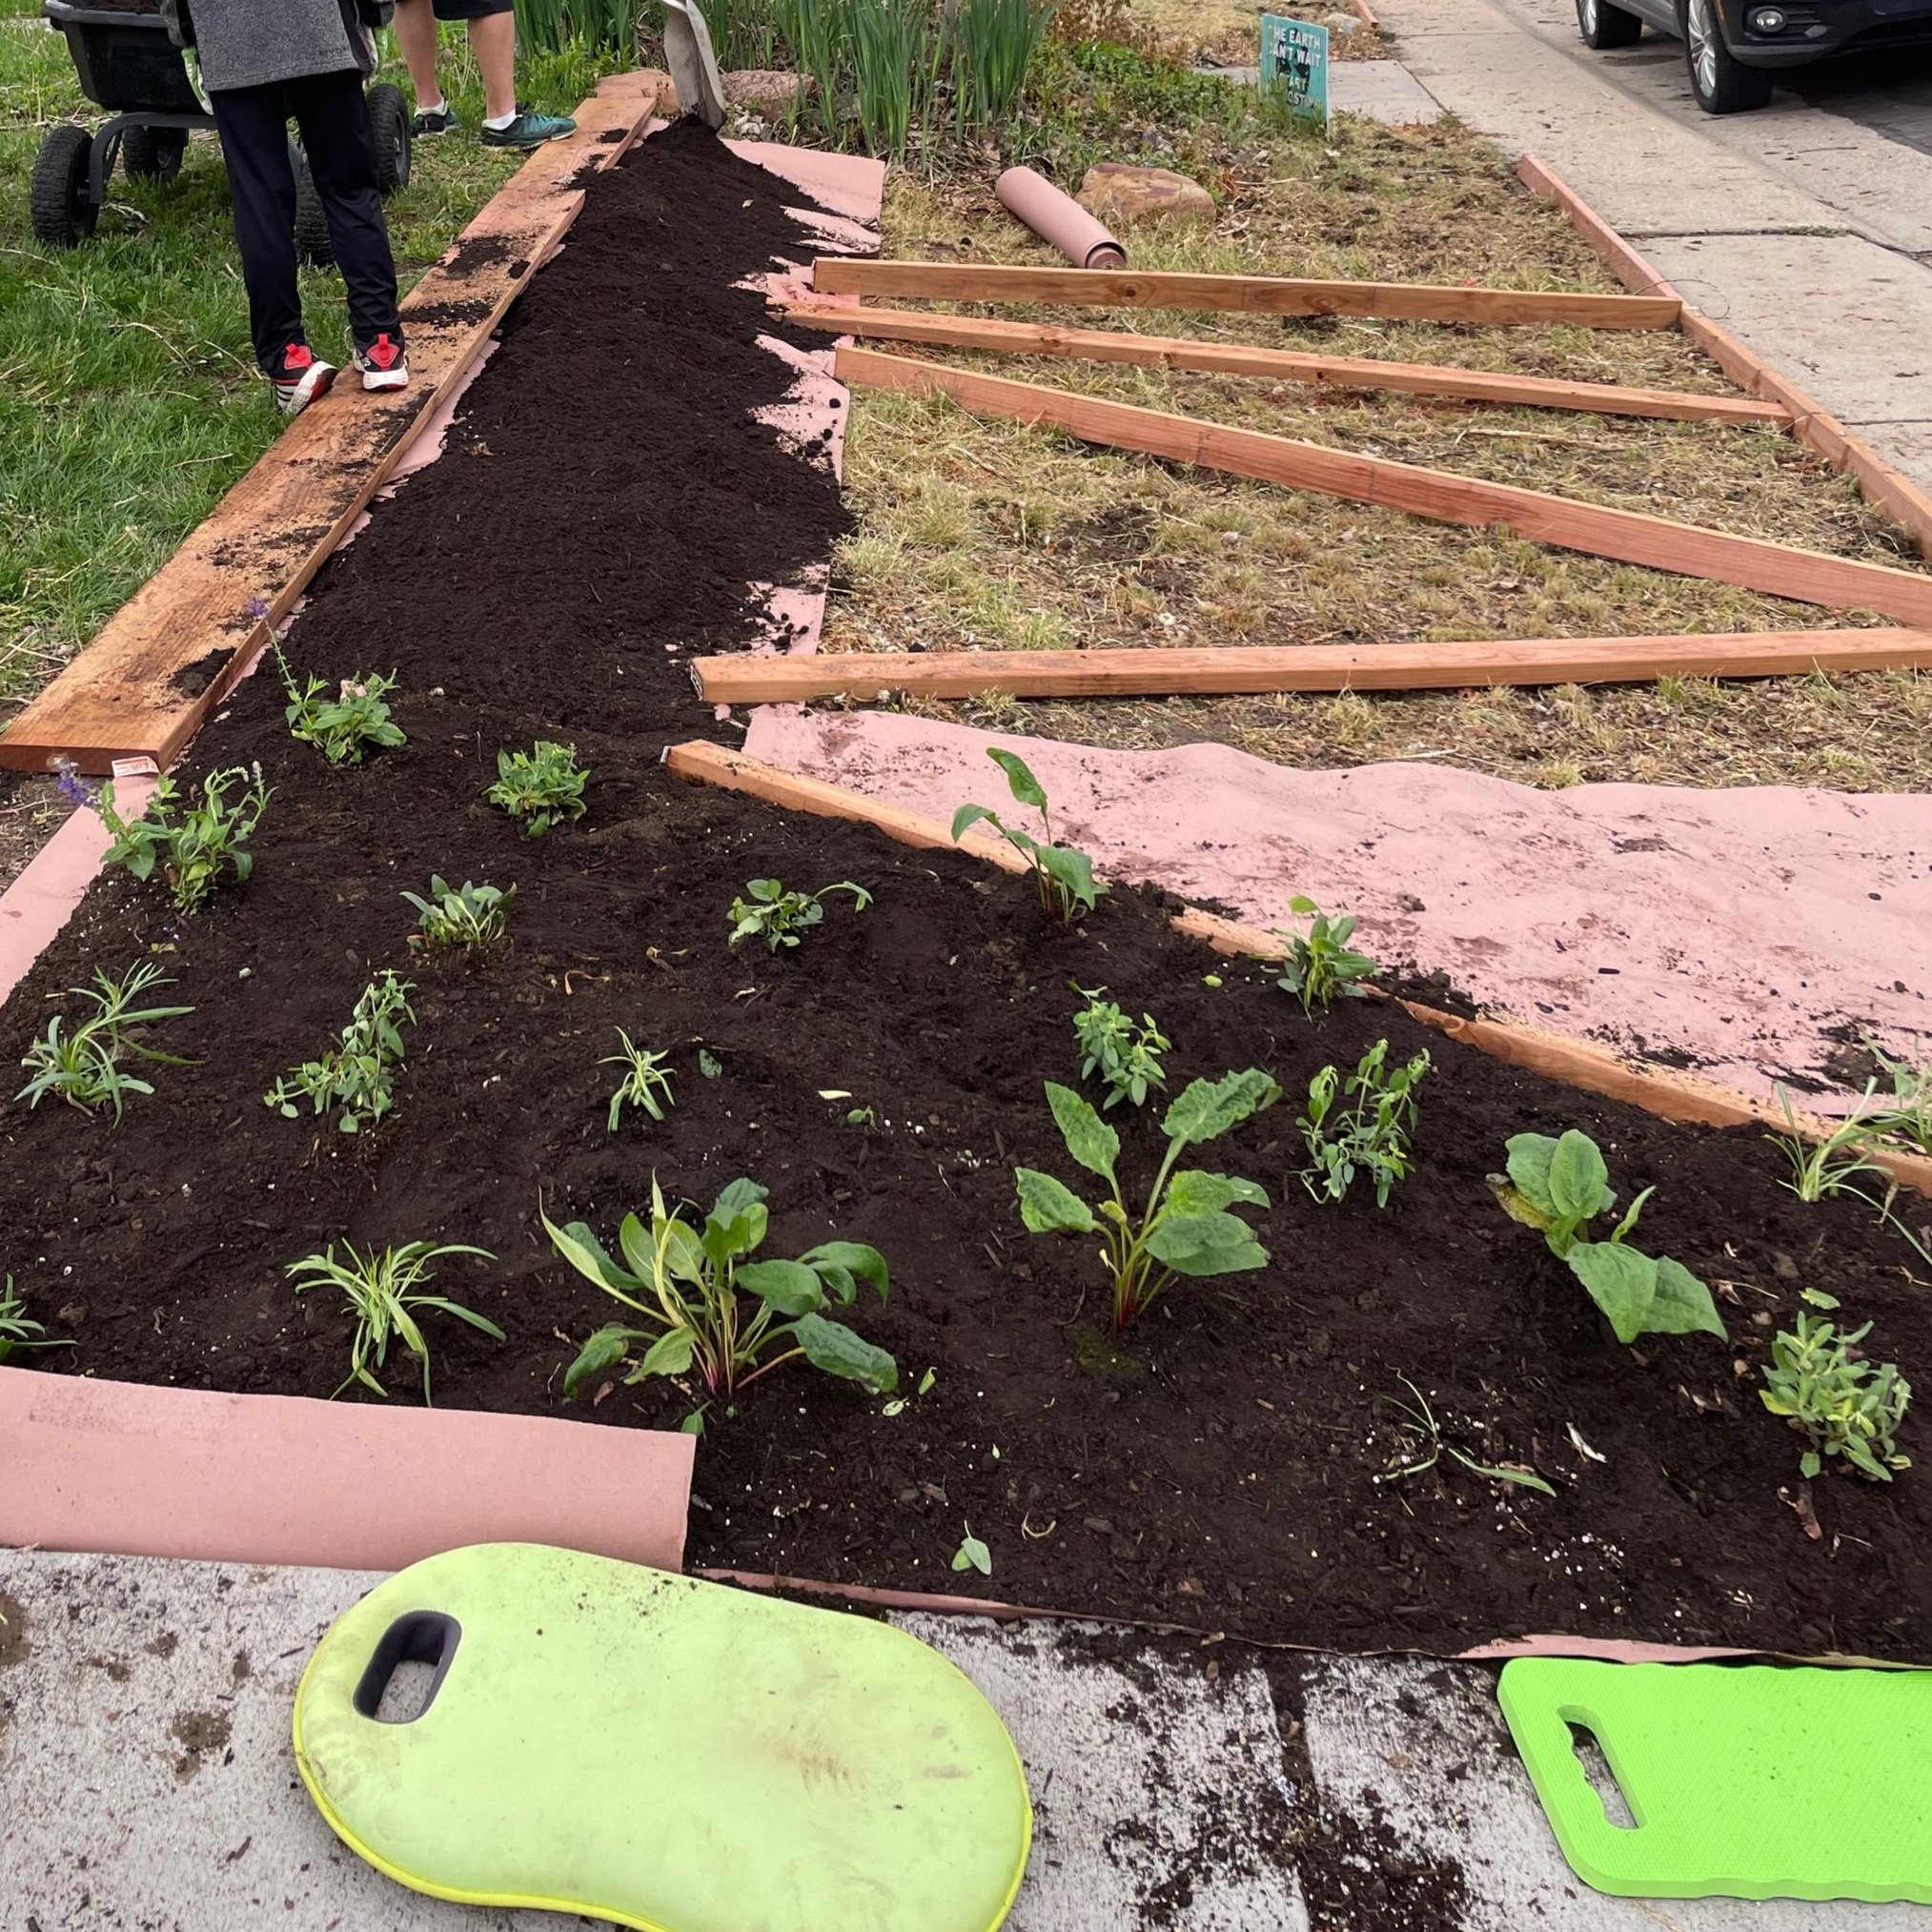
A peek into the project at the end of Year 1 including information about planting everything.
The one exception to this rule who I found was garden designer, Benjamin Vogt. First of all, his book, Prairie Up, has detailed instructions for designing and installing his method of prairie-style native planting. These were incredibly helpful. Additionally, while he is a busy guy, he often answers questions on his Instagram page. So I encourage you to purchase his book and give him a follow on Instagram. He is a natural teacher, and he doesn’t gate-keep his methodology. Much of what I describe here is drawn from his work, so credit where credit is due!
There are really two pieces to a Wildlife Garden installation: Site Preparation and Planting. So let’s look at both. The better prepared the site is, the easier the planting will be — and the easier it will be to maintain, too.


Laying out the boundaries before weed removal began.
Site Preparation
There are two stages to Site Preparation: removing anything that's already growing there – for me that was lots of noxious weeds and a little grass – and then getting the earth ready to receive the new plants.
Weed Removal
As a perfectionist, this is where I wish I could turn back time and start over. That’s not because things didn’t turn out well. They did. But I could have done this differently and have made things easier for myself
What would I do differently?
First of all, I would have started almost a year sooner by solarizing the entire site. Now, that's in retrospect, of course. But solarizing is a fabulous tool for killing weeds AND weed seeds. And it makes a huge difference over time. I have used solarization in several places in our yard to great success. Does it mean you will never have weeds? Nope. Most weed seeds are airborne, so solarizing won't do anything about the new weeds coming in. BUT our property is infested with two perennial weeds: Field Bindweed and Canada Thistle. Both have deep roots and can regenerate over and over again from those roots. Solarizing would have done the job well. But I didn't know we were going to do this project in time.
How do you solarize?
Solarizing in the Northern Hemisphere should start in late June or Early July and last for a minimum of 6 weeks – the longer the better. I would have started in July and left it until May when we planted. There is more information in this post, but basically you lay down large sheets of plastic – I use upcycled billboards. The lack of sunlight and water plus the buildup of heat kills anything underneath. Now, yes, that can also kill the microbes in the soil, too. That is certainly something to consider. But in the case of our yard, the tradeoff would have been worth it, frankly. There are ways to reestablish microbial life. We just didn't have the time for this project.

So what did we do?
Because it was the wrong time of the year, and I didn't have time to solarize the yard, I turned to herbicides. With 1000 square feet to do, an established tree's roots in certain places, and a very established population of weeds, this was the best solution for me. I used RoundUp only in the places where we would be planting. It took one application following the manufacturer's instructions. And the job was done. I don't use herbicides lightly, and if you choose this route, you must follow the instructions to the letter. But it was effective for this massive project.
I will say this, too: I was too careful in a few areas where there were exposed tree roots, and I'll be fighting the bindweed there forever. I should have been more aggressive in that area because bindweed is tenacious and can kill my other plants if I am not careful. That's the nature of bindweed.
We waited three weeks after applying RoundUp before moving on to the next phase.

Look at all of those beautiful plants! Let’s get planting!
Preparation for Planting
This phase went beautifully, and I wouldn't change a thing. I wanted a layer of organic material to exclude light, and I wanted to add a little nutrition back into the soil as a soil test revealed very little organic material at all. Frankly, this is part of why nothing grew in this area.
We worked wedge by wedge — prepping the site then planting. This was to limit the compaction of the compost, and to make the site easier to access. The wedges were part of the planting plan, and using lumber to lay them out made it easy to move from section to section.
So here's what we did:

Lay down a layer of builder's paper.
If we had been doing a smaller area – or had more time to save them – we would have used cardboard. But cardboard takes a VERY long time to break down here, so that might have been a problem on this scale anyway. The builder's paper is biodegradable and acts as a light barrier for any weeds that might still be lurking underneath. We used landscaping staples to hold down the paper – a very important piece!

Put down 3-4" of food-based compost.
I have had trouble in the past with compost that brings in weed seeds. It is so frustrating! So we ordered food-based compost from Compost Colorado. It is the nicest compost I've ever used, and it was great for this project. We ordered it by the yard. It wasn't cheap, but I knew it wasn't filled with weed seeds, either. We even had a rogue zucchini which sprouted in one spot – I'm sure from the compost!
Rake everything smooth.
We spent a lot of time making sure that the compost was level and evenly distributed across the area.
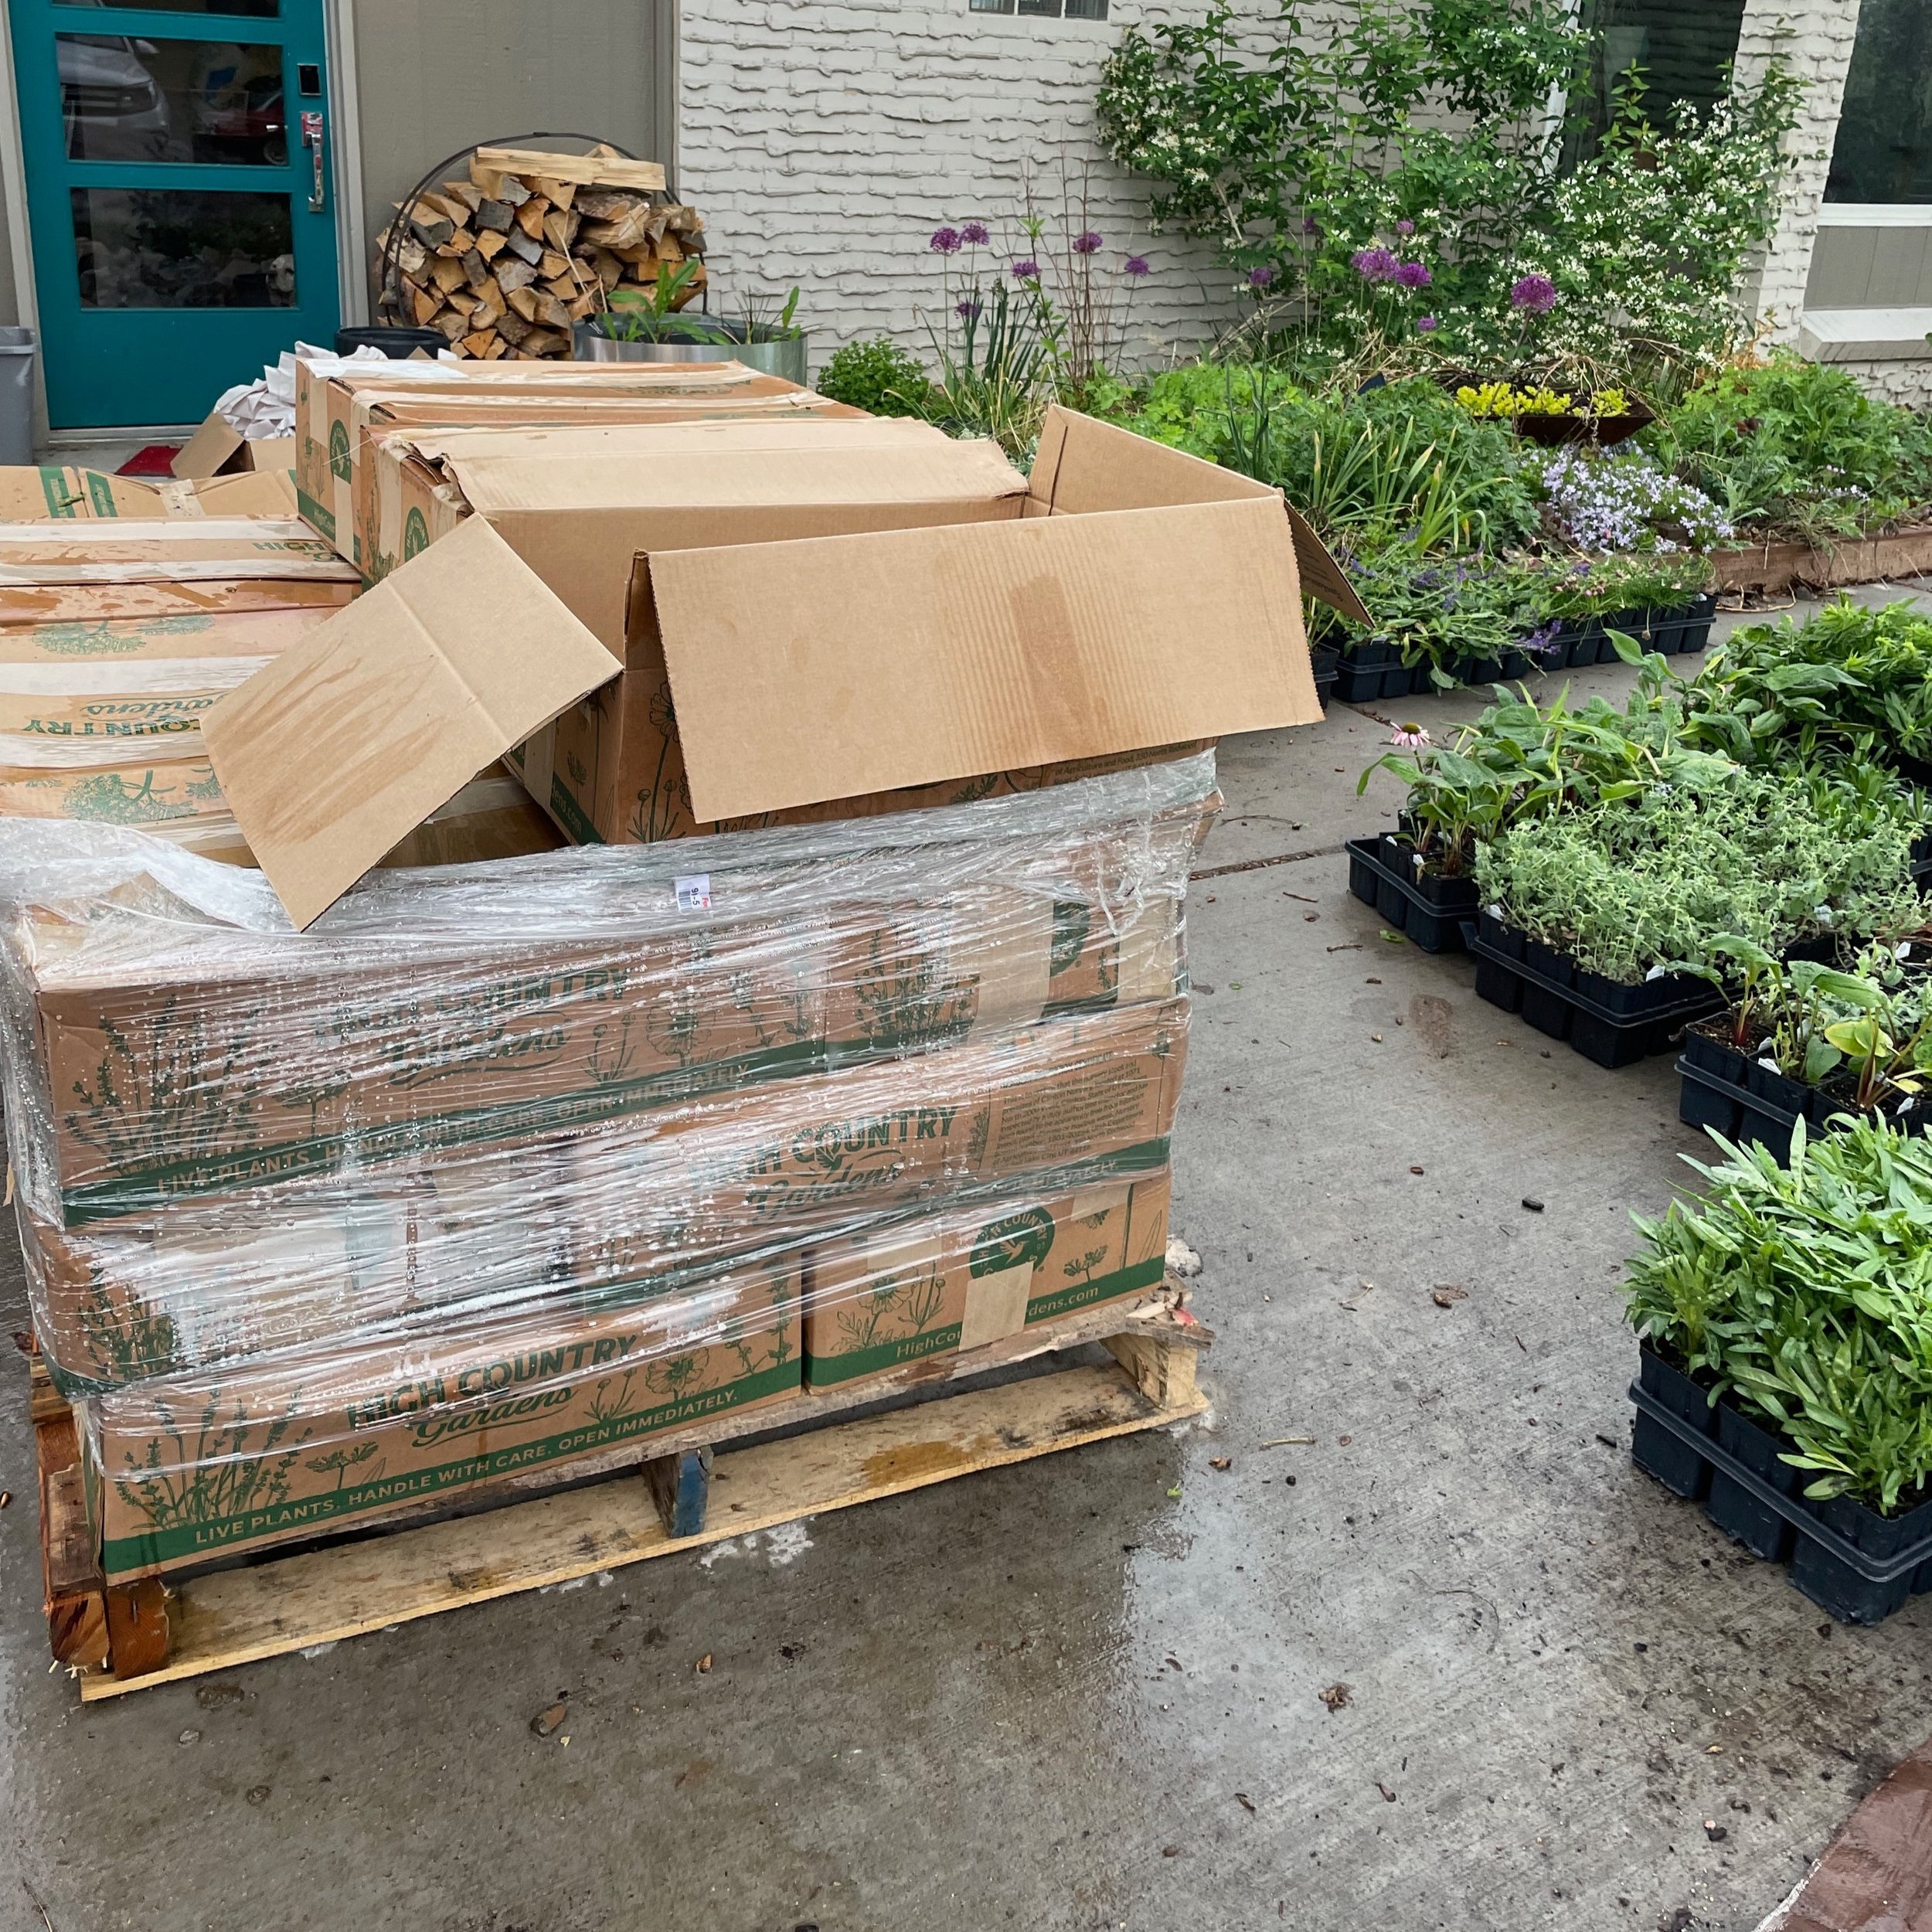
Pallets of plant boxes — unpacking them was such a joy!
How to Plant
Planting nearly 1000 plants takes time and organization. I took Kelly D. Morris' class, New Naturalism, and we talked a lot about plant selection and organizing plants into communities. So I spent a LOT of time with spreadsheets thinking about the site, which plants would work well together, and how to make something look natural and beautiful and work well, too. That's a lot. But I came up with six groupings of plants which would be repeated across the 1000 square foot area.
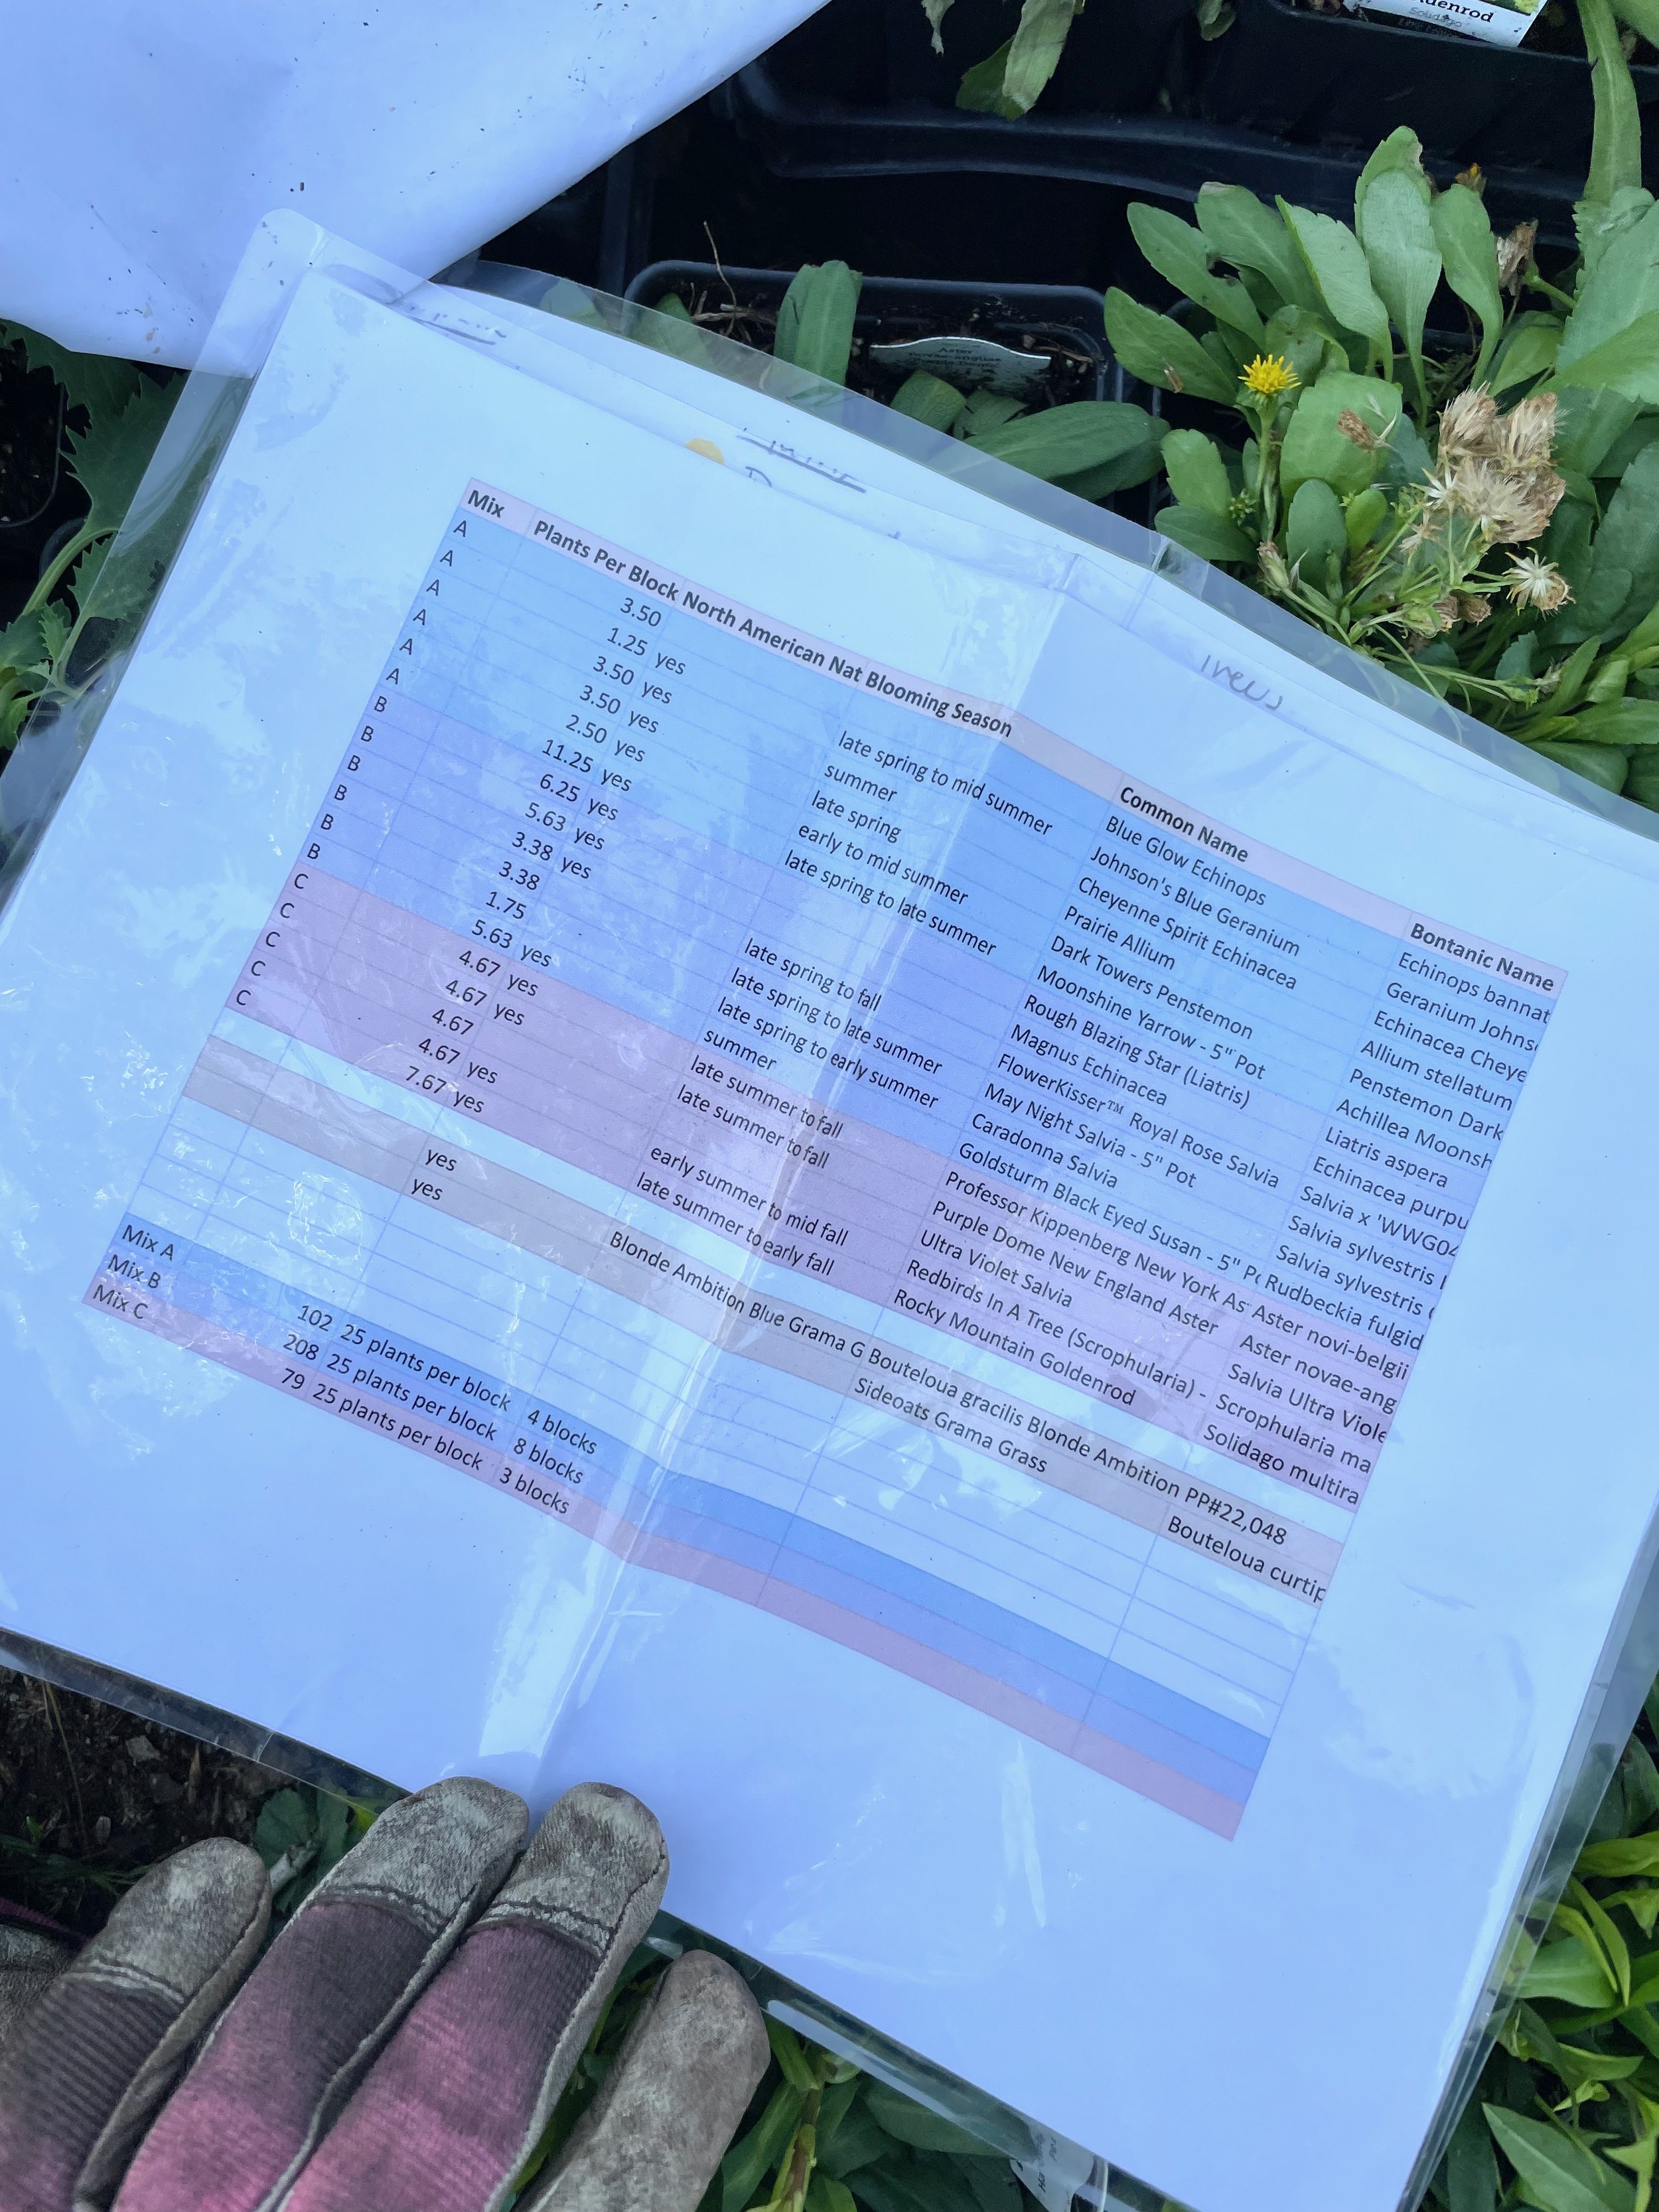
The planting plan spreadsheets. I laminated them which made the whole thing easier!

A diagram of the planting plan showing the large wedges from which we worked.
When the plants arrived, we spent an entire day organizing them into those groupings – first by species and then into groups. That was a day well spent. Had we not done this organization work, the planting work would have taken much longer.

Organizing the plants into the planting groups which made everything much easier in the end.
All told, it took three adults plus one middle schooler three full days to plant 1000 plants. I also had another middle schooler and his grown-up who came and assisted for an afternoon, too. So if you are going to tackle this all at once, get some friends to help!

On my plan, I divided the site into wedge-shaped areas. We used pieces of lumber to mark out the wedges, and then planted – one wedge at a time. We also gave each person working a specific job:
Runner: putting together the next two or three groups of plants to be planted; also taking the discarded plastic pots and putting them in the collection bin
Hole Digger: using a planting auger and a driver, this person put in 50 holes at a time. This takes strength in both the hands and the upper body.
Planter: physically planted each plant, putting the pots into a trug to be taken away and sorted

A good auger is essential for digging all of those holes!

Working wedge-to-wedge made things less messy and easier to tackle
Get some good friends to help! It makes the whole thing more fun!
Necessary equipment
These are the things which I found to be essential to this project:
Gardening Gloves

Kneeling Pad


Trowel


Because of the size and nature of the site, we worked across the site left to right and from the top of each wedge to the bottom to minimize the amount of time we spent kneeling or standing on the muddy compost.

Planting the Trees & Shrubs
Correctly planting trees ensures their success long-term. They should be planted correctly from the start, and I followed the current guidelines which call for a wide and shallow, bowl-shaped hole which better supports root-growth. For more about planting trees, use this guide.
Mulch
I toyed with the idea of putting down wood chips once everything was planted. In the end I decided against it because I wanted to be able to scatter some seeds amongst the plants, and wood chips tend to keep seeds from germinating.
Do I regret this decision? Sometimes. It would be nice to have fewer weeds, but once the densely-planted design grows in, the weed pressure should be significantly reduced.

Here’s the after shot — well, after the big planting. But of course, there was more work to be done!
Recycling
When it was all done, we had a lot of waste to dispose of properly. The cardboard boxes in which the plants had been shipped were used as weedblocking underneath a path area. Other cardboard was recycled. I found a local native nursery who took the pots and plant trays. And I recycled the plant tags. Later I had a conversation with High Country Gardens about starting a mail-back program for some or all of these materials. Maybe that will happen in the future. But the gardening industry generates a lot of plastic waste — finding a good reuse for those materials is always the best solution.
Reflection
While the installation of the Wildlife Garden was a huge project, it has been incredibly fruitful! I'm so proud of how it looks, and I'm delighted every time I see birds and butterflies and other creatures discovering our yard as a sanctuary for them. This project continues to evolve – we have a water feature to install, and so much more, so I hope you'll subscribe both here and on my YouTube channel as well as on Instagram where there will be updates and more as the garden grows.
And, as always, reach out if you have questions!
Pin it!

Whether you are planting a wildlife garden, a pollinator garden, or just planting native plants, preparing your site is critical to your success. Learn how to prepare your site, how to prevent weeds, and how to plant native plants. Also: garden front yard, wild gardening, native plants for pollinators, plants for birds, getting rid of weeds, starting new garden, wildlife border, gardening plan.