DIY Hanging File Drawer
DIY Hanging File Drawer
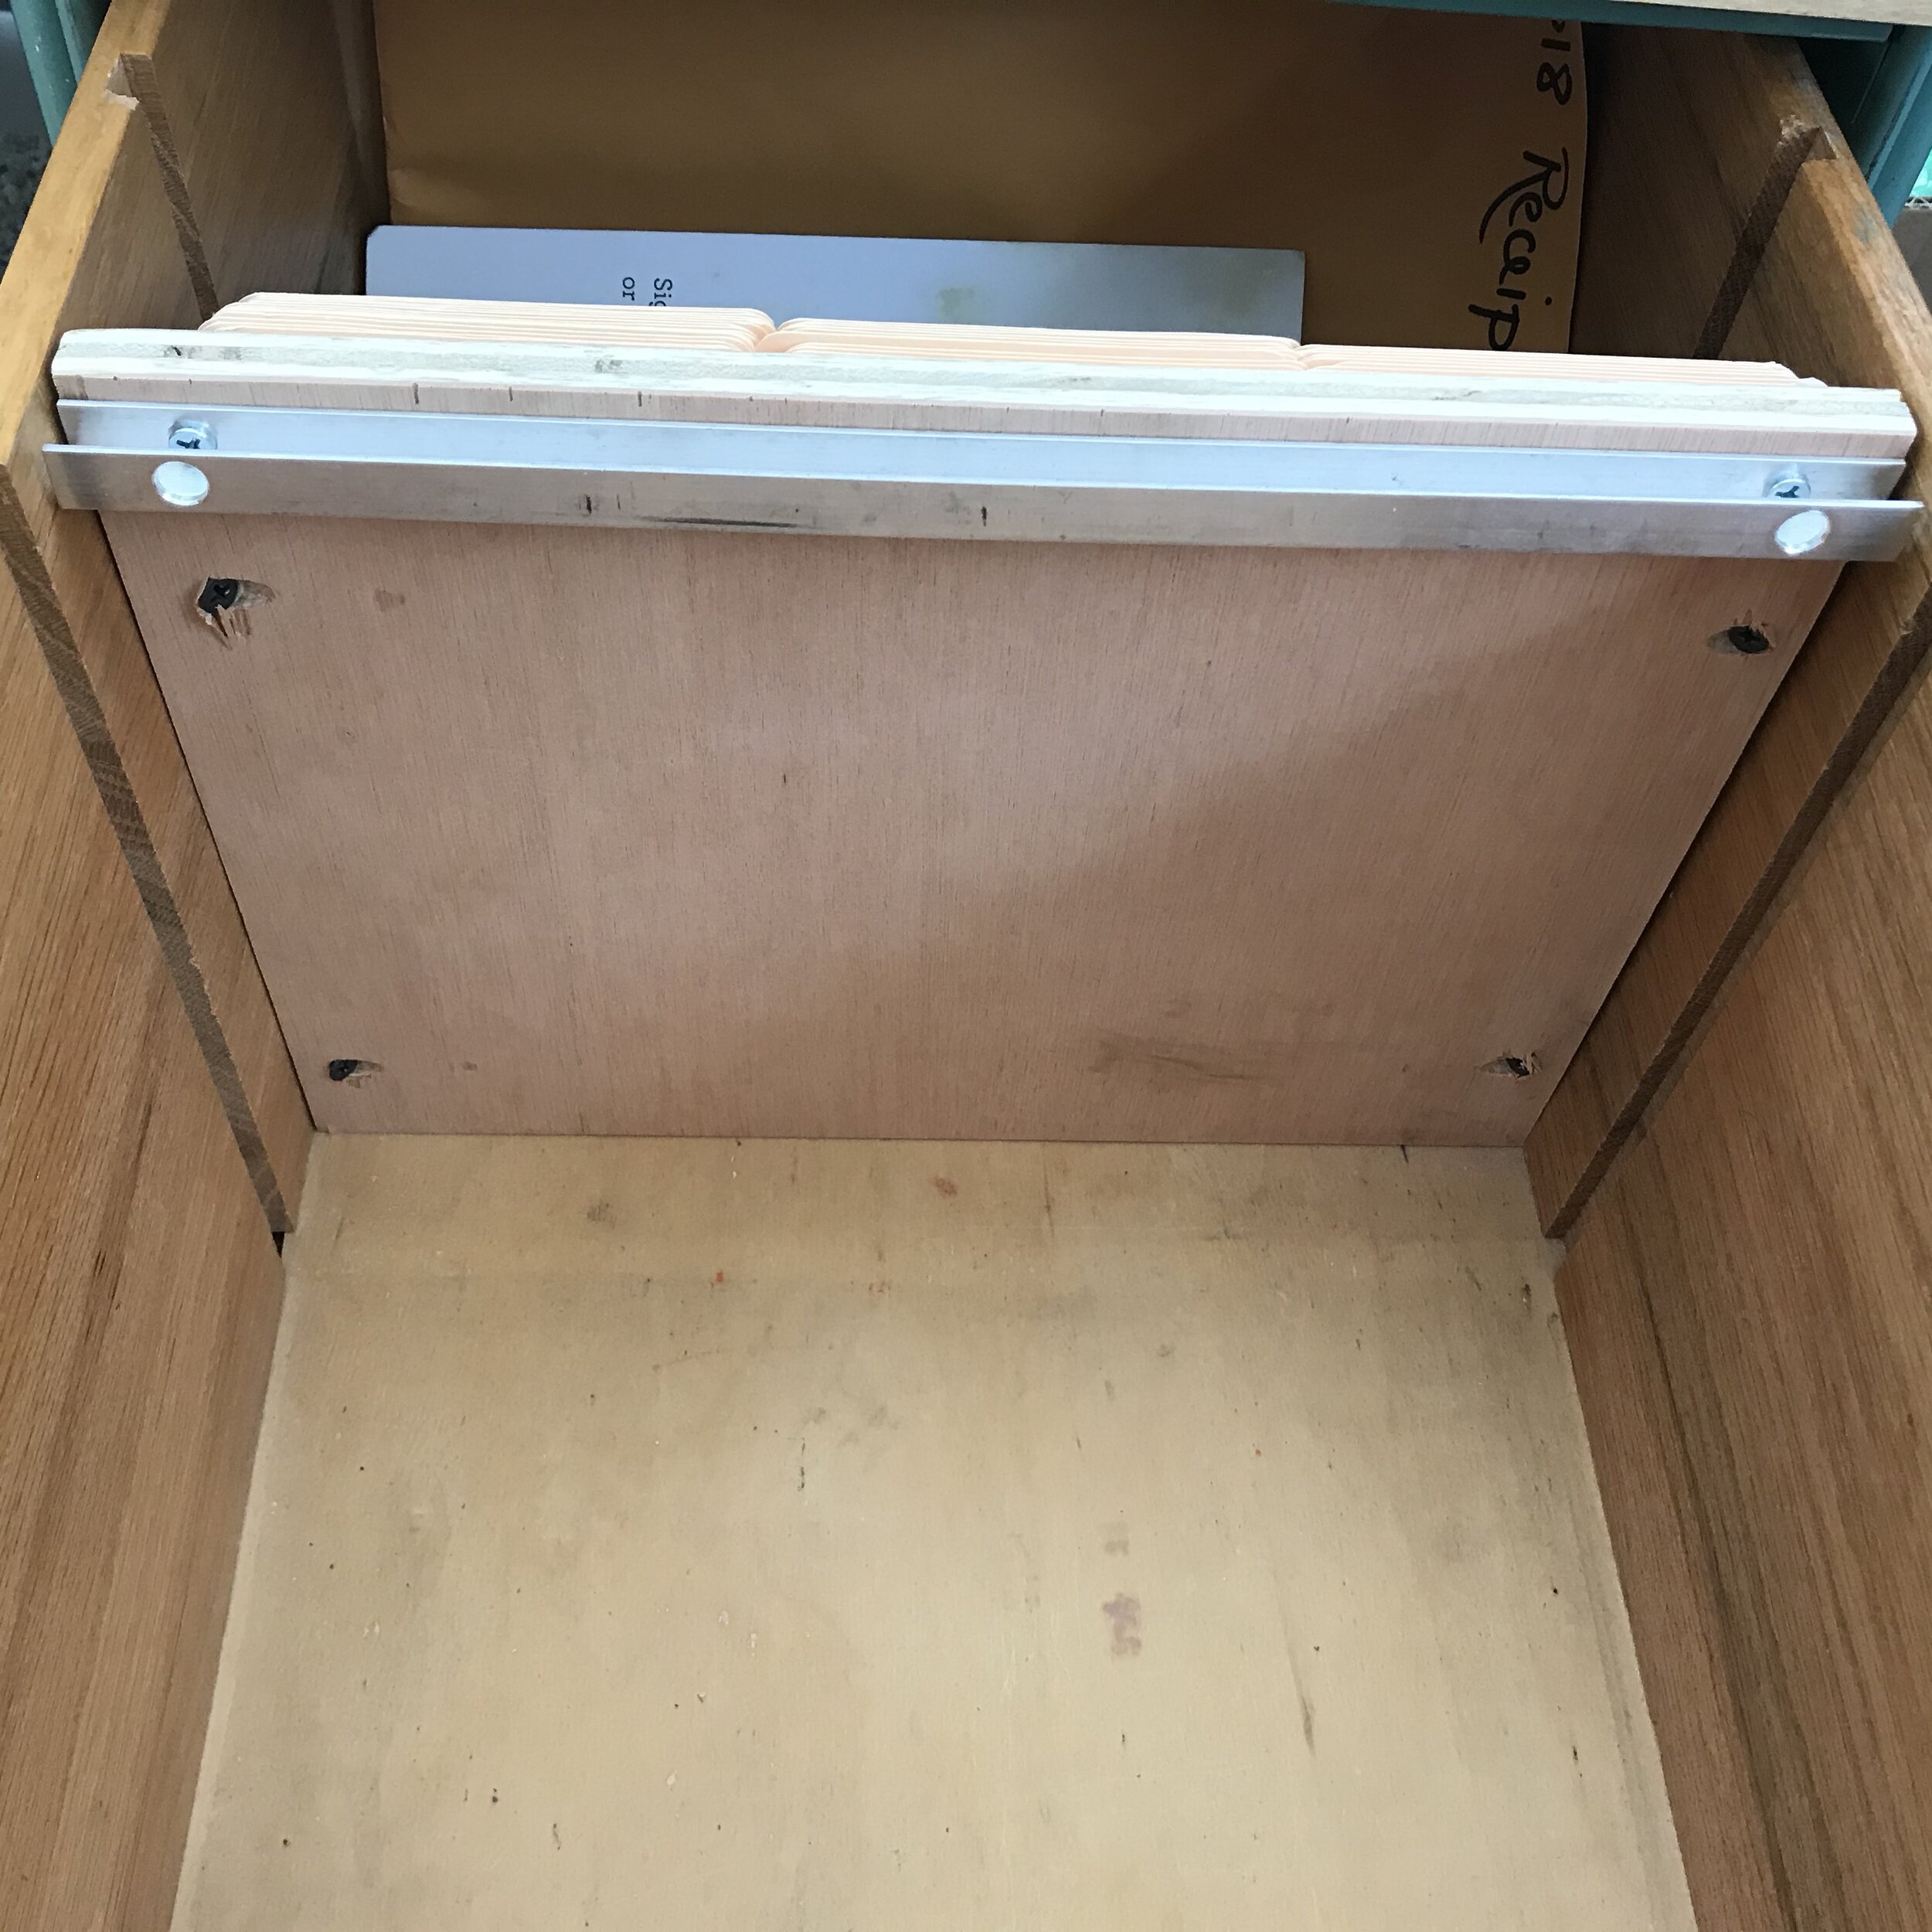
When I purchased a vintage teacher’s desk for the Workroom Makeover, one of the features I loved about it was the file drawer. I needed a good file solution, and this one is great. However, the dividers for the file drawer had long since disappeared, and the empty drawer needed to be retrofitted to accommodate files again. I could have just cut a piece of plywood to slip into the existing grooves in the drawer sides which would have worked nicely for file folders. However, I wanted hanging files. So with some simple tools and supplies, my husband outfitted the drawer for hanging folders.
Materials
aluminum channel
plywood
screws
drill
Note: aluminum channel is sold in 36” lengths at places like Home Depot. Because it is aluminum, it can be cut with woodworking tools. You’ll need to cut it to length — or have it cut.
Step 1: Measure and Cut
Measure the drawer and cut both the plywood and the aluminum channel to fit. To make fastening the channel to the desk, we drilled holes in the channel which allowed the screws to fasten easily and allowed the drill bit to go through the channel for ease of installation.
Step 2: Fasten channel to front of drawer
To ensure that your measurements will be exact, fasten the channel to the existing drawer front first.
Step 3: Install the separating Panel
Measure from the installed channel back in the drawer. In my case, the grooves in the drawer were not sized appropriately for hanging files, so we had to screw the panel in to the sides of the drawers at an angle. But you may be lucky and may be able to use an existing groove or spacer.
Optional: Install a spacer
My drawer had two grooves in it, so we cut another plywood panel — this time half-height — and slid it into the second groove. This creates three distinct compartments in the desk drawer which helps to keep things organized.
Pin it!
Add your files!
The aluminum channel holds the hanging files perfectly!


