Week Three | October 17 | Furniture for an Office & Sewing Room
I am taking on the room where I spend more time than any other: my Workroom. Part library, part sewing room, part home office, and part art studio, my Workroom has to do it all. This week is all about furniture — the new, the vintage, and the repurposed.
Week Three! Week Three! This is, according to tradition and urban legend, where the One Room Challenge earns the word “challenge.” The first two weeks are exciting and inspiring. But by Week Three, sh*t gets real, people. And it is very, very real in my Workroom.
Let’s also throw in the fact that cases and cases of The Nice List arrived to be shipped out late last week. Yes, I have to keep working in this room while I’m doing this makeover. There’s no shutting the door and just walking away! So, I am trying to keep the chaos as confined as possible, and this week’s projects made a big impact in the room in short bursts of time.
So let’s get down to it… if you are just joining me, welcome! I’m tackling on my Workroom for this season of the One Room Challenge. Last spring we did a Guest Room Refresh which was so fun I decided to do it all again!
My Workroom functions primarily as my writing space, but it is also a library, an art studio, a craft room, and a sewing room — all crammed into an 11’ x 14’ space in our Mid Century Modern home. Here’s the space plan as well as the inspiration board:
So this week’s focus is furniture. It takes the right furniture to make all of those functions work in a small room. The furniture also has to be adaptable, functional, and can’t cost a fortune. In my case, I needed to work with what I had and make it better in the space — and add a little vintage flair, too.
Let’s start with the vintage flair!
A Vintage Teacher’s Desk
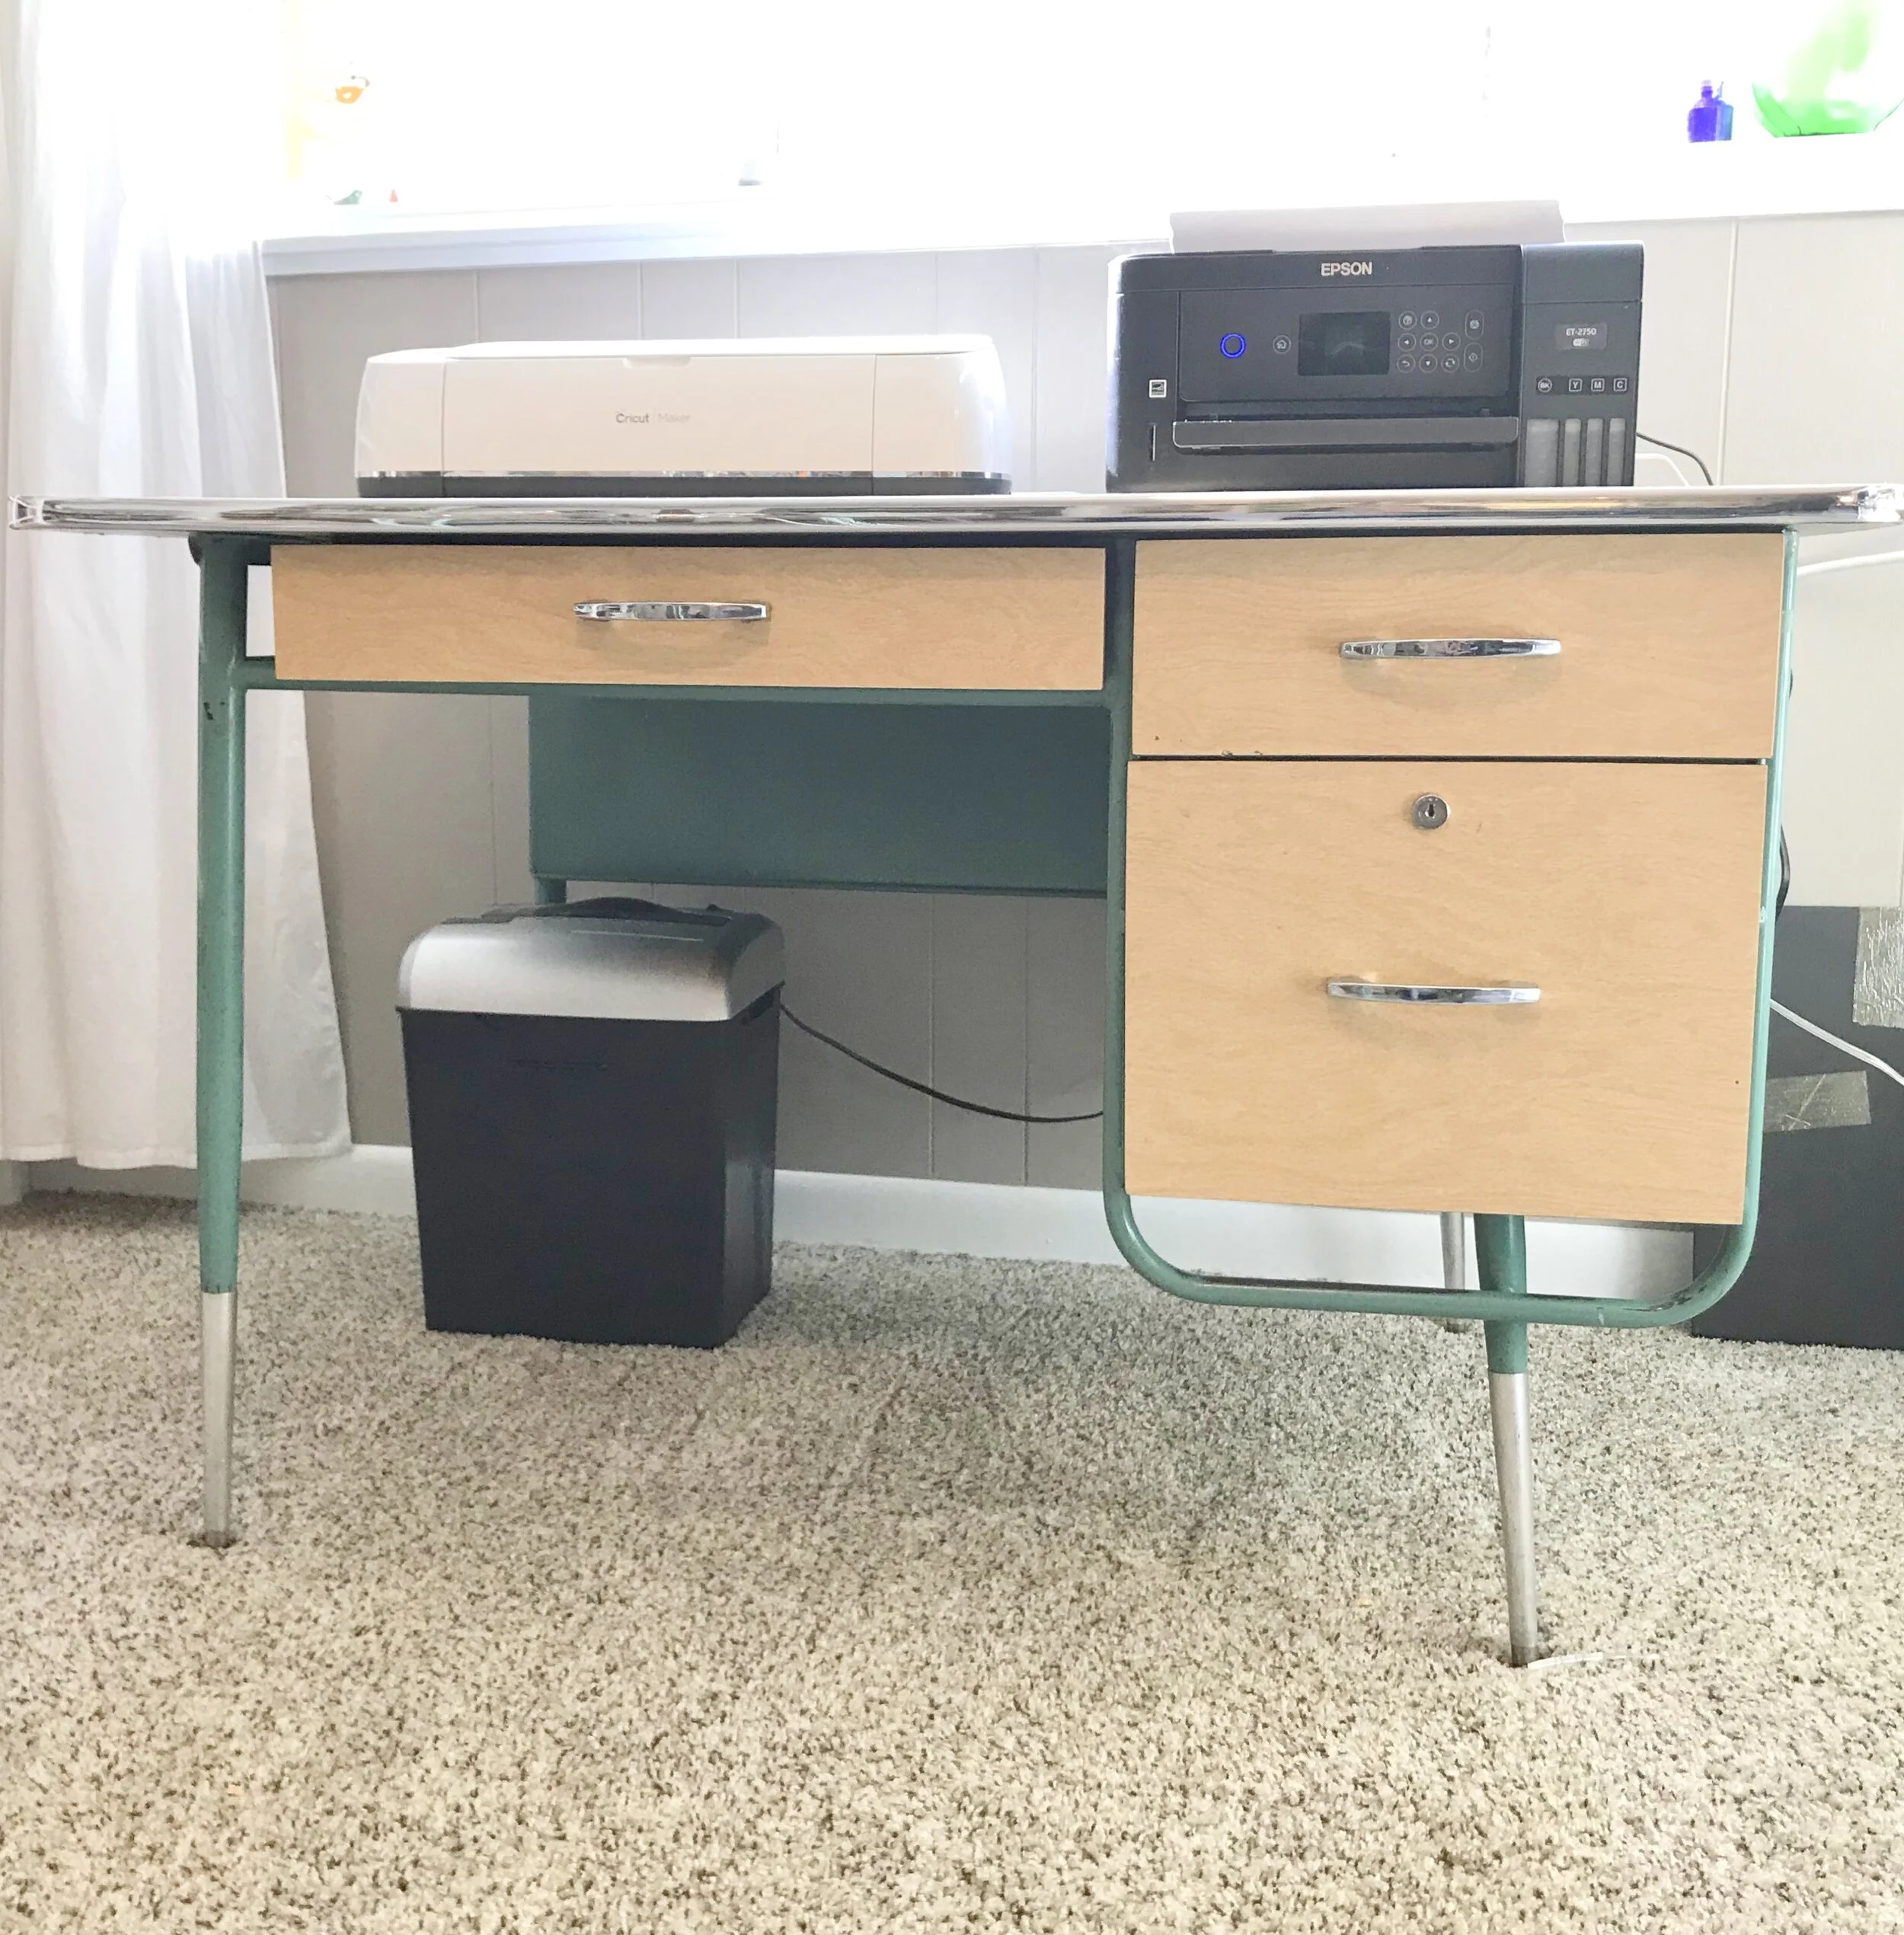
Before I began the ORC, I had a piece of white laminate desktop mounted on legs underneath my window. That was the table for my printer and my Cricut. Underneath was an upholstered bench inside of which were my files. Somewhat functional, but cluttered and not attractive. And the storage was all wrong. I had to solve this problem. So I turned to my favorite source for vintage cast-offs: the Facebook Marketplace. Sure enough, I found a 1950’s teacher’s desk in gorgeous condition.
The best part: it was $25. Sold!
The desk is steel painted in a perfect mid-century aqua with three drawers including a file drawer. The desk top is generous, too, which leaves plenty of room for my Cricut and my printer — neither of which are small.
It needed a little love, and in Week 5 I will show you how I am outfitting the drawers — each one with a purpose. But this week, I have a tutorial for you on how to replace the plastic or rubber trim on a mid century tabletop or desk. The trim on this piece was cracked and damaged in one corner, so I stripped it all off and replaced it with new trim. The desk’s top is a maple-look formica, and the original rubber trim was a matching shade of yellow. I couldn’t find trim in the right color, so I went with chrome to match the desk’s original handles. I absolutely love how it came out.
Warning: this is a two person project! I did it by myself, and it was much harder — and stickier — than it should have been. I needed a second set of hands!
Before: not functional or attractive. Just cobbled together.
After: a dash of vintage plus functional drawers and a great work surface.
A Reading Chair
Option 1: comfortable, basic Ikea with sentimental memories.
Option 2: The Reading Throne with vintage charm and regal fabulousness.
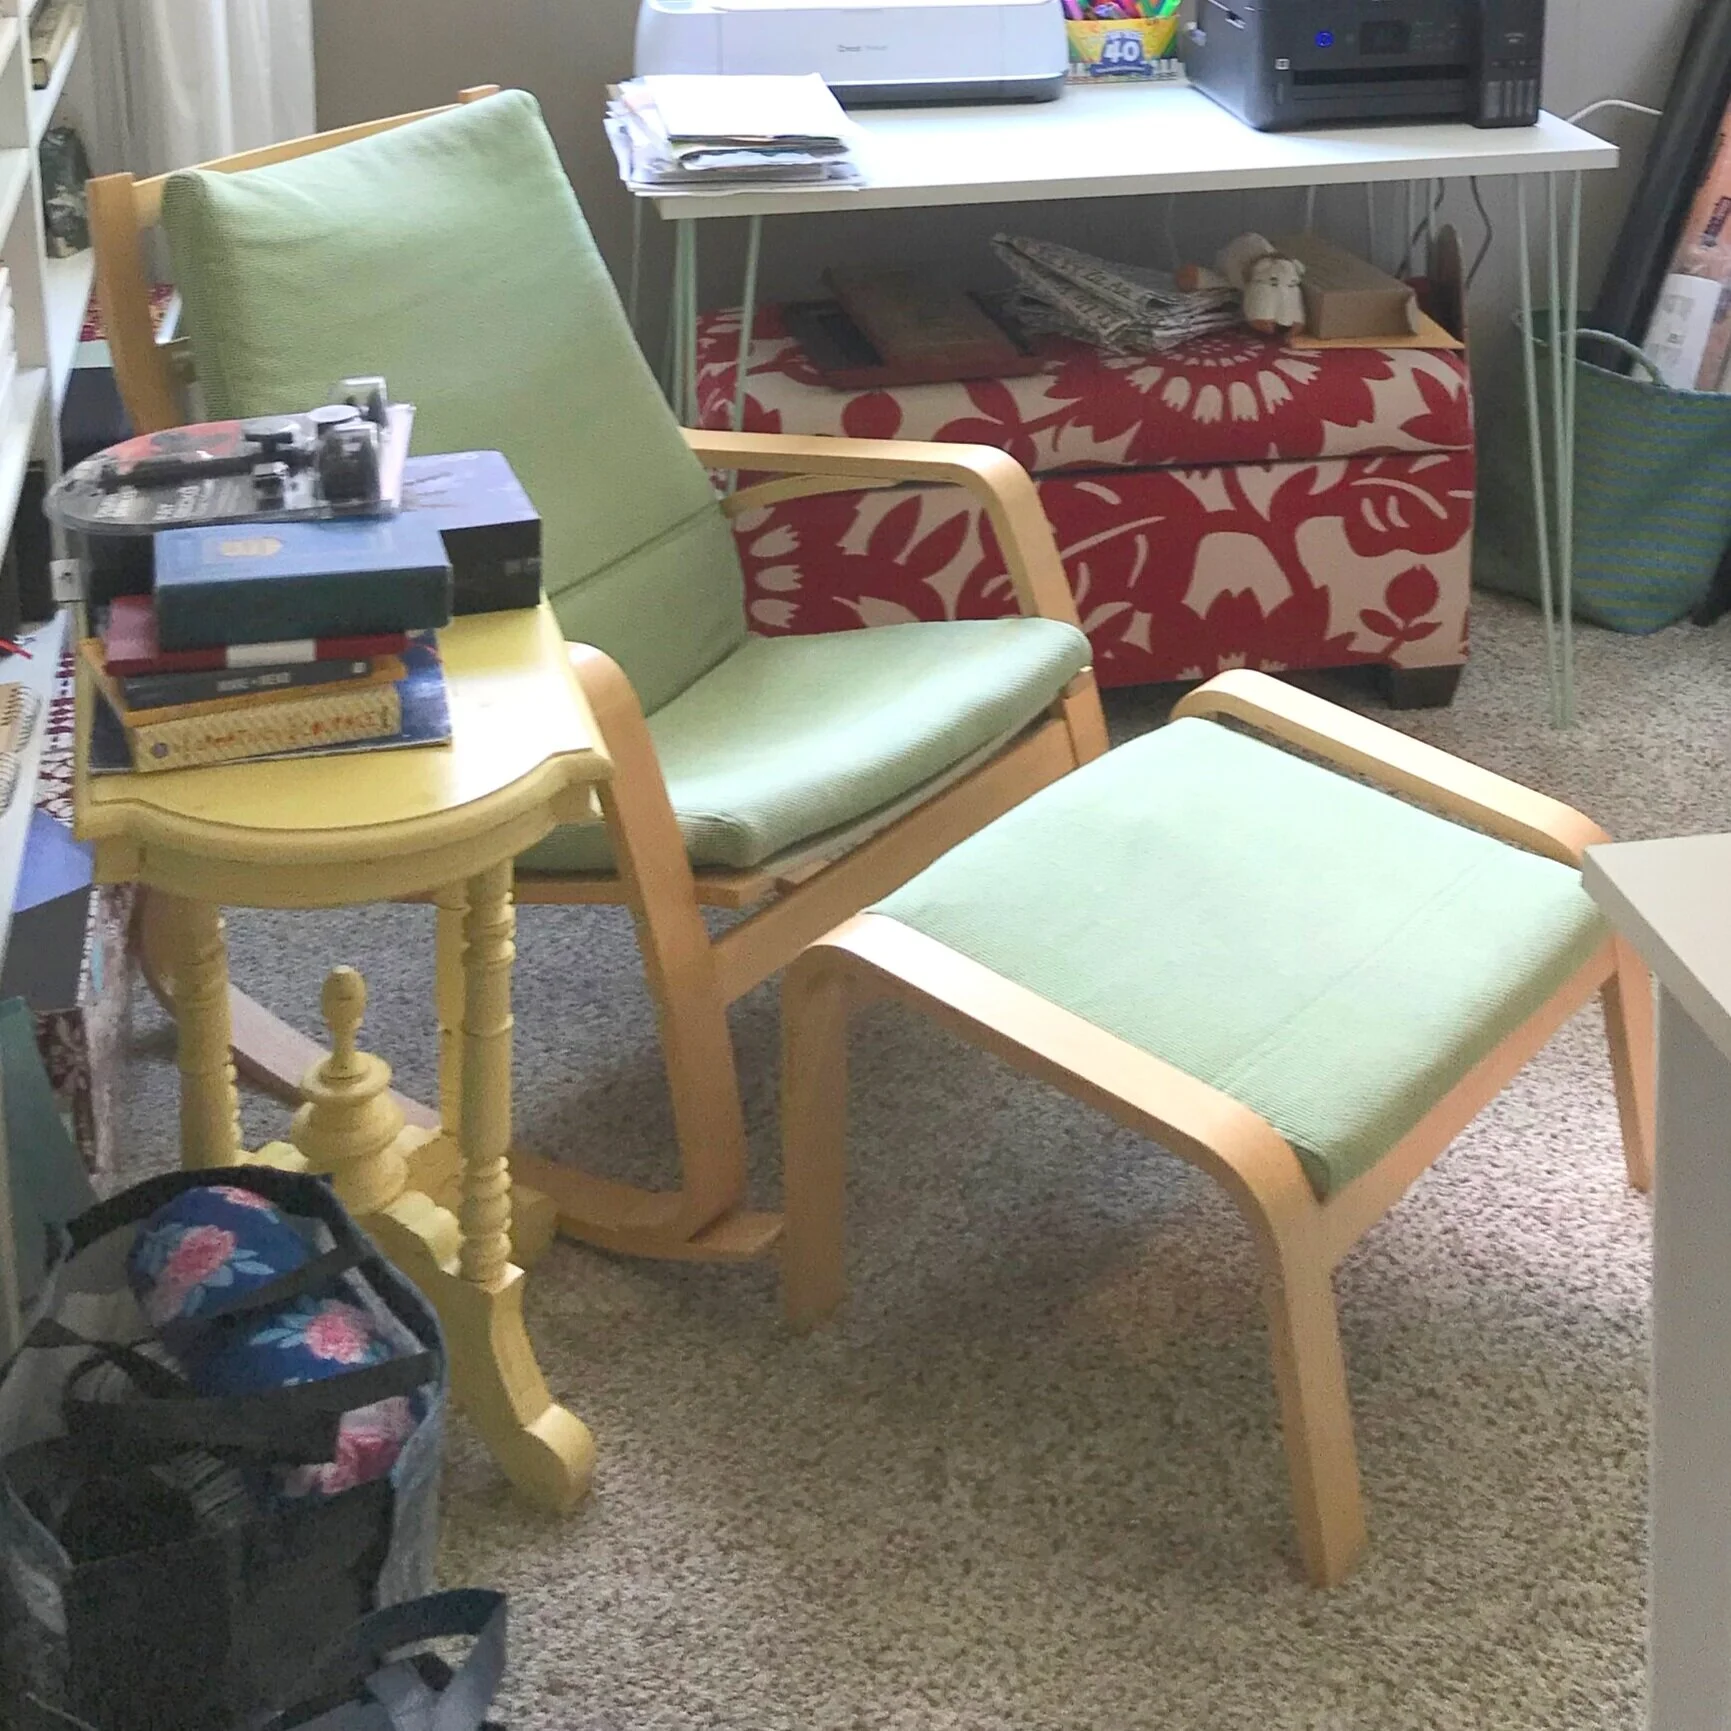
In the before days, I also had a rocking chair and footstool in this room for reading and editing. The chair, from Ikea, is super-comfortable, and I love sitting in it. But it really crowded the room. I still have that chair, and I’m withholding judgement until everything in the room is done. I’m not sure I’ll have room for a reading chair at all. We will see.
But I also found this piece of vintage glam on the Facebook Marketplace which might change my mind. Clearly, this chair will become The Reading Throne should it make the cut. It’s a bit of Camelot-fabulousness straight from the late 50s — and for the regal bargain price of $50!
But will there be room for a reading chair? I’m still not sure.
Butcher Block Countertops as Desktops
Nope. It isn’t really curved! This was just the only way to squeeze it all into a photo! It is 14’ long!
The melamine desktops that I was using had seen better days. They originally belonged to my grandmother who used them in her sewing room. About five years ago she decided she was tired of them, and she gave them to me along with her entire suite of elfa (Thanks, Grandma!). The counter tops have been moved and resized several times since, and they just didn’t look good anymore.
When looking to replace them, I wanted something natural and not plastic, so I chose butcher block countertops which we have used many times in many, many places before including in two kitchens: here and here. I love butcher block. It is easy to work with, comes in long lengths, and it is gorgeous! Caring for butcher block isn’t as hard as most people think, too. It can be stained or not. Sealed or not. Stains can be sanded out easily. And it just mellows with time.
So we mounted 14 feet of butcher block — all along one wall of the room. That’s a lot of workspace! But now I have designated work stations for sewing, writing, and gift wrapping as well as an open spot for my son to use — or anything else that comes up. Finally, I have room to leave a project out and come back to it later without having to rearrange my office space. That is a luxury to be sure, and I am so thankful!
To finish the surface, we sanded and sanded until the desktops are as smooth as silk. Then I applied three coats of Boiled Linseed Oil. This finish takes several days to fully dry, and the smell is potent. But the finish is golden and smooth. And it is a classic MCM finish. Plus, it is cheap, non-toxic, and easy! You just have to let it cure.
I have a full tutorial on how to install a desk like this. Check it out!
A Work Table with Hairpin Legs
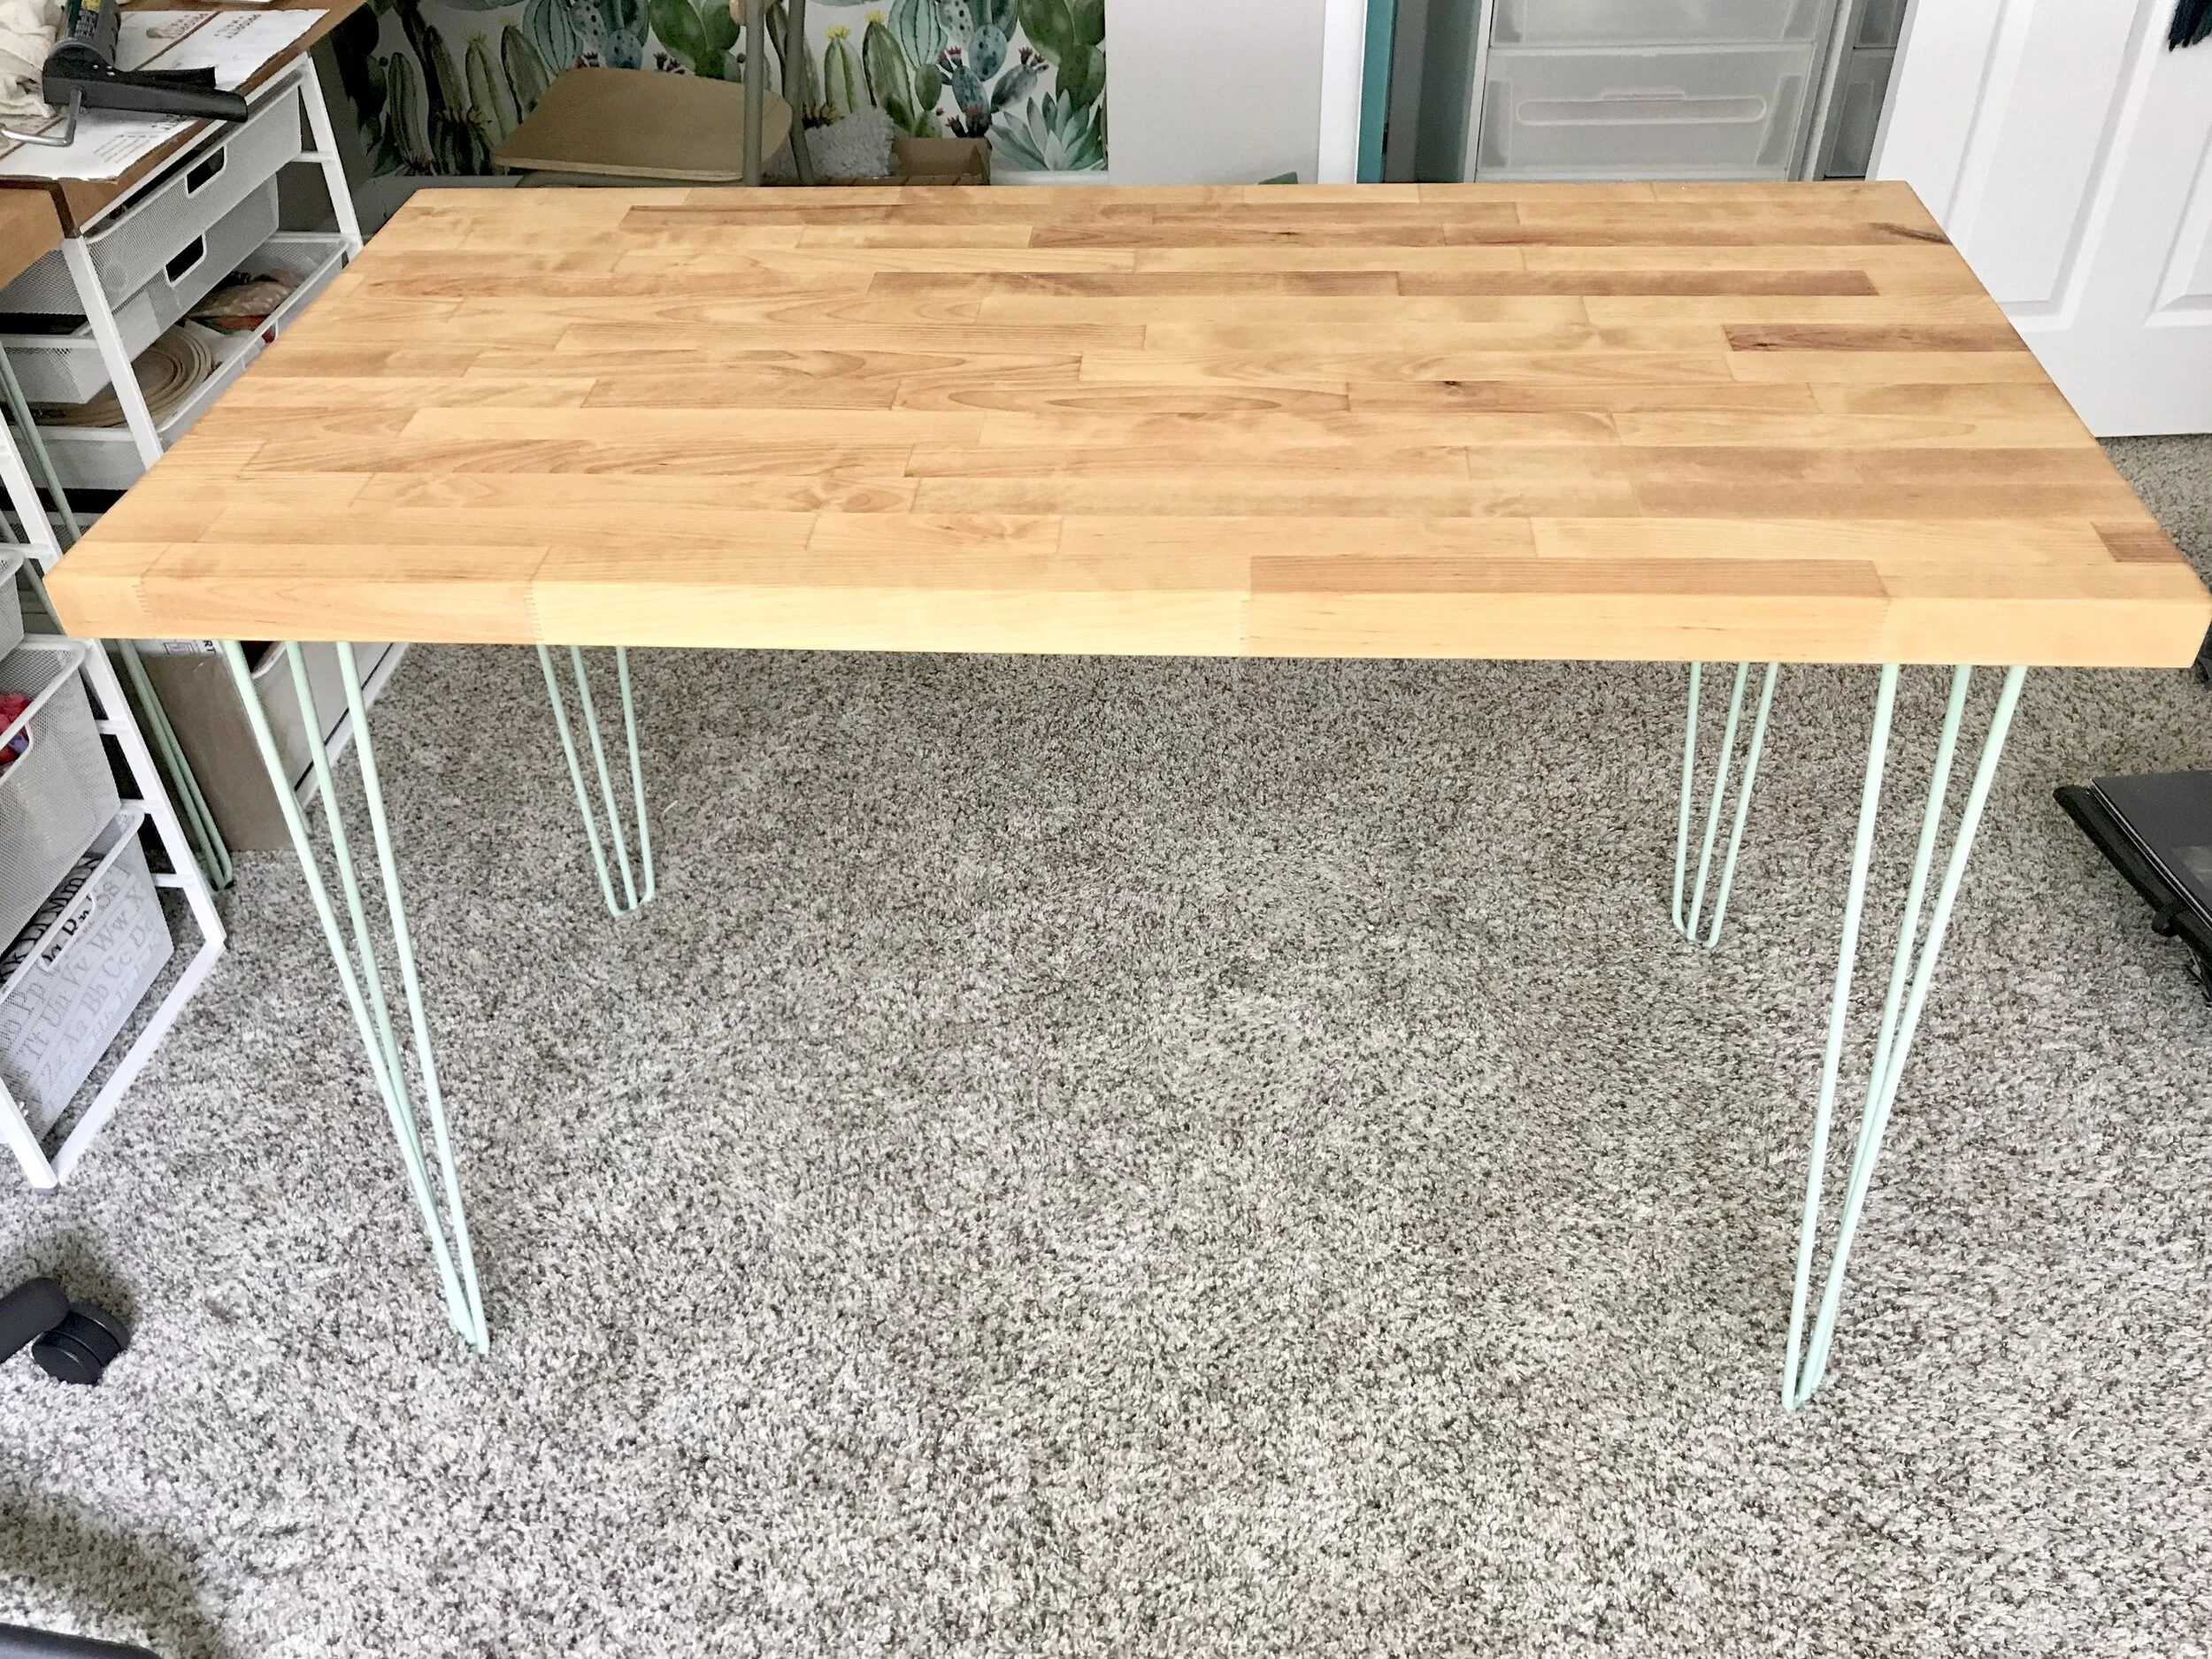
We had one substantial length of countertop remaining after installing my 14’ work surface, so we added the hairpin legs I already had to create a 4 ft. long floating work table which I can move around the room as needed. Generally, however, it will sit to the right of my computer work station creating an L-shaped work area.
Hairpin Legs Source: DIYHairpinLegs.com
Billy Bookshelves from Ikea
I wrote last week about my Billy Bookcases, and nothing really changed this week. But while I am talking furniture, and in case you missed them, I have two tutorials for making Billy Bookcases look customized and built-in. Check them out! I am very pleased with the results!
Still not styled, but I am loving the green peeking out!
ELFA from the Container Store
As I said, about five years ago my grandmother decided her elfa system just wasn’t what she wanted anymore. We lived nearby at the time, so she gave it to me. I am incredibly lucky, because I absolutely love elfa, and I couldn’t afford this desk configuration otherwise.
Elfa is utilitarian, clean, and easy to reconfigure. Tucked under my long work surface I have 4 drawer frames. And then tucked into a corner will be a fifth drawer frame eventually. I am working on organizing each drawer carefully, KonMari-ing my way through all of the contents.
One of my favorite parts about the elfa system is that the drawers are fully removable. So as I have been working the KonMari method, I have just pulled the drawers out completely, laid them out side by side, and then sorted through the contents bit by bit. It has made what could be truly tedious, much more pleasant. Additionally, the drawers are interchangeable, so I have completely reconfigured my drawer frames enabling me to group like items together very easily.
The butcher block desktop does not rest on top of the elfa drawer units. I am tall, so a taller work surface fits me ergonomically, but it also gives me the ability to move the drawer units around as needed. They aren’t on casters — there isn’t quite enough space for that — but they can be moved and rearranged. In fact, I’m not sure this is the final arrangement.
I am always watching the Facebook Marketplace for elfa components, and I even once scored a full tower for FREE! If you are thinking about starting with elfa and you live in a market with a Container Store, the Marketplace is a great place to find pieces for less. I had to go out and buy one tower and a few drawers to outfit my Workroom. The right things just didn’t come up in time here, but if you don’t have a deadline, watch the Marketplace and wait.
Week 5 will be all about organization including how the drawers are organized, so there will be more to come!
I have two widths of elfa drawers which helps given all the different functions in this room!
Pulling the drawers out and treating them like bins for like items makes KonMari-ing my Workroom so much easier.
I have a lot more to do! But I feel like things are really coming together, and I am excited about where this is headed. If you are interested in ordering a copy of my Christmas organizer and planner, The Nice List, there are some available in my store! I’d love to ship a copy to you this week while I am filling orders! The Nice List is a fabulous way to give yourself a peaceful, organized, and more joyful Christmas season.
Over the next three weeks I’ll be working my tail off to finish this creative space! I can’t wait to settle in to my beautiful new Workroom, but there are miles to go before that happens.
Here’s my schedule for the coming weeks:
Week 4 | Oct 24 | Lighting & Windows
Week 5 | Oct 31 | Storage & Organization
Week 6 | Nov 7 | Before & After
I’ll be sharing the how-to for all of my projects as well as my favorite shopping sources for all things vintage and new.
You can follow along on Instagram or like Mid Modern Mama on Facebook for tips, tricks, and sneak peeks along the way, too.
Thanks to Linda of The One Room Challenge for organizing the whole shebang! Thanks also to Better Homes and Gardens, the ORC media sponsor.
Ok. Gotta get back to work!
Ciao!
Don’t miss a single update!
Sign up and each installment of the One Room Challenge will come directly to your email on Thursdays! And be sure to stop by the One Room Challenge Blog to check out the other creative renovations happening across the country. You can also follow #oneroomchallenge and #bhgorc on Instagram for more inspiration! Be sure to follow me as well!


