Fall 2019 ORC, Vintage Decor Angela Nickerson Fall 2019 ORC, Vintage Decor Angela Nickerson

Week Six | November 7 | A Place for Everything

Week Six | November 7 | A Place for Everything

A weekly roundup of the progress on my One Room Challenge Workroom Makeover. This week: the Big Reveal! The room is done!

The Before and After reveal for the Workroom Makeover. See where this home office /art studio / sewing room / craft room makeover began -- and the beautiful finished room. Featuring storage ideas, DIY projects, organizational tips, and KonMari tips …

I am taking on the room where I spend more time than any other: my Workroom. Part library, part sewing room, part home office, and part art studio, my Workroom has to do it all. This week: the big reveal! It is all done, and here’s how it turned out!


Hello! In case we haven’t met before, I’m Angela aka Mid Modern Mama. I’m a writer and author of several books by day, and a passionate DIY-er by night. Assisted by my architect husband and our power-tool-savvy Bambino, I am out to transform our Mid Century Atomic Ranch one room at a time. Welcome! In case you need to catch up, here are the previous weeks’ links for this One Room Challenge! Enjoy!


With introductions covered, let’s jump right in. The Workroom Makeover is DONE — without a minute to spare, I might add! A quick review of where I started: my Workroom is my home office and library first and foremost. This is where I spend my day writing and editing. But it is also my art studio, sewing room, and craft room, too. Additionally, I manage some inventory for my book sales here as well as the inventory of Bambino’s outgrown clothing that I sell online.

So there’s a LOT going on in this room! And in the “before” photos you will see, it was not a pretty picture. When we moved in two years ago, I barely unpacked and then got to work. So the entire room needed to be KonMari’d, organized, and freshened up. It also lacked color, good lighting, and functional furniture. The bones were there, but it needed help!

At the onset, I outlined six goals for this project:

  1. Treat the room as a studio apartment. Go through the entire KonMari process, and eliminate the clutter.

  2. Create distinct working zones for each function of the room.

  3. Bring in unifying colors.

  4. Bring in plants and elements of the natural world.

  5. Improve the lighting for all tasks.

  6. Complete the makeover with a low environmental impact.

If you are interested in the specifics on how I accomplished each of those goals, the details are spelled out in weeks 2-5.

The room’s scheme was inspired by my three passions: art, books, and travel. And that inspiration came together in this idea board and space plan before I began:

The Workroom Makeover inspiration board

The Workroom Makeover inspiration board

The multi-functional space plan changed a bit, but all of the major functions are present.

The multi-functional space plan changed a bit, but all of the major functions are present.


My Green Workroom

So, here it is! Verdant and full of life — and tidy!

While I was in the midst of the KonMari process, I painted one accent wall and wallpapered another. Can you have two accent walls in one room? In this case, the answer is YES! The other walls and trim I left their original colors. They were just painted two years ago and are in good shape.

I absolutely love the cactus wallpaper! It is so cheerful, colorful, and inviting.

The Before and After reveal for the Workroom Makeover. See where this home office /art studio / sewing room / craft room makeover began -- and the beautiful finished room. Featuring storage ideas, DIY projects, organizational tips, and KonMari tips …

After finishing the KonMari process, the space plan changed a bit. I have significantly less stuff to stow and accommodate, which freed up room in this 11’ x 16’ space.

I spent a lot of time working on the lighting in this room. I have layers upon layers of lighting for every kind of task and activity — something that was sorely lacking before I began. I can’t believe how much brighter this room is now!

The Before and After reveal for the Workroom Makeover. See where this home office /art studio / sewing room / craft room makeover began -- and the beautiful finished room. Featuring storage ideas, DIY projects, organizational tips, and KonMari tips …

The first big project was my desk which now runs all the way along the 16’ wall on one end of the room. We made it from butcher block countertop which is mounted to the wall and rests on two hairpin legs at the front. Tucked underneath the countertop are the elfa drawer units which I already had. I reorganized and reconfigured them once the KonMari process was done. Each drawer now has a specific purpose and is tidied using containers, bins, and boxes from around the house.

The desk is so long that I can’t capture it all in one image — even with my wide-angle lens — in this somewhat narrow room!

The desk is so long that I can’t capture it all in one image — even with my wide-angle lens — in this somewhat narrow room!

The Before and After reveal for the Workroom Makeover. See where this home office /art studio / sewing room / craft room makeover began -- and the beautiful finished room. Featuring storage ideas, DIY projects, organizational tips, and KonMari tips …

Not only did I put up a botanical wallpaper, but I also brought in a garden of plants so I am not alone all day anymore. #plantparenthood

This little birds are souvenirs from my travels to Korea and Austria.

This little birds are souvenirs from my travels to Korea and Austria.


The Writing Spot

With so many functions centered in this room, I needed to plan designated places for each activity type. First and foremost: writing. I kept my computer centered by the window for both daylight exposure and a chance to watch the squirrels and cats — my daily entertainment.

The Before and After reveal for the Workroom Makeover. See where this home office /art studio / sewing room / craft room makeover began -- and the beautiful finished room. Featuring storage ideas, DIY projects, organizational tips, and KonMari tips …

I surrounded my workspace with elements of beauty and reminders of my favorite place: Italy.

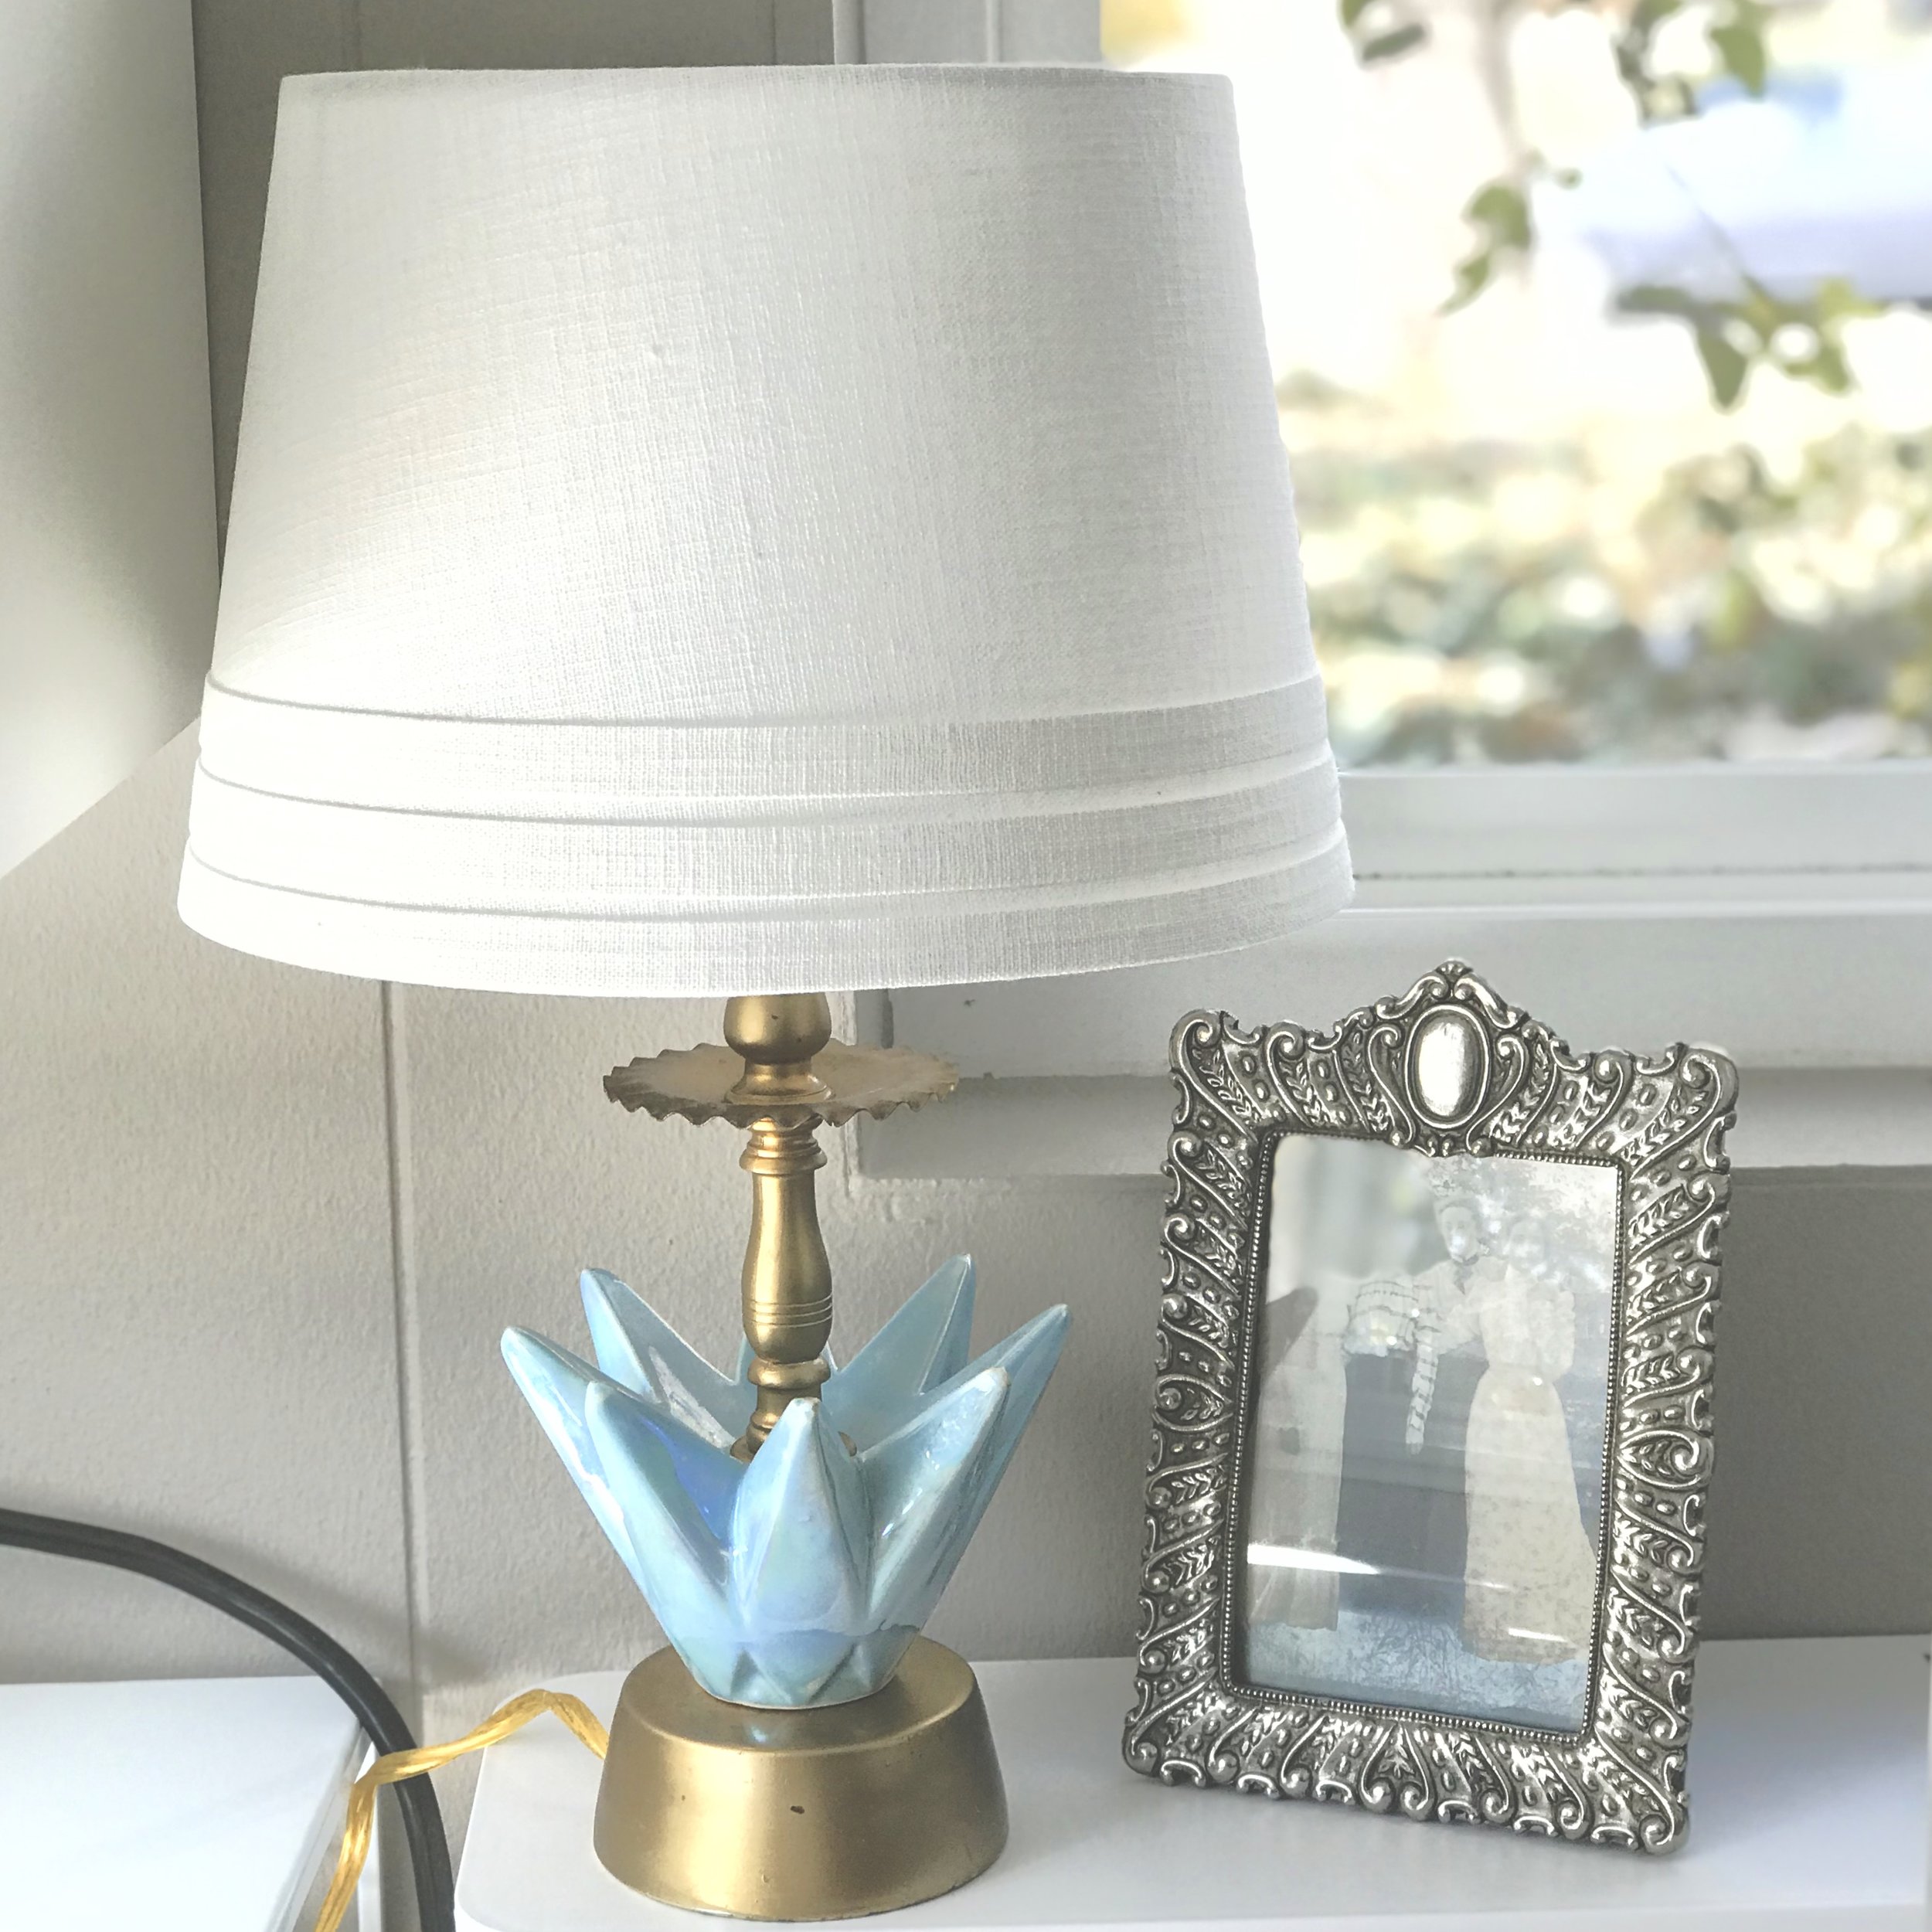
On my left: my Muses, a vintage lamp, my little Italian village, and a photo of me with my dearest girlfriends.

On my left: my Muses, a vintage lamp, my little Italian village, and a photo of me with my dearest girlfriends.

On my right: some new friends of the botanical variety and the Bocca della Verita — the Mouth of Truth — from Rome. The Mexican Milgra on the wall was one of the inspiration pieces for the room.

On my right: some new friends of the botanical variety and the Bocca della Verita — the Mouth of Truth — from Rome. The Mexican Milgra on the wall was one of the inspiration pieces for the room.

From a leftover length of countertop, I also made a table with hairpin legs. This table floats, so it can be moved around the room as needed. Generally, however, it sits at the right of the writing area creating an L-shaped desk for planning or research materials.

The Before and After reveal for the Workroom Makeover. See where this home office /art studio / sewing room / craft room makeover began -- and the beautiful finished room. Featuring storage ideas, DIY projects, organizational tips, and KonMari tips …

This turntable is meant for a refrigerator, but it holds all of my essentials and has handles, so I can move it from place to place easily.

The Before and After reveal for the Workroom Makeover. See where this home office /art studio / sewing room / craft room makeover began -- and the beautiful finished room. Featuring storage ideas, DIY projects, organizational tips, and KonMari tips …
 
Antique glass ink bottles line the windowsill and catch the morning light.

Antique glass ink bottles line the windowsill and catch the morning light.

The Library

As a writer I am naturally a reader. I spend my day bathing in words, surrounded by words, eating words. And I read voraciously. I also tend to buy books because I know all too well that’s how writers earn their livings. So our house is filled with books. This is my personal library — books I use professionally, for the most part. They are organized by subject. I did reduce my library slightly in the KonMari process which allowed me a bit more room for accessorizing.

The Before and After reveal for the Workroom Makeover. See where this home office /art studio / sewing room / craft room makeover began -- and the beautiful finished room. Featuring storage ideas, DIY projects, organizational tips, and KonMari tips …

I used the same Billy bookcases from Ikea that I already had. However, we removed the backs, painted the wall, and installed the bookcases creating a detail which makes them look a bit more custom. I also filled the holes for the shelves and hid the back channel which gives the bookcases a built-in look.

There are two tutorials for how to achieve this look.

In the middle of the bookcases, I created two symmetrical alcoves. They are filled with my favorite things gathered on my travels around the world and photographs from my trips, too.

An antique photograph of the Colosseum in Rome from the 1800s centers this alcove surrounded by items collected from Japan and Norway and photographs from other travels.

An antique photograph of the Colosseum in Rome from the 1800s centers this alcove surrounded by items collected from Japan and Norway and photographs from other travels.

As I collected some of my favorite artifacts together, I focused on blending natural elements — wood, stone — with handmade items as well. My husband cut some slices of wood from felled branches in our backyard to create levels and height for some of the smaller items.

The Before and After reveal for the Workroom Makeover. See where this home office /art studio / sewing room / craft room makeover began -- and the beautiful finished room. Featuring storage ideas, DIY projects, organizational tips, and KonMari tips …

Each alcove features a horizontal art piece collected with photographs from my travels. Most of the photos are from Rome, Florence, and Venice.

Russian nesting dolls including a set given to me by my grandparents and a set from my trip to the USSR with them — my first trip abroad.

Russian nesting dolls including a set given to me by my grandparents and a set from my trip to the USSR with them — my first trip abroad.

Other artifacts are scattered amongst the books for variety and texture. Each chosen for its sentiment.

The wooden troll is from Norway. The green vase was made by a potter in Japan. And the mailbox door is from my time teaching at a boarding school.

The wooden troll is from Norway. The green vase was made by a potter in Japan. And the mailbox door is from my time teaching at a boarding school.

I found the fossil when I was in middle school, and I have collected the vintage books over the years.

I found the fossil when I was in middle school, and I have collected the vintage books over the years.

Fall 2019 ORC-9269.jpg

My books are arranged by subject. One entire bookcase is devoted to Italy. Other travel books are arranged by country. Sadly, in our move from Los Angeles, several boxes of books were lost including my entire collection of books about Korea and Korean history.

A Welsh dragon keeps watch over the books about Great Britain.

A Welsh dragon keeps watch over the books about Great Britain.


The Sewing Room

I don’t sew every day or even every week, but I do sew regularly, and now I have a place for everything. I gave the sewing area a good test run in the midst of this makeover while making Bambino’s Harry Potter costume for Halloween. I made a few tweaks, but in general it works very well, and I am pleased to be able to work on a project, leave it, and return to it without having to completely upend the rest of the room. The alcove makes a perfect little sewing room.

I made the sewing machine cover a few summers ago from a shirt that was accidentally torn.

I made the sewing machine cover a few summers ago from a shirt that was accidentally torn.

The drawers at the left of the sewing spot hold notions, thread, needles, and my scrap fabrics. I reconfigured the elfa wall unit so that it is easier to reach. Elfa is incredibly flexible. I was able to completely reconfigure the entire unit for under $25. I purchased one more standard and had the staff at the Container Store cut my other standards down in length — which they did for free. By making the elfa unit horizontal across the wall rather than vertical, more of it is accessible now that the wall is lined with a desk. Case in point: scissors and pins are all within easy reach now.

The floating table makes a great cutting surface for sewing projects.

The floating table makes a great cutting surface for sewing projects.

When working on a large sewing project, I can move the tall tower of drawers out of the way for more room.

The Before and After reveal for the Workroom Makeover. See where this home office /art studio / sewing room / craft room makeover began -- and the beautiful finished room. Featuring storage ideas, DIY projects, organizational tips, and KonMari tips …

Above the sewing area, I hung a gorgeous signed print by Irving Amen which I found on the Facebook Marketplace. I love these women making music and surrounded by elements of nature and daily life. It is a Mid Century piece and was already framed. The colors are absolutely stunning, too.

Fall 2019 ORC-8534.jpg

I do a lot of visible mending, and I have never had a dedicated mending basket until now!

My mending basket is full! Time to get back to work.

My mending basket is full! Time to get back to work.

 
Fall 2019 ORC-8497.jpg
 

The Art Studio and Craft Room

Art supplies can be tricky to store. They are odd shapes, often messy, and can take up a lot of room. After KonMari-ing my art supplies, I found that the upper cupboard and the drawers below were perfectly adequate for storing all of my art supplies. I keep an art journal and dabble in watercolors amongst other projects.

The Before and After reveal for the Workroom Makeover. See where this home office /art studio / sewing room / craft room makeover began -- and the beautiful finished room. Featuring storage ideas, DIY projects, organizational tips, and KonMari tips …

With supplies in bins and neatly labeled using my Cricut, everything is organized and easy to find. Magazine files hold reams of paper, magazines, and other projects.

The Before and After reveal for the Workroom Makeover. See where this home office /art studio / sewing room / craft room makeover began -- and the beautiful finished room. Featuring storage ideas, DIY projects, organizational tips, and KonMari tips …

I absolutely love using my Cricut to make labels. These were made using four different coordinating colors of vinyl — all of which I had on hand.

I have a stack of bins labeled WIP — Work in Progress — for projects that need to be put away mid-creativity.

I have a stack of bins labeled WIP — Work in Progress — for projects that need to be put away mid-creativity.

The turntable holds glue of all kinds and a jar of paintbrushes making this cabinet efficient and tidy.

Fall 2019 ORC-8999.jpg
The tall elfa drawer unit holds my child’s artwork to be saved and archived. The top three drawers are empty for unfinished projects to dry or to be tucked away until they are finished.

The tall elfa drawer unit holds my child’s artwork to be saved and archived. The top three drawers are empty for unfinished projects to dry or to be tucked away until they are finished.


The Gift Wrapping Station

I have wanted a gift wrapping station since Martha Stewart introduced me to the concept long, long ago, and I’ve come close in a few houses, but this is by far the best dedicated spot ever. If you’ve been following me, you know I love Christmas, gift giving, and beautiful wrapping. I even wrote a Christmas planner! This year wrapping gifts will be amazing — and so much easier.

The station itself is designed to be self-sufficient for smaller gifts.

The Before and After reveal for the Workroom Makeover. See where this home office /art studio / sewing room / craft room makeover began -- and the beautiful finished room. Featuring storage ideas, DIY projects, organizational tips, and KonMari tips …

I’ve included storage for smaller off-cuts of wrapping paper — rolled to prevent crushing. Scissors and tape are right at hand. The glass jar holds cuts of ribbons to be reused. I always use real ribbon — not plastic or paper ribbon — so it can be used again and again. Gift cards, note cards, pens, and markers are all right there, too.

The Before and After reveal for the Workroom Makeover. See where this home office /art studio / sewing room / craft room makeover began -- and the beautiful finished room. Featuring storage ideas, DIY projects, organizational tips, and KonMari tips …

More wrapping materials are stored in the closet. Smaller items are in drawers while wrapping paper is tucked in the closet’s corner in a hamper.

fullsizeoutput_7438.jpeg
fullsizeoutput_7439.jpeg
fullsizeoutput_743a.jpeg
fullsizeoutput_7437.jpeg
 

The Printing, Shipping, and Cricut Zone

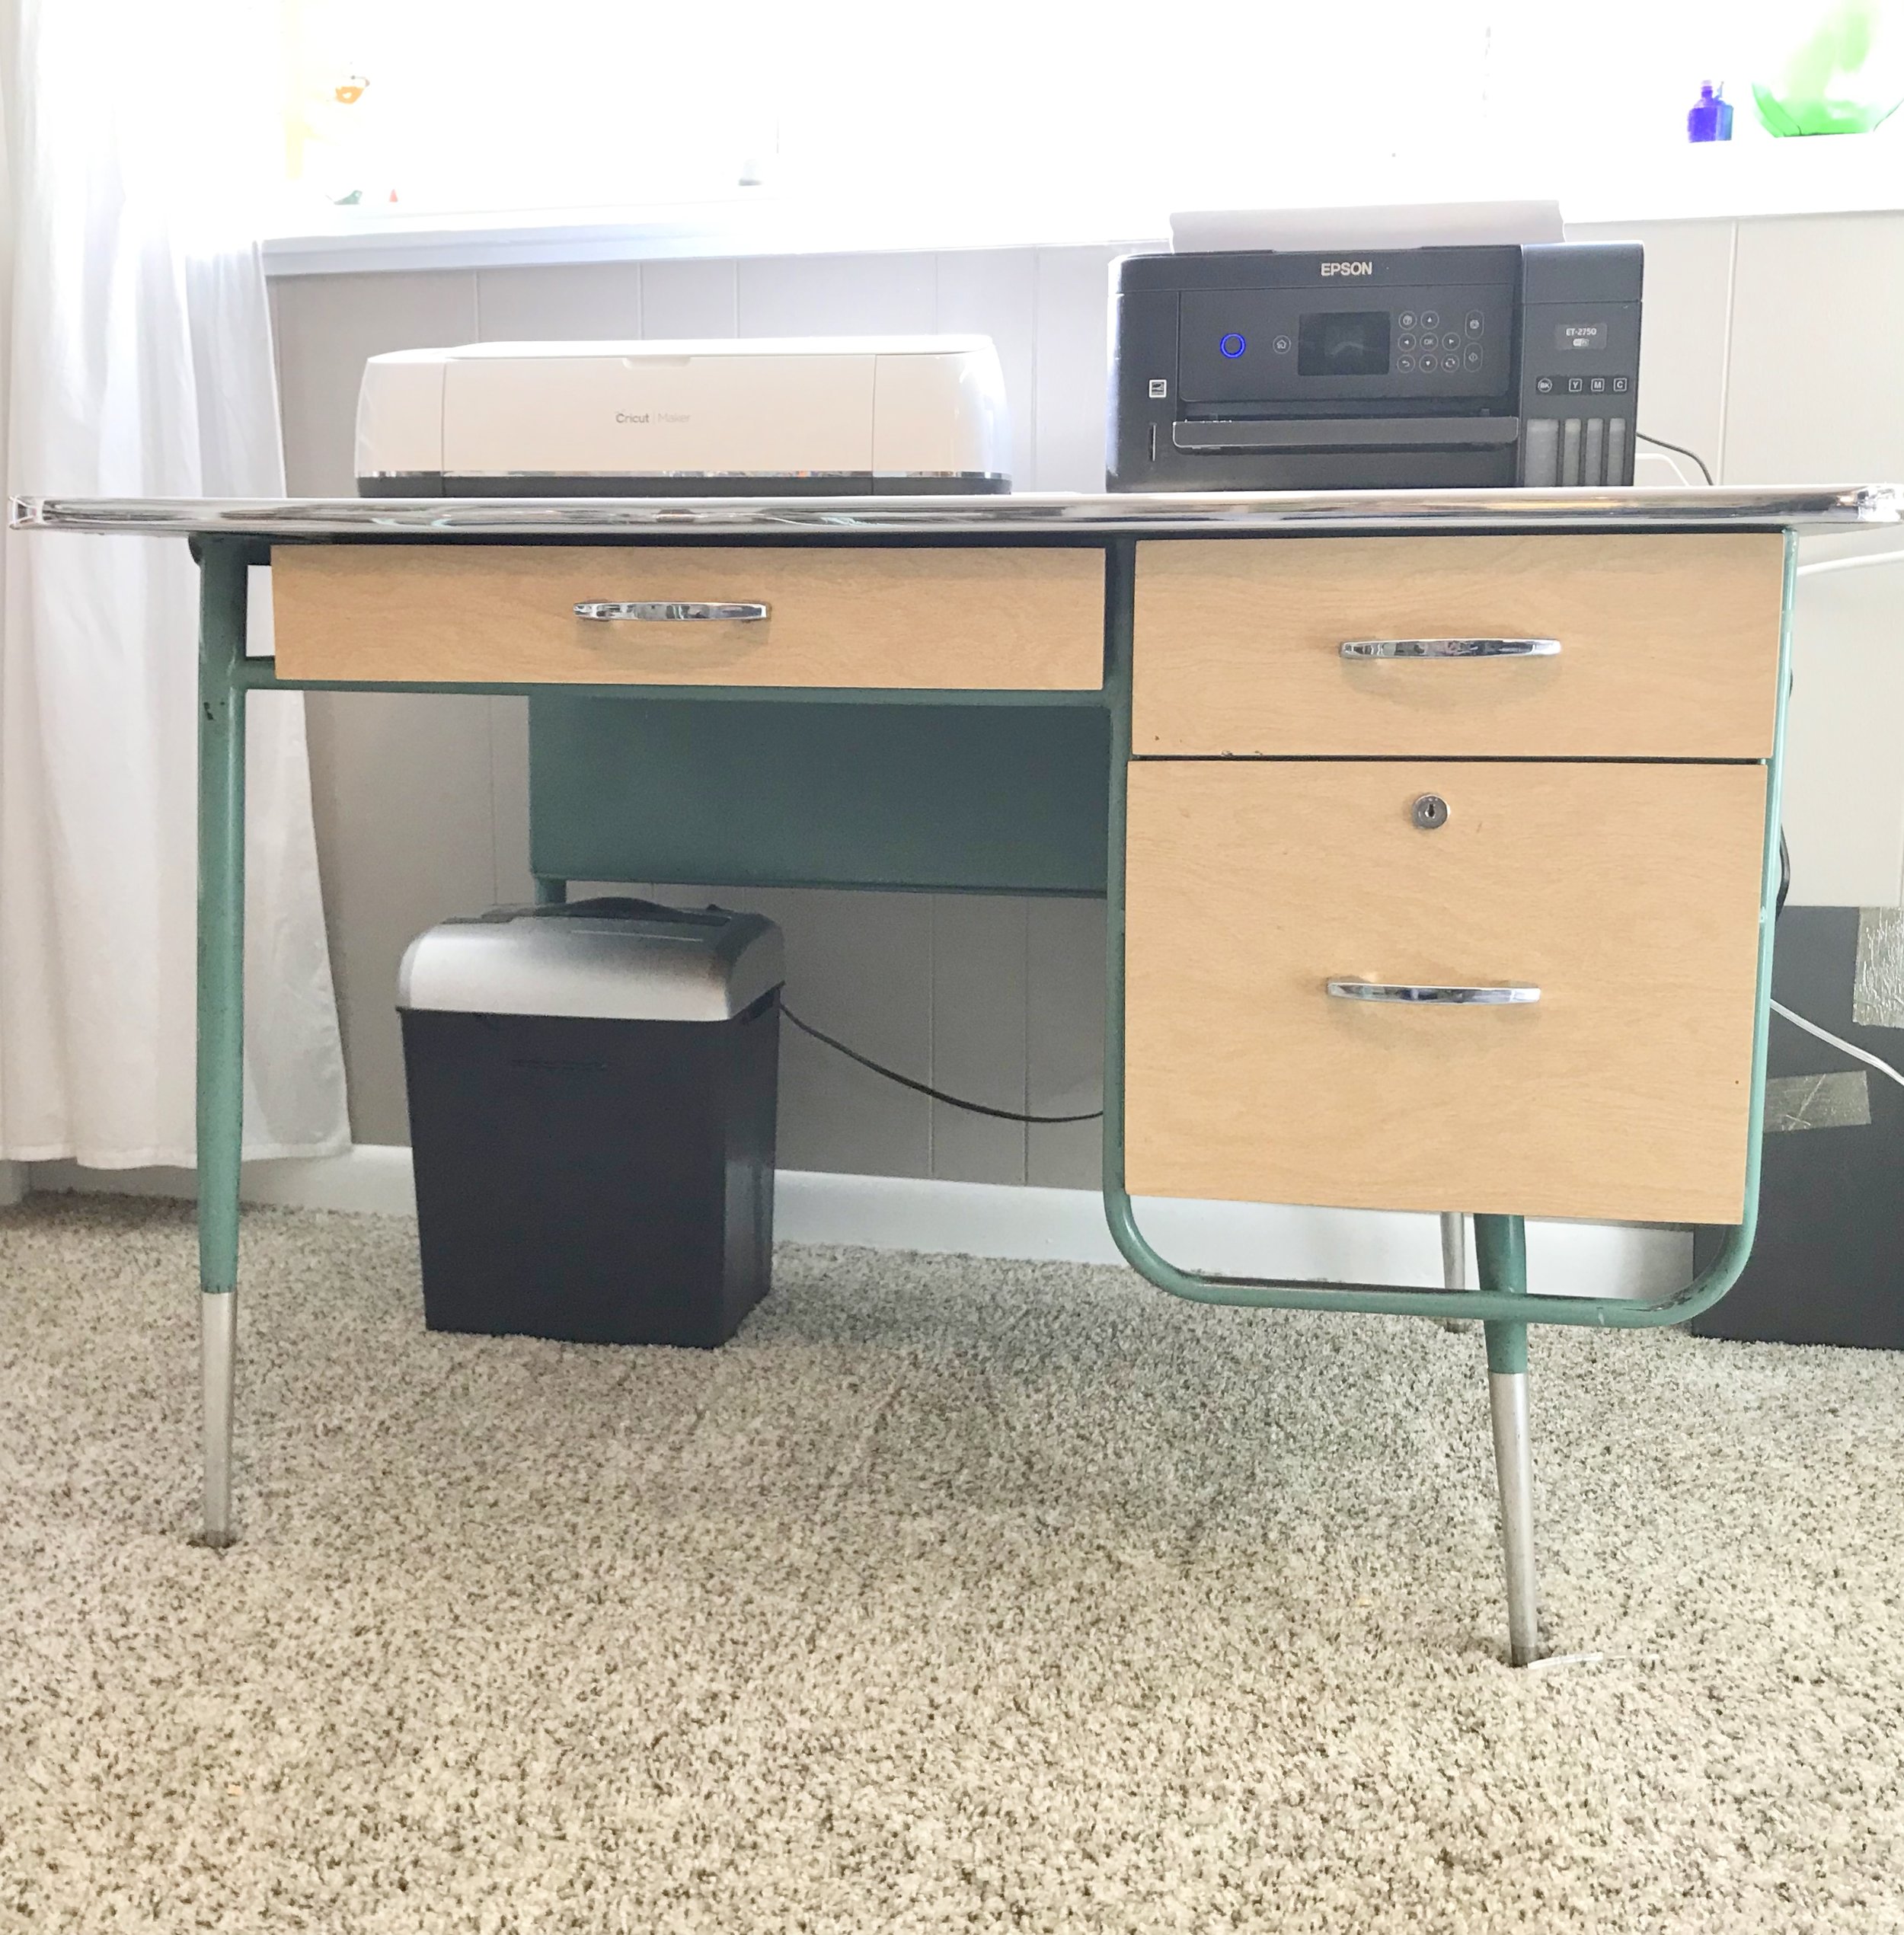
The only furniture I purchased for this room, in the end, was a vintage teacher’s desk from the 1950s which I bought on the Facebook Marketplace for $25. It was even the right color! It makes the perfect station under the window for my printer, Cricut, files, and supplies. The trash, recycling, and shredder fit underneath as well.

The desk needed a thorough cleaning, and I replaced the cracked trim around the top with new trim in a chrome finish.

My husband built a stand to go over the Cricut which created space for a lamp and plant on the desktop as well.

The Before and After reveal for the Workroom Makeover. See where this home office /art studio / sewing room / craft room makeover began -- and the beautiful finished room. Featuring storage ideas, DIY projects, organizational tips, and KonMari tips …

The desk drawers each got a makeover and a new function: Cricut tools, shipping supplies, and files. The drawers are all lined with off-cuts from the cactus wallpaper in the alcove.

Fall 2019 ORC-9358.jpg
fullsizeoutput_7370.jpeg
Fall 2019 ORC-9354.jpg

In the middle of the ORC, I also gave the shipping function a good test as I had to ship out the pre-orders and retail orders for The Nice List, my Christmas planner. The floating table again worked perfectly, this time for packaging orders and writing the accompanying thank you notes.

The Before and After reveal for the Workroom Makeover. See where this home office /art studio / sewing room / craft room makeover began -- and the beautiful finished room. Featuring storage ideas, DIY projects, organizational tips, and KonMari tips …
Fall 2019 ORC-9239.jpg
 
No Mid Century office space is complete without a rotary phone.

No Mid Century office space is complete without a rotary phone.


The Closet and Inventory Storage

The closet in this room was partially done before I began. We had already installed shelving and the rolling carts have been in our family for many years performing one duty or another. But I KonMari’d the entire closet which allowed me to move my book inventory into the closet. I also spruced up the storage for Bambino’s Closet — where I sell Bambino’s gently-used clothing.

The Before and After reveal for the Workroom Makeover. See where this home office /art studio / sewing room / craft room makeover began -- and the beautiful finished room. Featuring storage ideas, DIY projects, organizational tips, and KonMari tips …
Fall 2019 ORC-9422.jpg
New labels make these boxes full of clothing more attractive.

New labels make these boxes full of clothing more attractive.

 
My changing art gallery: clipboards mounted on the wall.

My changing art gallery: clipboards mounted on the wall.


At last there is a place for everything,

and everything is in its place!


The Final Numbers

I haven’t done all of the final finances yet, but I can tell you one very important thing…

For this entire project, I bought a grand total of FIVE containers. That’s right. Five. And I only bought two of them so that they would match others I already had. Other than that, every drawer, every bin, every box — they were all things we already had around the house. Marie Kondo is right, and this room proves it again. I used boxes and jars and baskets and bins and containers that I already had — and it all looks so tidy. Here’s a peek into the elfa drawers as proof!


Thank You Notes

A big thank you to Kelly-Moore Paints who provided the paint for this project. That yummy green color is KM5106 | Prickly Pear Cactus.

The Before and After reveal for the Workroom Makeover. See where this home office /art studio / sewing room / craft room makeover began -- and the beautiful finished room. Featuring storage ideas, DIY projects, organizational tips, and KonMari tips …

Thanks to Linda of The One Room Challenge for organizing the One Room Challenge! Thanks also to Better Homes and Gardens, the ORC media sponsor. On Instagram, check out #oneroomchallenge and #bhgorc to see all of the amazing room reveals, or visit the One Room Challenge Blog where you’ll find the link-up to all of the participating blogs. There are rooms of every kind, aesthetic, and design. It is an amazing thing to explore and get inspiration!

If you are interested in ordering a copy of my Christmas organizer and planner, The Nice List, there are some available in my store! I’d love to ship a copy to you this week while I am filling orders! The Nice List is a fabulous way to give yourself a peaceful, organized, and more joyful Christmas season.

You can follow along on Instagram or like Mid Modern Mama on Facebook for more about my ORC projects and all kinds of other fun.

Thanks for stopping by!
Ciao!
Angela


Don’t miss a single update!

Sign up and each installment of the One Room Challenge will come directly to your email on Thursdays! And be sure to stop by the One Room Challenge Blog to check out the other creative renovations happening across the country. You can also follow #oneroomchallenge and #bhgorc on Instagram for more inspiration! Be sure to follow me as well!


@MidModernMama

Pin it!

Read More
Fall 2019 ORC, Vintage Decor Angela Nickerson Fall 2019 ORC, Vintage Decor Angela Nickerson

Week Five | October 31 | Organizing a Home Office/Sewing/Art Room

Week Five | October 31 | Organizing a Home Office/Sewing/Art Room

A weekly roundup of the progress on my One Room Challenge Workroom Makeover. This week’s focus: organizing it all in a home office, sewing room, art studio, and craft room.
one room challenge fall craft room makeoverjpg

I am taking on the room where I spend more time than any other: my Workroom. Part library, part sewing room, part home office, and part art studio, my Workroom has to do it all. This week I am talking organization and KonMari. Can you really KonMari a sewing room? I have the answer!

Here we are! The penultimate ORC post for this round, and I’m excited to show you some of the organization I’ve incorporated into my Workroom. I have been working to organize the many items and multiple purposes in this room for weeks, and I’m very pleased with the results. The room isn’t done yet, but it is so much more functional and easy to use! This is proof that you can make a big change in just five weeks!

Lighting at Last!

First, an update on lighting: I have some! Last week I wrote about the struggles I had to find the right overhead lighting for this room. I was trying to get adequate indirect/direct lighting here without spending a fortune. Well, fixture #3 ended up being perfect. Because the bulbs are at the end of the spokes, the light is cast both up toward the ceiling where it bounces (indirect) and down toward the floor (direct).

Good overhead lighting is so important in an art studio, sewing room, or craft room. This fixture has proven to be a great choice!

Good overhead lighting is so important in an art studio, sewing room, or craft room. This fixture has proven to be a great choice!

It isn’t at all what I had originally pictured in the room, but it works. How do I know? This weekend I spent a lot of time sewing Bambino’s Halloween costume — Harry Potter robes made from black fleece. I’m not sure there could be a better test for a lighting scheme! I was able to sew late into the night illuminated by a combination of my two overhead lights and the new task lamp I purchased. It all worked very well, and the costume was finished ahead of schedule!

This project also gave me a chance to really use the dedicated sewing area in my Workroom. Unlike the Guest Room Refresh, I don’t have any sewing projects for this ORC — which seems really strange! Maybe I will need to make a pillow just for fun! But while sewing this costume, I really gave that work area a test and found a few places where I needed to tweak my organization. Overall, though, it worked beautifully! I’m so pleased about that!

My sewing station with a sewing machine cover made from a torn blouse.

My sewing station with a sewing machine cover made from a torn blouse.

Sewing the Harry Potter costume

Sewing the Harry Potter costume

A warm and cozy Harry Potter costume for snowy trick-or-treating

A warm and cozy Harry Potter costume for snowy trick-or-treating


A KonMari Update

So what have I done? Well, I started with Marie Kondo’s book, The Life-Changing Magic of Tidying Up. I discovered Kondo about four years ago. We had just moved to Los Angeles, and I broke my foot while moving boxes in our new house. While I convalesced, I read The Life-Changing Magic of Tidying Up, and then took on using the KonMari method on our home. It made a remarkable difference in so many ways! I truly unpacked our house — something we hadn’t done in several moves. And I took carload after carload of unused items to be donated. When you move frequently as we have in the last decade, it is easy to just move boxes from one place to another without actually opening them and evaluating what is inside!

And then we moved again. This time to Colorado.

We arrived two years ago, and my Workroom was an afterthought. I shoved boxes inside and just shut the door until the rest of the house was unpacked, and we were more settled. Then I hastily put things away without truly thinking about function or organization. And I got to work.

Well, two years later that just wasn’t working. So a big part of this One Room Challenge has been organizing and evaluating every item in my Workroom. I broke a big KonMari rule. To truly KonMari your home, you are supposed to consider your house as a whole. But having done this relatively recently — and doing a good job of maintaining the rest of the house — I decided to just take on the Workroom, treating it in essence like a studio apartment. I did all of the KonMari Method steps in order, and I used Marie Kondo’s principles — just on a much smaller, more concentrated scale.

During the KonMari process, I took all of the drawers out and used them as sorting bins.

During the KonMari process, I took all of the drawers out and used them as sorting bins.

Bankers boxes are great for long-term storage of documents.

Bankers boxes are great for long-term storage of documents.

I have taken loads of items to be donated. I have sold a lot on the Marketplace. I am part of a Freecycling group, and I’ve been able to give away a bunch as well. And in the end, I am confident that what I have left is useful and will spark joy in the many creative pursuits I take on in this room. Ultimately, having a room that is functional and beautiful sparks joy — far more than any individual item might.

So can you KonMari art supplies? Yes! What about sewing materials? Yes! Office supplies? Yes! Photographs? Yes! Books? Yep. Even books.

I have some tips and tricks for using the KonMari Method on a sewing room, art room, or craft room, and I pulled them all together in one spot.

The best part of the KonMari process is all of the space that is freed up! I took a whole box of books to be donated. I got rid of tons of almost-empty art supplies. And consolidating materials gave me storage containers of all kinds which could be repurposed in other places and ways.


Workroom Organization Solutions

One of my goals for this Workroom Makeover is to use what I already have and to keep purchasing to a minimum. Not only does this save money, but it is also a greener approach, so finding organization solutions has been a creative experiment — and it has been successful! I am so pleased to open my drawers and bins and to see tidy divisions largely created using shoe boxes, bins, box lids, jars, cans, and containers I already had. Frankly, part of making the storage attractive lies in grouping like items together. Nothing is jumbled or disorganized. It is tidy and pleasant to look at. I’ve even sorted markers and pens by color which just makes everything prettier — and easier to find and to put away again.

Organizing Tip: keep a collection of bins, jars, and containers nearby as you are sorting and organizing. I collected containers from around the house (and I keep a stash just for these kinds of projects). As I worked on each drawer, I had an assortment of containers to work with, and I didn’t have to run out to buy anything. My stash includes:

  • Shoe boxes

  • Small, study boxes

  • Glass jars

  • Plastic jars (like peanut butter jars)

  • Spare bins and baskets

  • Tin cans and containers

konmari containers.jpeg
konmari boxes.jpeg
konmari+containers.jpg

I found that as I went through the KonMari process, a large pile of empty bins and containers began to accumulate as I got rid of items. I even freecycled some of those containers that no longer sparked joy. And I still have a small collection for last minute projects as they arise.

Here’s a peek into my desk drawers. You can see all the different types of containers, boxes, and bins at work:


A Place for Everything and Everything in its place

The key to long-term tidiness is two fold: managing the amount of stuff you have AND designating a place for everything so that putting it away is easy and clear. As I approached my drawers and shelves and bins and baskets I wanted each to have a clear purpose and for every item in the Workroom to have a specific place where it lives.

So, for example, my planners and journals now live in an old basket I had in another part of the house. It can be moved easily when I am working on one project or another, but it also has a spot under my desk where it can be out of the way. And the basket is attractive — something that is always important to me.

An old basket holds journals and planners and can be moved from place to place easily.

An old basket holds journals and planners and can be moved from place to place easily.

For more specific items, I created some organizational tools, too. I have a lot of stationery — more than I thought even. And my old greeting card organizer had, at some point, gotten wet so it was time for a new one. Rather than buying something new, I created a card organizer from an Ikea bin. I used the same method to organize my stickers which I use in my planning practice. I’ve put together a simple tutorial for making both organizers which could easily be adapted to any collection of similarly-sized items.

So far I have only purchased the following organizational items:

  • 1 large white plastic bin

  • 2 lidded baskets: I wanted them to match the two I already owned, because they are very visible.

  • 4 archival boxes (found on the Marketplace for $5 each)

Everything else has been repurposed or redistributed from another place. I do feel like this Workroom is a bit of an Ikea retrospective — a parade of Ikea’s greatest organizational hits over the years. But I also love that I can tell you, for example, that the wooden magazine holders are now at least 15 years old.

That also tells you a bit about how many containers and storage solutions I already had — but it also is an indication of one of Marie Kondo’s bits of wisdom. She talks about how we tend to try to organize our stuff, putting it into more and more containers, when what we really need to do is evaluate the stuff we have first. And that is so true! The less stuff we have — even in a creative space — the fewer organizational tools we need.

And then there’s this bit of truth which I just keep repeating to myself over and over…

clutter used to be money.jpg

I don’t know who said it first, but that is a hard truth that has become a mantra, and those words have actually made the does-it-spark-joy question easier to answer, too. If it does not spark joy, then it could be money again — either sold or as a tax deduction.


Closet Organization Solutions

I haven’t even talked about the closet really. And honestly, it was already half-way done before I began. About six months ago, we installed Ikea’s Algot closet system. To be clear: I am in NO WAY compensated by Ikea. But I absolutely LOVE the Algot closet system. We first installed it in the 1948 Subdivision Sweetheart, and it is a game-changer. It is easy to design and easy to install. It is relatively inexpensive. And it works beautifully! We are slowly installing it in all of the closets in this house, too.

When I did the Guest Room Refresh, I moved the inventory for Bambino’s Closet (I resell Bambino’s outgrown clothing on Facebook and Kidizen) into my office, and we installed a few Algot shelves to help make that happen. But I went through every item in the closet as part of the KonMari Method — and I was able to move my entire book inventory in there was well which is super-helpful! And now the closet is so tidy!

The closet contains the doors to the crawlspace, so the bottom half of the closet needs to be accessible. We have had these drawer units from Ikea for about 15 years. They have had many, many lives (and several repairs — one fell off a moving van once). I’m pretty sure they are currently living their best life, though. One unit is filled with gift wrapping supplies. The other holds my photography gear, the gift drawer, and some miscellaneous items. As with my desk, each drawer has a discreet purpose. And since they are on wheels, they can be easily moved as needed. I’m a big fan of putting castors on things — anything! It makes furniture so much more flexible!

Tucked into the closet’s corner: a hamper full of wrapping paper. The other corner has room for hanging items and stores my tripod. Both corners are easily accessible when the rolling drawers are pulled out.

The closet in the Workroom — a storage workhorse with inventory for both my store as well as the gently-used clothes I sell online.

The closet in the Workroom — a storage workhorse with inventory for both my store as well as the gently-used clothes I sell online.

wrapping paper organization.png
 

Updating the Vintage Desk

A few weeks ago I showed you how I replaced the trim on my $25 1950’s teachers desk. That was an easy — if rather sticky — project. But that’s not all I have done to update this desk.

First, as with everything else, I determined the best functions for each drawer. The desk holds my Cricut and printer, and has three drawers. It replaces a hot mess of a makeshift table with a file trunk stowed underneath.

I sorted through all of the files — every last piece of paper. And I did a lot of shredding. A lot. I also confined many records to deep storage in bankers boxes. These are great for tax documents and other records you don’t need to access often. They are cheap, perfect for files, and easy to stack.

Once I had my files sorted, my husband created a super-easy way to retrofit the file drawer in the desk so that it will now hold hanging files. He is clever that way, and I am so glad to have hanging files again!

konmari files bankers boxes.jpg

The top drawers each have functions as well, and both were thoroughly cleaned and freshened up. I used some scraps of wallpaper to line the bottom of each drawer — held in place with a light spray of Super77. It’s a pleasure to look inside and see a peek of color!

One drawer holds all of my Cricut tools and supplies. The other holds my shipping materials . In each drawer I put a cardboard box to hold smaller items — also lined with wallpaper. The boxes are held in place with a little double-stick tape on the bottom. They make simple, cheap drawer dividers and keep smaller items corralled.

konmari drawer organizers.jpg

The shipping drawer is organized in the same way. I use large clamps to keep the envelopes separated and tidy. Half-sheet labels fit easily in the box along with smaller envelopes and packing tape. I print labels for all shipping on my printer, and the portable scale is fantastic. I never have to stand in line to buy postage when I am sending out packages of The Nice List or clothes that I have sold.

line drawers with wallpaper.jpg
 

Cricut Labels Everywhere!

My family gave me a Cricut Maker last year for Christmas, and I have used it for a variety of projects, but I’m not sure any project has been more fun that the day last week that I spent labeling everything that wasn’t moving in the Workroom. Seriously. So. Much. Fun. I chose a simple font, picked a bunch of coordinating colors of adhesive vinyl from my stash, and I labeled all of the bins filled with art supplies and tools in my open cupboard as well as jars full of sewing notions, and the bins of clothing for sale in Bambino’s Closet. It was fabulous!

cricut labels .jpeg
cricut labels ikea bins.jpeg
cricut labels.jpeg
cricut label jam jar.jpg
 

Family Photographs and Kids Artwork

As you are supposed to do, I have left the two most sentimental KonMari categories to the end. For me that’s photographs and Bambino’s artwork. And I doubt I will finish both before the big reveal next week. But I have a plan for both categories. And if I don’t finish, I’ll update you when it does happen. For now, both categories are tidy and organized. But they need to be KonMari’d which I haven’t done, yet.

The photographs will all be sorted, and those I want to keep will be scanned, labeled, and archived. The others will be tossed. I know. Throwing away photos seems wrong, but it isn’t. And I will keep some of the prints — I just can’t keep all of them.

As for Bambino’s artwork: I have a flat file of sorts — a tall elfa rack in which all of the artwork is stored. When I am ready to take on that project, it will be easy to pull everything out and KonMari it all. I’m still researching the best ways to digitize kids art. It isn’t all worthy of being saved, but I do want to keep a lot of it. So I need a good long-term solution. Still working on that.

The top three drawers of this unit are empty intentionally. They are for projects which need to dry — collage, paint, etc. This way I have a safe space to tuck things away while they dry or until I can work on them again.

kids artwork storage
 

Phew! That’s a LOT of information! But KonMari-ing and then organizing all of these various functions into a harmonious room has been a big project!

Just one more week to wind everything up! It is getting real around here, and I’m happy with how this is turning out. I just need to pull the last bits together and finish a few more projects. Hopefully I can get it all done on time!

If you are interested in ordering a copy of my Christmas organizer and planner, The Nice List, there are some available in my store! I’d love to ship a copy to you this week while I am filling orders! The Nice List is a fabulous way to give yourself a peaceful, organized, and more joyful Christmas season.

Next week I’ll have photos of the entire room FINISHED! I have several projects yet to do before that happens, but I’m excited to get it all done at long last. So be sure to come back next week for the big reveal!

Week 6 | Nov 7 | Before & After

You can follow along on Instagram or like Mid Modern Mama on Facebook for tips, tricks, and sneak peeks along the way, too.

Thanks to Linda of The One Room Challenge for organizing the whole shebang! Thanks also to Better Homes and Gardens, the ORC media sponsor.

Ok. Gotta get back to work!
Ciao!
Angela


Don’t miss a single update!

Sign up and each installment of the One Room Challenge will come directly to your email on Thursdays! And be sure to stop by the One Room Challenge Blog to check out the other creative renovations happening across the country. You can also follow #oneroomchallenge and #bhgorc on Instagram for more inspiration! Be sure to follow me as well!


@MidModernMama

Pin it!

Read More
Fall 2019 ORC, Vintage Decor Angela Nickerson Fall 2019 ORC, Vintage Decor Angela Nickerson

Week Four | October 24 | Lighting

Week Four | Oct 24 | Lighting

A weekly roundup of the progress on my One Room Challenge Workroom Makeover. This week’s focus: lighting for a busy room with many different functions.
one room challenge fall craft room makeoverjpg

I am taking on the room where I spend more time than any other: my Workroom. Part library, part sewing room, part home office, and part art studio, my Workroom has to do it all. This week : lighting. Well, there is going to be some… I hope.

Friends, Romans, Countrymen… Let’s start with the good news! Last week I wrote about the arrival of the 2019 edition of The Nice List. I had cases of books that arrived, ready to be shipped out. If you are just joining me, The Nice List is my Christmas planner/organizer which will get you through the holidays with panache and ease, helping you plan your time and your giving.


Anyway, cases of The Nice List arrived, and my Workroom got its first REAL test! I had to set up and ship out all of my orders. And friends: it worked beautifully! Last year, frankly, the shipping was a bit of a nightmare. This year: So. Much. Easier. It was nice, too, to have a real event in the middle of it all to test the room’s layout and design features. I don’t have massive shipments to do daily or weekly — that is a seasonal event. But I do ship out books, clothes that I sell online, and The Nice List orders.

The assembly line served me well!

The assembly line served me well!

Lots of orders ready to be shipped!

Lots of orders ready to be shipped!

Using the floating table as my staging area, the vintage teacher’s desk, and my 16’ long work space, I was able to create an assembly line which moved orders from my computer to the post office quickly and efficiently.

In fact, I was able to get all of the retail and pre-orders shipped out in less than a week!

So, hooray for good layout and planning!

butcher block desk.jpg
 

Lighting for a Home Office and Workroom

But here’s where the good news dwindles.

I scheduled an update on Lighting today. And while I can tell you what good lighting in a Workroom SHOULD look like, I can’t show you yet.

Let’s talk theory first: good lighting in a multipurpose room like the Workroom should be layered. My Workroom functions primarily as my writing space, but it is also a library, an art studio, a craft room, and a sewing room — all crammed into an 11’ x 14’ space in our Mid Century Modern home. Additionally, I often take photographs and video of projects for Mid Modern Mama, so I need to have lighting that accommodates those functions, too.

I have two large windows which provide some natural light, but my Workroom is at garden level which means the windows are at ground level. I get great morning light, but it fades quickly in the afternoon — particularly in the late fall and winter.

I started with two overhead light fixtures in the Workroom: an LED boob light that was, frankly, worthless, and a spotlight in the alcove area — also worthless.

The “boob light”

The “boob light”

The “boob light” over the desk area is absolutely worthless.

The “boob light” over the desk area is absolutely worthless.

The spotlight

The spotlight

The spotlight in the alcove is very direct light in a place that needs fewer shadows.

The spotlight in the alcove is very direct light in a place that needs fewer shadows.

Indirect/Direct Lighting

Given that I need to have lighting for so many different tasks and functions, I am taking a layered approach to the lighting in my Workroom.

But I have some constraints:

  • I can’t install can lights.

  • I have to work with the two junction boxes already installed in the room.

  • I have a limited budget.

  • I want everything to be as green and energy efficient as possible.

My husband, an architect, suggested, too, that I want to maximize the indirect light. Indirect light fixtures bounce light off a light-colored ceiling — in my case a white ceiling.

  • Indirect Light: fixtures point light toward a ceiling or walls to bounce the light back into the room

  • Direct Light: fixtures point the light down toward the room, at a closer range toward a task

Indirect light offers some big advantages including a big reduction in shadows — a huge advantage when taking photographs and video as I often do.

So I ordered two direct/Indirect lights to install. And we put one of them up.

Light temporarily hooked up

Light temporarily hooked up

fullsizeoutput_7385.jpeg
Current overhead lighting situation

Current overhead lighting situation

Utilitarian? Yes.

Bright? Yes.

Missing all kinds of pieces and hardware? Also, yes.

But do you see how the fixture shines light UP to create indirect light? This fixture can even operate on two switches, so you could just turn on the indirect lighting or the direct light — or both. And it is dimmable. In theory it should have been a great solution.

But we ordered two, and BOTH were missing pieces and parts. Not helpful. So they are going back.

And I am without a central light in the Workroom. More updates to come… hopefully soon. I'm rather in the dark!

Alcove Lighting

I did find a West Elm fixture for the alcove area on the Facebook Marketplace for just $15. I have installed it for now, and it is a vast improvement over the spotlight! But I’ll have to wait to see what I find for the main light, before I decide if this is a keeper. Notice, too, this also provides some indirect light. While the light isn’t pointed up, the nature of the fixture means that some light hits the ceiling and bounces which helps make this previously-dark corner much brighter.

Before: see how dark and shadowy the alcove is?

Before: see how dark and shadowy the alcove is?

After: so much brighter!

After: so much brighter!

How to Layer Light with lamps

Layering light is the same as layering bedding or clothing or accessories. Different kinds of light — indirect and direct — coming from different light sources to fill in a lighting picture. As in a theater, light sources can even be different colors for added depth or functionality depending on the room. In rooms with multiple functions like the Workroom, consider including:

  • Indirect light sources

  • Overhead lighting

  • Lamps for light pools and ambiance

  • Task lighting for specific functions

Remember: it is rare that all of these lights will be on at the same time. But including multiple light sources with different functions allows you to light the room differently for different “scenes” or uses.

In the Workroom, in addition to the overhead ambient lighting, I will also layer in lamps for pools of light as well as targeted task lighting for specific work areas.

I started the ORC with several lamps, pictured below. I sold the two silver lamps on the Facebook Marketplace. They are cute, but their heads didn’t move enough to be truly functional for my needs. I originally bought the two vintage lamps for the ORC Guest Room Refresh, but I didn’t end up using them. I love them, but the lamp shades are all wrong! And that Ott Lamp was a gift from my grandmother the quilter. It is functional but not attractive. I keep it tucked away and pull it out for specific task lighting like sewing projects.

The lamps are sitting on the horrid and bizarre countertop that used to span the alcove. It was tiled in a strangely ugly floor tile. I think it was for a TV at some point… but I don’t know. Thankfully, it is gone now!

The lamps are sitting on the horrid and bizarre countertop that used to span the alcove. It was tiled in a strangely ugly floor tile. I think it was for a TV at some point… but I don’t know. Thankfully, it is gone now!

As for those pools of ambient light, I have three table lamps. And here’s another frustration: I can’t find the right shades for the pair of vintage lamps. I found something that is just ok — but not amazing. I may need to learn to make lampshades!

This is the Merie Table Lamp from Crate and Barrel. I’ve had it for years and love it. It used to be in our living room, but it needed a new home — and found one!

This is the Merie Table Lamp from Crate and Barrel. I’ve had it for years and love it. It used to be in our living room, but it needed a new home — and found one!

These are better… but not perfect. A little too Modern Farmhouse for this room. I really just want the same lampshade that’s on the big table lamp, but I can’t find one that matches!

These are better… but not perfect. A little too Modern Farmhouse for this room. I really just want the same lampshade that’s on the big table lamp, but I can’t find one that matches!

Task lighting is particularly important as I often work on small, detailed projects — especially sewing projects — at night. So I have task lighting options which can be used and moved as needed around the room. I’m still undecided about which of these will work better. The tall lamp is the wrong color, so I need to find it in a better shade if I am going to keep it. The smaller lamp just may not be tall enough. I’m still thinking about them both.

task lamps home office.jpeg

If that seems like a lot of lights and lamps in one room: well, it is. But as I have said before, the Workroom is a hard-working room with multiple uses. And I am not always the only person working in this room, either. So it is important that the room be both flexible and truly functional.

I will keep you updated on how it all comes out! Be sure to follow along on Instagram as the Scintillating Saga of the Light Fixtures continues!

I do have one little lamp shade tip for you: How to Make a Ring Lamp Shade Fit!


I have a lot more to do! But I feel like things are really coming together, and I am excited about where this is headed. If you are interested in ordering a copy of my Christmas organizer and planner, The Nice List, there are some available in my store! I’d love to ship a copy to you this week while I am filling orders! The Nice List is a fabulous way to give yourself a peaceful, organized, and more joyful Christmas season.

Over the next two weeks I’ll be working my tail off to finish this creative space — and finish up a Halloween costume and ship out book orders… phew!

Here’s my schedule for the coming weeks:
Week 5 | Oct 31 | Storage & Organization
Week 6 | Nov 7 | Before & After

I’ll be sharing the how-to for all of my projects as well as my favorite shopping sources for all things vintage and new.

You can follow along on Instagram or like Mid Modern Mama on Facebook for tips, tricks, and sneak peeks along the way, too.

Thanks to Linda of The One Room Challenge for organizing the whole shebang! Thanks also to Better Homes and Gardens, the ORC media sponsor.

Ok. Gotta get back to work!
Ciao!
Angela


Don’t miss a single update!

Sign up and each installment of the One Room Challenge will come directly to your email on Thursdays! And be sure to stop by the One Room Challenge Blog to check out the other creative renovations happening across the country. You can also follow #oneroomchallenge and #bhgorc on Instagram for more inspiration! Be sure to follow me as well!


@MidModernMama

Pin it!

Read More
Fall 2019 ORC, Vintage Decor Angela Nickerson Fall 2019 ORC, Vintage Decor Angela Nickerson

Week Three | October 17 | Furniture for an Office & Sewing Room

Week Three | Oct 17 | Furniture for an Office & Sewing Room

A weekly roundup of the progress on my One Room Challenge Workroom Makeover. This week’s focus: furniture choices for this multipurpose room.

one room challenge fall craft room makeoverjpg

I am taking on the room where I spend more time than any other: my Workroom. Part library, part sewing room, part home office, and part art studio, my Workroom has to do it all. This week is all about furniture — the new, the vintage, and the repurposed.

Week Three! Week Three! This is, according to tradition and urban legend, where the One Room Challenge earns the word “challenge.” The first two weeks are exciting and inspiring. But by Week Three, sh*t gets real, people. And it is very, very real in my Workroom.

Let’s also throw in the fact that cases and cases of The Nice List arrived to be shipped out late last week. Yes, I have to keep working in this room while I’m doing this makeover. There’s no shutting the door and just walking away! So, I am trying to keep the chaos as confined as possible, and this week’s projects made a big impact in the room in short bursts of time.

So let’s get down to it… if you are just joining me, welcome! I’m tackling on my Workroom for this season of the One Room Challenge. Last spring we did a Guest Room Refresh which was so fun I decided to do it all again!

My Workroom functions primarily as my writing space, but it is also a library, an art studio, a craft room, and a sewing room — all crammed into an 11’ x 14’ space in our Mid Century Modern home. Here’s the space plan as well as the inspiration board:

Space plan for a craft room in a bedroom. Home office, art studio, library, art room.
A workroom makeover that is so much more. Part home office, part library, part sewing room, craft room, and art studio, this Workroom space has many functions which means the design, organization, and decor of this renovation must all be on point. A…

So this week’s focus is furniture. It takes the right furniture to make all of those functions work in a small room. The furniture also has to be adaptable, functional, and can’t cost a fortune. In my case, I needed to work with what I had and make it better in the space — and add a little vintage flair, too.

Let’s start with the vintage flair!


A Vintage Teacher’s Desk

Before I began the ORC, I had a piece of white laminate desktop mounted on legs underneath my window. That was the table for my printer and my Cricut. Underneath was an upholstered bench inside of which were my files. Somewhat functional, but cluttered and not attractive. And the storage was all wrong. I had to solve this problem. So I turned to my favorite source for vintage cast-offs: the Facebook Marketplace. Sure enough, I found a 1950’s teacher’s desk in gorgeous condition.

The best part: it was $25. Sold!

The desk is steel painted in a perfect mid-century aqua with three drawers including a file drawer. The desk top is generous, too, which leaves plenty of room for my Cricut and my printer — neither of which are small.

It needed a little love, and in Week 5 I will show you how I am outfitting the drawers — each one with a purpose. But this week, I have a tutorial for you on how to replace the plastic or rubber trim on a mid century tabletop or desk. The trim on this piece was cracked and damaged in one corner, so I stripped it all off and replaced it with new trim. The desk’s top is a maple-look formica, and the original rubber trim was a matching shade of yellow. I couldn’t find trim in the right color, so I went with chrome to match the desk’s original handles. I absolutely love how it came out.

Warning: this is a two person project! I did it by myself, and it was much harder — and stickier — than it should have been. I needed a second set of hands!

Before: not functional or attractive. Just cobbled together.

Before: not functional or attractive. Just cobbled together.

After: a dash of vintage plus functional drawers and a great work surface.

After: a dash of vintage plus functional drawers and a great work surface.


A Reading Chair

Option 1: comfortable, basic Ikea with sentimental memories.

Option 1: comfortable, basic Ikea with sentimental memories.

Option 2: The Reading Throne with vintage charm and regal fabulousness.

Option 2: The Reading Throne with vintage charm and regal fabulousness.

In the before days, I also had a rocking chair and footstool in this room for reading and editing. The chair, from Ikea, is super-comfortable, and I love sitting in it. But it really crowded the room. I still have that chair, and I’m withholding judgement until everything in the room is done. I’m not sure I’ll have room for a reading chair at all. We will see.

But I also found this piece of vintage glam on the Facebook Marketplace which might change my mind. Clearly, this chair will become The Reading Throne should it make the cut. It’s a bit of Camelot-fabulousness straight from the late 50s — and for the regal bargain price of $50!

But will there be room for a reading chair? I’m still not sure.


Butcher Block Countertops as Desktops

Nope. It isn’t really curved! This was just the only way to squeeze it all into a photo! It is 14’ long!

Nope. It isn’t really curved! This was just the only way to squeeze it all into a photo! It is 14’ long!

The melamine desktops that I was using had seen better days. They originally belonged to my grandmother who used them in her sewing room. About five years ago she decided she was tired of them, and she gave them to me along with her entire suite of elfa (Thanks, Grandma!). The counter tops have been moved and resized several times since, and they just didn’t look good anymore.

When looking to replace them, I wanted something natural and not plastic, so I chose butcher block countertops which we have used many times in many, many places before including in two kitchens: here and here. I love butcher block. It is easy to work with, comes in long lengths, and it is gorgeous! Caring for butcher block isn’t as hard as most people think, too. It can be stained or not. Sealed or not. Stains can be sanded out easily. And it just mellows with time.

So we mounted 14 feet of butcher block — all along one wall of the room. That’s a lot of workspace! But now I have designated work stations for sewing, writing, and gift wrapping as well as an open spot for my son to use — or anything else that comes up. Finally, I have room to leave a project out and come back to it later without having to rearrange my office space. That is a luxury to be sure, and I am so thankful!

To finish the surface, we sanded and sanded until the desktops are as smooth as silk. Then I applied three coats of Boiled Linseed Oil. This finish takes several days to fully dry, and the smell is potent. But the finish is golden and smooth. And it is a classic MCM finish. Plus, it is cheap, non-toxic, and easy! You just have to let it cure.

I have a full tutorial on how to install a desk like this. Check it out!

craft room makeover before.jpg
 

A Work Table with Hairpin Legs

We had one substantial length of countertop remaining after installing my 14’ work surface, so we added the hairpin legs I already had to create a 4 ft. long floating work table which I can move around the room as needed. Generally, however, it will sit to the right of my computer work station creating an L-shaped work area.

Hairpin Legs Source: DIYHairpinLegs.com

fullsizeoutput_72db.jpeg
 

Billy Bookshelves from Ikea

I wrote last week about my Billy Bookcases, and nothing really changed this week. But while I am talking furniture, and in case you missed them, I have two tutorials for making Billy Bookcases look customized and built-in. Check them out! I am very pleased with the results!

Still not styled, but I am loving the green peeking out!

Still not styled, but I am loving the green peeking out!


ELFA from the Container Store

As I said, about five years ago my grandmother decided her elfa system just wasn’t what she wanted anymore. We lived nearby at the time, so she gave it to me. I am incredibly lucky, because I absolutely love elfa, and I couldn’t afford this desk configuration otherwise.

Elfa is utilitarian, clean, and easy to reconfigure. Tucked under my long work surface I have 4 drawer frames. And then tucked into a corner will be a fifth drawer frame eventually. I am working on organizing each drawer carefully, KonMari-ing my way through all of the contents.

One of my favorite parts about the elfa system is that the drawers are fully removable. So as I have been working the KonMari method, I have just pulled the drawers out completely, laid them out side by side, and then sorted through the contents bit by bit. It has made what could be truly tedious, much more pleasant. Additionally, the drawers are interchangeable, so I have completely reconfigured my drawer frames enabling me to group like items together very easily.

The butcher block desktop does not rest on top of the elfa drawer units. I am tall, so a taller work surface fits me ergonomically, but it also gives me the ability to move the drawer units around as needed. They aren’t on casters — there isn’t quite enough space for that — but they can be moved and rearranged. In fact, I’m not sure this is the final arrangement.

I am always watching the Facebook Marketplace for elfa components, and I even once scored a full tower for FREE! If you are thinking about starting with elfa and you live in a market with a Container Store, the Marketplace is a great place to find pieces for less. I had to go out and buy one tower and a few drawers to outfit my Workroom. The right things just didn’t come up in time here, but if you don’t have a deadline, watch the Marketplace and wait.

Week 5 will be all about organization including how the drawers are organized, so there will be more to come!

I have two widths of elfa drawers which helps given all the different functions in this room!

I have two widths of elfa drawers which helps given all the different functions in this room!

Pulling the drawers out and treating them like bins for like items makes KonMari-ing my Workroom so much easier.

Pulling the drawers out and treating them like bins for like items makes KonMari-ing my Workroom so much easier.

elfa office furniture.jpeg
 

I have a lot more to do! But I feel like things are really coming together, and I am excited about where this is headed. If you are interested in ordering a copy of my Christmas organizer and planner, The Nice List, there are some available in my store! I’d love to ship a copy to you this week while I am filling orders! The Nice List is a fabulous way to give yourself a peaceful, organized, and more joyful Christmas season.

Over the next three weeks I’ll be working my tail off to finish this creative space! I can’t wait to settle in to my beautiful new Workroom, but there are miles to go before that happens.

Here’s my schedule for the coming weeks:

Week 4 | Oct 24 | Lighting & Windows
Week 5 | Oct 31 | Storage & Organization
Week 6 | Nov 7 | Before & After

I’ll be sharing the how-to for all of my projects as well as my favorite shopping sources for all things vintage and new.

You can follow along on Instagram or like Mid Modern Mama on Facebook for tips, tricks, and sneak peeks along the way, too.

Thanks to Linda of The One Room Challenge for organizing the whole shebang! Thanks also to Better Homes and Gardens, the ORC media sponsor.

Ok. Gotta get back to work!
Ciao!


Don’t miss a single update!

Sign up and each installment of the One Room Challenge will come directly to your email on Thursdays! And be sure to stop by the One Room Challenge Blog to check out the other creative renovations happening across the country. You can also follow #oneroomchallenge and #bhgorc on Instagram for more inspiration! Be sure to follow me as well!


@MidModernMama

Pin it!

Read More
Fall 2019 ORC, Vintage Decor Angela Nickerson Fall 2019 ORC, Vintage Decor Angela Nickerson

Week Two | October 10 | I Have this Thing With Green

Week Two | Oct 10 | I Have this Thing with Green

A weekly roundup of the progress on my One Room Challenge Workroom Makeover including paint color choices, a new gorgeous wallpaper, and simple ways to reduce the ecological impact of a renovation project.

one room challenge fall craft room makeoverjpg

I am taking on the room where I spend more time than any other: my Workroom. Part library, part sewing room, part home office, and part art studio, my Workroom has to do it all. This week let’s talk color, paint, wallpaper, and how to KonMari a room with so much going on.

It’s Week Two, and, frankly, there is a ton of change in the Workroom, and I’m so excited! Someone on Instagram said I was moving at “rocket speed!” And in some ways that is true. Much of what I have done this week is relatively quick work with lots of impact. But I have also front-loaded some of the biggest projects because copies of my Christmas organizer, The Nice List, are due to arrive right in the middle of the One Room Challenge so there will be press to do, sales and shipping to manage, and all kinds of other distractions. Want to buy a copy? Click here! With that in mind, I took on a ton of work in the last week!

So let’s get down to it… if you are just joining me, welcome! I’m taking on my Workroom for this season of the One Room Challenge. Last spring we did a Guest Room Refresh which was so fun I decided to do it all again!

My Workroom functions primarily as my writing space, but it is also a library, an art studio, a craft room, and a sewing room — all crammed into an 11’ x 14’ space in our Mid Century Modern home. For more about where I started (including some scary before photos), the space plan, and inspiration pieces, check out the ORC Week One post!

A workroom makeover that is so much more. Part home office, part library, part sewing room, craft room, and art studio, this Workroom space has many functions which means the design, organization, and decor of this renovation must all be on point. A…

Project Goals

I didn’t lay these out explicitly last week, so here are the goals I’m working on.

  1. Treat the room as a studio apartment. Go through the entire KonMari process, and eliminate the clutter.

  2. Create distinct working zones for each function of the room.

  3. Bring in unifying colors.

  4. Bring in plants and elements of the natural world.

  5. Improve the lighting for all tasks.

  6. Complete a makeover with a low environmental impact.

I’m working on all of those goals at the moment, and most of this week’s update is about Goals 3 and 4. But, let’s talk about Goal 6: having a low environmental impact. Renovation can be incredibly wasteful. And so much of home improvement is about replacing, buying, getting the newest and the latest — whether you need it or not. Additionally, a lot of home decor is mass-produced under less-than-ethical circumstances. And did you know, for instance, that the textile industry — fabrics, fashion, upholstery — is one of the planet’s largest polluters?

We strive to be both environmentally and budget conscious in our home. We aren’t perfect by any stretch, but for this makeover project, I’m taking some concrete steps to make this project greener with a low environmental impact.

Here’s a partial list of what I am doing:

  1. Keeping what works.

  2. Repurposing older items.

  3. Buying used and vintage where possible.

  4. Installing energy-efficient lighting.

  5. Donating, selling, and freecycling what I don’t need.

  6. Avoiding plastics as much as possible.

  7. Using renewable resources wherever possible like sustainably-harvested wood, for example.

  8. Recycling waste

As we continue to make progress, I’ll talk more about these efforts, but know that the green in my project goes beyond wall color.

One of the dreaded “before” photos!

One of the dreaded “before” photos!

Seriously! How did I get anything done?

Seriously! How did I get anything done?

One last horrid “before” photo!

One last horrid “before” photo!


Paint Colors and Wallpaper

So let’s talk about that wall color, shall we? The room was already painted in the same shade of mushroom that covers our entire house. It was also painted just two years ago, and the paint is in great shape. So there was no need to paint the entire room. This is one of the green decisions I made: to paint a perfectly-fine room would have been wasteful. But I needed to find a color palette that complimented the mushroom and that would bring light and life into this room.

Here’s what I came up with, and I hear you saying, “Angela, that’s a LOT of colors!” You aren’t wrong. But those colors are all pulled out of the other gorgeousness in this room — the wallpaper.

The Workroom Makeover color palette

The Workroom Makeover color palette

The wallpaper | Mojave by Vilber

The wallpaper | Mojave by Vilber

If you follow me on Instagram (and if you don’t, please do!), you may know that I’m dabbling in watercolors. Since I spend my days immersed in words, branching out into other media like watercoloring, collage, and art journaling open up new and different forms of creativity and help me to be a better writer.

When I saw this wallpaper, I fell in love. With the beautiful watercolor cacti, the gorgeous shades of green, and the large-scale pattern, it brings together so many elements that I am seeking in this room including plants, nature, and color.

The wallpaper, by the way, is called Mojave and is made by Vilber, a Spanish wallpaper company. Traditional wallpaper isn’t a green choice, but Vilber and a growing number of wallpaper companies are changing that. Traditional wallpaper is printed on paper that isn’t necessarily responsibly harvested. It is covered in toxic chemicals — often with a plastic coating. Not only is this in your home, but it can be a truly toxic mess if your home, God forbid, every catches fire.

environmentally friendly wallpaper vilbers.jpeg

So I looked for eco-friendly wallpapers, and Vilber’s papers fit the bill. They are printed with latex inks and are PVC-free. They use paper certified by the Forest Stewardship Council meaning their paper comes from recycled or sustainable forestry practices. And their products have earned Greenguard certification meaning they are certified as being low emissions. You know that icky smell that comes when you normally hang wallpaper? That’s off-gassing — chemicals in the paper, ink, and paste being released into the air. This wallpaper was not stinky!

“But, Angela, you already have an accent wall.”

I know. I know. But here’s the thing…


Can you Can Have Two Accent Walls?

Yes! Yes, you can!

In the case of this room, the two accent walls define two separate functions in the room. The green wall is the wall with the bookshelves. The wallpapered wall is in the alcove marked “Art Supplies | Sewing | Gift Wrapping.” Those functions have changed just a little bit, but the alcove is still a distinct zone, and the wallpaper in the alcove helps to define that space more clearly.

Space plan for a craft room in a bedroom. Home office, art studio, library, art room.

So, here’s the big drama moment! The alcove before and after!

The Before

alcove+before+wallpaper.jpg

And After!

A workroom makeover that is so much more. Part home office, part library, part sewing room, craft room, and art studio, this Workroom space has many functions which means the design, organization, and decor of this renovation must all be on point. A…

More about that desk next week when it is finished! And that spotlight is going to be replaced soon. I can’t wait!

And here’s the library accent wall before and after… The bookcases aren’t styled yet, but I had to put the books back up so we could walk in here! I love the difference the green makes. It actually makes the white trim look whiter, crisper. And even the unstyled books pop against the green. I can’t wait to get everything tidied up!

library+wall+home+office.jpg
after+paint+home+craft+room+makeover.jpg
remove backs of billy bookcases.jpg

We also finished out the Billy Bookcases so that they are a permanent fixture in the room and look truly installed. I have two project tutorials showing exactly what we did. These bookcases have been moved three times across the country. And they look better now than they did when we bought them from Ikea! We came up with cheap and simple solutions to make a set of Billy bookcases look custom and expensive.


The Paint Colors

The paint colors are all from Kelly-Moore Paints who have graciously sponsored all of the paint for this One Room Challenge project. The existing wall color is almost exactly the same as Tungsten (KM4572), so that was my starting point.

kelly moore paint colors home office.jpg

The Library accent wall is painted in the Prickly Pear Cactus (KM5106). The other colors will be used as accents in the room. And I just love the names of the colors — plants, beach glass, love. So many of my favorite things! Thanks to Kelly-Moore for being my paint sponsor on this project!


Over the next four weeks I’ll be working my tail off to finish this creative space! I can’t wait to settle in to my beautiful new office, but there are miles to go before that happens.

Here’s my schedule for the coming weeks:

Week 3 | Oct 17 | Furniture
Week 4 | Oct 24 | Lighting & Windows
Week 5 | Oct 31 | Storage & Organization
Week 6 | Nov 7 | Before & After

I’ll be sharing the how-to for all of our projects as well as my favorite shopping sources for all things vintage and new.

You can follow along on Instagram or like Mid Modern Mama on Facebook for tips, tricks, and sneak peeks along the way, too.

Ok. Gotta get back to work!
Ciao!


Don’t miss a single update!

Sign up and each installment of the One Room Challenge will come directly to your email on Thursdays! And be sure to stop by the One Room Challenge Blog to check out the other creative renovations happening across the country. You can also follow #oneroomchallenge and #bhgorc on Instagram for more inspiration! Be sure to follow me as well!


@MidModernMama

Pin it!

Read More
Fall 2019 ORC, Vintage Decor Angela Nickerson Fall 2019 ORC, Vintage Decor Angela Nickerson

Week One | October 3 | The Workroom Before

Week One | Oct 3 | The “Before” Tour

I am tackling the room where I spend more time than any other: my Workroom. This room functions in many ways — home office, art studio, craft room, sewing room, and library — so function, storage, and light are key.

I am taking on the room where I spend more time than any other: my Workroom. Part library, part sewing room, part home office, and part art studio, my Workroom has to do it all. I’ll let you in on the inspiration board as well as plans for this multipurpose room where organization and storage are critical.

one room challenge fall craft room makeoverjpg

Hello, again! And welcome to the Fall 2019 One Room Challenge! This is my second ORC, and I am ready for another design adventure. And I am so excited about the people I will meet and the incredible designs that will emerge from the Featured and Guest Participants.

So who are these participants? We come from all over the world and every walk of life. Some are design professionals. Some are influencers. And then there are all of the others — people who need to get a room of their home DONE. We all commit to making it happen in six weeks, and we cheer each other on. Honestly, that’s the best part! When do you get a cheering section for a home improvement project? Well, for the One Room Challenge, that’s exactly what you get, and it is fabulous!

I have taken on My Workroom for this One Room Challenge. I spend most of my days in my Workroom writing and editing. But this is more than just a home office. It is also my sewing room, my art studio, a craft room, and a home library. And each of those functions needs a different type of space, so I have done some serious space planning for this room.

We love working on our home — and it needs a lot of work. But this room is a relatively easy project. No electrical work. No walls to move. No plumbing. The Workroom Makeover is all about design, storage, and organization to create a functional creative space. And my husband, an architect with mad power-tool skills, is here to help along the way.

We aren’t new to renovation, however. We have completely redone two other homes: a 1980s Cabin in the City and our 1948 Subdivision Sweetheart. And last spring we did a Guest Room Refresh for the One Room Challenge. But this is the latest project in our current home: our Colorado Atomic Ranch.

The Before Pictures

Our current home was built in 1958. It is a split-level home in a whole neighborhood of Mid Century Modern houses. However, the last sixty years have not been kind to this house, and it needs a lot of love. But that’s what we do! We have always purchased the worst house in the best neighborhood — and then worked our magic a bit at a time.

Located on the lower level of our home, the Workroom is in 1950s-speak at “garden level.” That means the windows are at ground level — and all of the outlets are in the middle of the wall because everything below the window is cement block.

Dimensions: 11’ x 14” | 154 sq. feet

The Workroom before we moved in: basic and boring.

The Workroom before we moved in: basic and boring.

The Workroom taken from the corner between the two windows.

The Workroom taken from the corner between the two windows.

The room is a mushroom grey with white trim. In fact, all of the rooms in our house are the same color. It is almost identical to the guest room which we transformed for the last One Room Challenge. But it does not have the built in shelves and the closet is in a slightly different location in the room. The Workroom windows are also somewhat larger — which is why I chose it for my own personal haven.

However, that’s what it looked like before we moved in. Here’s what it looked like a few weeks ago…

fullsizeoutput_70ff.jpeg


This is the hardest part for me… showing other people what a disaster this room has become. *deep breath*

We moved into this house two years ago, and we basically stacked a bunch of boxes in this room and shut the door until Bambino started school. Then I hurriedly unpacked, threw things on shelves, and just let them sit there. This room looks almost exactly as it did two days after I’d opened all of the boxes. I kept saying, “I will clean it up soon!” So here we are at soon — two years later!


Can you KonMari an Art Studio/Sewing Room?

Yes. Yes, you can. And I am going to do just that. I am only going to tackle this room, however. To truly KonMari a home, you take on the entire house, but we did that four years ago. Now it is time to treat my Workroom as a self-contained home. I’m going to do the whole KonMari process as if this was my studio apartment. It’s a lot of paper — and a lot of komono. But it will feel so good to get it all done!

fullsizeoutput_7109.jpeg

The Furniture

This room has been furnished largely in Elfa, an organizing system from The Container Store. That is thanks to my grandmother. She had all of this Elfa in her sewing room and decided it didn’t work for her, so a few years (and two states ago), it became mine. I have added a bit to what she gave me over the years, but it is very functional and totally adaptable. This is the third home where I have set up my Elfa office, and because it is modular, I’ve been able to adapt to three very different spaces quite easily.

However, all of that visual clutter has to go. It is too distracting when I am trying to work! So, I am considering very carefully what should be out and what should be hidden away (in a neat and tidy way, for sure).

The green rocking chair doesn’t belong in this room. It is too large. But it sentimental. It was the chair where I nursed Bambino, and I have so many sweet memories in that chair. Plus, it is comfortable. But it is too large. And it just doesn’t work in here. So a new chair is on the shopping list, too.

fullsizeoutput_7105.jpeg

Closet Organization

This room has a decent closet which is amazing, but it also contains the crawlspace access, so that impacts how the closet can be used and organized. We had to take off the closet doors, because getting in and out of the crawl space with the sliding closet doors was very difficult. I’m considering the closet as part of the room, and I’m taking on that beast as well!

Next to the closet is this strange, dark alcove with a bizarre counter. That counter makes me crazy! It is at an odd height — not really a working height for anyone. And it is covered with the world’s ugliest TILE. Seriously. With a bizarre lip of wood trim… it is just odd all the way around. It will be gone.

IMG_5788.jpg

Lighting

The alcove has a strange little spotlight that does nothing but heat up the room. So the alcove spotlight and the boob light in the middle of the ceiling must go. Fortunately, I’m married to an architect who is helping me design good, functional lighting for this space. I’d love fancy crystal chandeliers or something fun, but since we can’t put in can lights, we are going to have to go with function — and a little fun, too.

fullsizeoutput_7113.jpeg

Installing & Styling the Billy Bookcases

I like big books, and I can not lie. And I read books. A lot. In fact, this is only half of my books. The rest are in the family room. And in a few boxes. And this is where Marie Kondo and I have a big disagreement: 30 books is NOT enough. However, I see her point, and I have stopped hoarding books that I know I’ll never read again. But surrounding myself with books sparks joy! So there will be books on shelves that look much nicer and more intentional than this disaster.

Then there are the storage boxes. Going through those boxes will be a fun challenge. They are all full of all kinds of notes, letters, photographs… each box holds a distinct project, but it is time to let go of some of those projects. I know. Tidying. Tidying. Tidying.

The Billy bookcases from Ikea are still in good shape despite being moved at least 3 times. So we will keep them, but we are going to properly install them.

And in another house which seems like a lifetime ago, they were beautifully styled. So that’s on the agenda, too. I don’t do books turned backwards or wrapped in paper… that is using books as an accessory. My books are tools. But they can still be beautiful. They just need some organization and love — and a few carefully chosen mementos from my travels.

fullsizeoutput_710f.jpg

Organization & Storage

One of my goals is to have all like items together, and to have them stored in simple, attractive containers, so they are easy to find, use, and put away. Because this room has so many functions, I also have to space plan for those functions and create zones for each activity along with storage so that the supplies are at hand and easy to find.

I don’t have an unlimited budget for storage containers — and I want to be as ecologically-conscious as possible, too. So I am focused on using what we have on hand first before I go out to buy new storage bins. We will see how that goes!

Currently one of the challenges in this room is that the only color comes in the form of clutter. The walls are grey. The desk is white. It is monochrome and blah. And then the clutter makes the entire room feel chaotic. So, adding color strategically is also a critical element of this design.


The Inspiration Board

I have been thinking about how I want the Workroom to feel for more than two years. When we moved in, my books and materials and supplies and stuff just landed in this room with very little thought or effort. I’ve done a little organizing here and there, but honestly I have been so busy this room has been an afterthought — a someday project. But as I was preparing for the One Room Challenge this summer, I suddenly had to make real decisions.

I came to two pieces as my jumping off points: a Dior gown and a handpainted milagro from Mexico. I saw the Dior gown last winter when Dior: from Paris to the World came to the Denver Art Museum. The entire exhibit was a phenomenal display of couture craft and exquisite detail — and the kind of sewing skills to which I can only aspire. But this gown of hand-painted silk satin — created in 2004 by John Galliano — took my breath away. It is exquisite, but Rococo-revival isn’t really my style, and our Mid Century house is far from the ateliers of Paris.

And then I found my Milagro (purchased from Curiosa). Handpainted. Birds. Similar colors. But simpler — a little more rustic but no less refined. I can’t have the Dior gown in my Workroom, but my Milagro from Mexico will certainly find a place.

dior dress handpainted.jpeg
santa fe milgros.jpg

The Dior gown and the milagro also marry two other important elements for this room: travel and nature. I have written several books including travel books. Travel is an important part of my professional and personal life, and my Workroom contains my extensive library as well as items from around the world that I hold dear.

But I also have to be realistic: when I am not traveling, I spend a lot of time in the Workroom. Alone. Often in the winter. So bringing the natural world inside is also important. So there will be plants. Lots of them. I have good natural light. I just need some plants to talk to!

That’s a lot of ideas: Dior, milagro, travel and books, plants — and there will, of course, be a Mid Century Modern influence, too. But I promise it will all come together in a way that makes sense!

So here’s the inspiration board…

My Post (88).jpg

I will share more about those colors in the coming weeks, but they are all Kelly-Moore paint colors. I have yummy things planned with those colors! Thanks to Kelly-Moore for being my paint sponsor on this project!

And here’s a rough space plan that I have been playing with in my Passion Planner. There have already been changes, and I’m sure there will be more along the way, but that’s where I started as I was planning.

With a multipurpose room like this, planning for the actual activities of the space must come first. The room has to function well or it will fail no matter how pretty it is!

fullsizeoutput_7119.jpeg

So over the next five weeks I’ll be working my tail off to create a room that is functional, beautiful, and serene — a perfect creative space.

Here’s my schedule for the coming weeks:

Week 2 | Oct 10 | Paint & Wallpaper
Week 3 | Oct 17 | Furniture
Week 4 | Oct 24 | Lighting & Windows
Week 5 | Oct 31 | Storage & Organization
Week 6 | Nov 7 | Before & After

I’ll be sharing the how-to for all of our projects along the way as well as my favorite shopping sources for all things vintage and new.

You can follow along on Instagram or like Mid Modern Mama on Facebook for tips, tricks, and sneak peeks along the way, too.

Ok. Gotta get back to work!
Ciao!


Don’t miss a single update!

Sign up and each installment of the One Room Challenge will come directly to your email on Thursdays! And be sure to stop by the One Room Challenge Blog to check out the other creative renovations happening across the country. You can also follow #oneroomchallenge and #bhgorc on Instagram for more inspiration! Be sure to follow me as well!


@MidModernMama

Pin it!

Read More

Order Now!


Instagram