Week Six | November 20 | Before & After
The Big Reveal! The Hygge Child’s Bedroom is done at long last!
For the Fall 2020 One Room Challenge, I am giving my son’s bedroom a hygge-infused makeover. As a not-so-little boy but not-quite tween, this room needs to be adaptable, functional, and a great place for play. I’ll let you in on the inspiration board as well as plans for this multipurpose room where organization and storage are critical and coziness is the word of the day — everyday. Be sure to check in on all of the other ORC projects on the ORC blog here.
It’s done. The Hygge Child’s Bedroom is done. The design plan changed quite a bit over time. Some of that was natural, but some of it was deeply personal. Redoing our child’s room during a time of social and familial upheaval was harder on Bambino than I expected. He was excited at the outset about the possibility, but as his room changed and was filled with tools and a mess, his excitement flagged. At one point he came to me and said, sobbing, “Why do I have to say ‘goodbye’ to so many things I love — things that have been with me my whole life?”
Heart broken for him, I stopped. I put several projects on hold and cancelled others. He wasn’t talking about toys. He was talking about rugs and bookcases and trunks and shelves — familiar, comfortable parts of his room that I had planned to paint, reupholster, or replace.
I made a new plan.
I didn’t repaint the small shelves. I didn’t reupholster the bench. I had started the project with several photographs from our travels as inspirations for the color scheme. I had been leaning into the mossy green branch — layers of greens and wood. In the end the room is less woodsy green and more colorful meadow as a result.
And it absolutely reflects the wholeness of Bambino, too.
Before & After
We have lived in this house a little more than three years, and Bambino’s room was a jumble of furniture and toys. The layout didn’t work well. He had outgrown a lot of the furniture and many of the toys in his room. And we had never been very deliberate about decorating this room — always leaving it to the proverbial someday.
Someday has come at last!
Hygge: a Danish and Norwegian word meaning “a quality of coziness and comfortable conviviality that engenders a feeling of contentment or well-being (regarded as a defining characteristic of Danish culture).”
I wanted to imbue this room with hygge while also staying true to Bambino’s personality and passions.
I started with the cleat wall when designing the room. I wanted storage for books as well as display space for significant toys and mementos. I also wanted the cleat wall to be something which could adapt and change as Bambino grows up.
Bambino requested a cozy spot to read and to hide during hide and seek. My husband designed and built the bed complete with both storage and the Book Nook.
The storage under the bed replaces one of the bookcases we had in the room freeing up more floorspace for play.
The rug I ordered is much more vibrant than it appeared, but with a rainbow bookcase and vivid valances, it works. And more importantly: Bambino loves it. I added a faux fur rug at the side of the bed for little feet on cold mornings.
Doing the One Room Challenge during the COVID-19 pandemic was more challenging than I even expected. From the outset, I committed to being safe during this process which meant: no outside help, no professional photographer, and no trips to the store — curbside pick-up or delivery only. I sourced a few items from the FBMP from sellers who agreed to contactless pickup. And my husband made one in-person trip to get lumber. But other than that, we were able to do everything safely.
Given that, however, it was also the most stressful One Room Challenge to date. That’s probably because we are all home all the time. My progress was particularly slow, because I never have time alone. I couldn’t work uninterrupted while Bambino was at school because he is going to school in the Art Room! So I have some catch up to do now that the room is done. Tutorials for many of our projects will be forthcoming in due time.
A Hygge Bed & Bedding
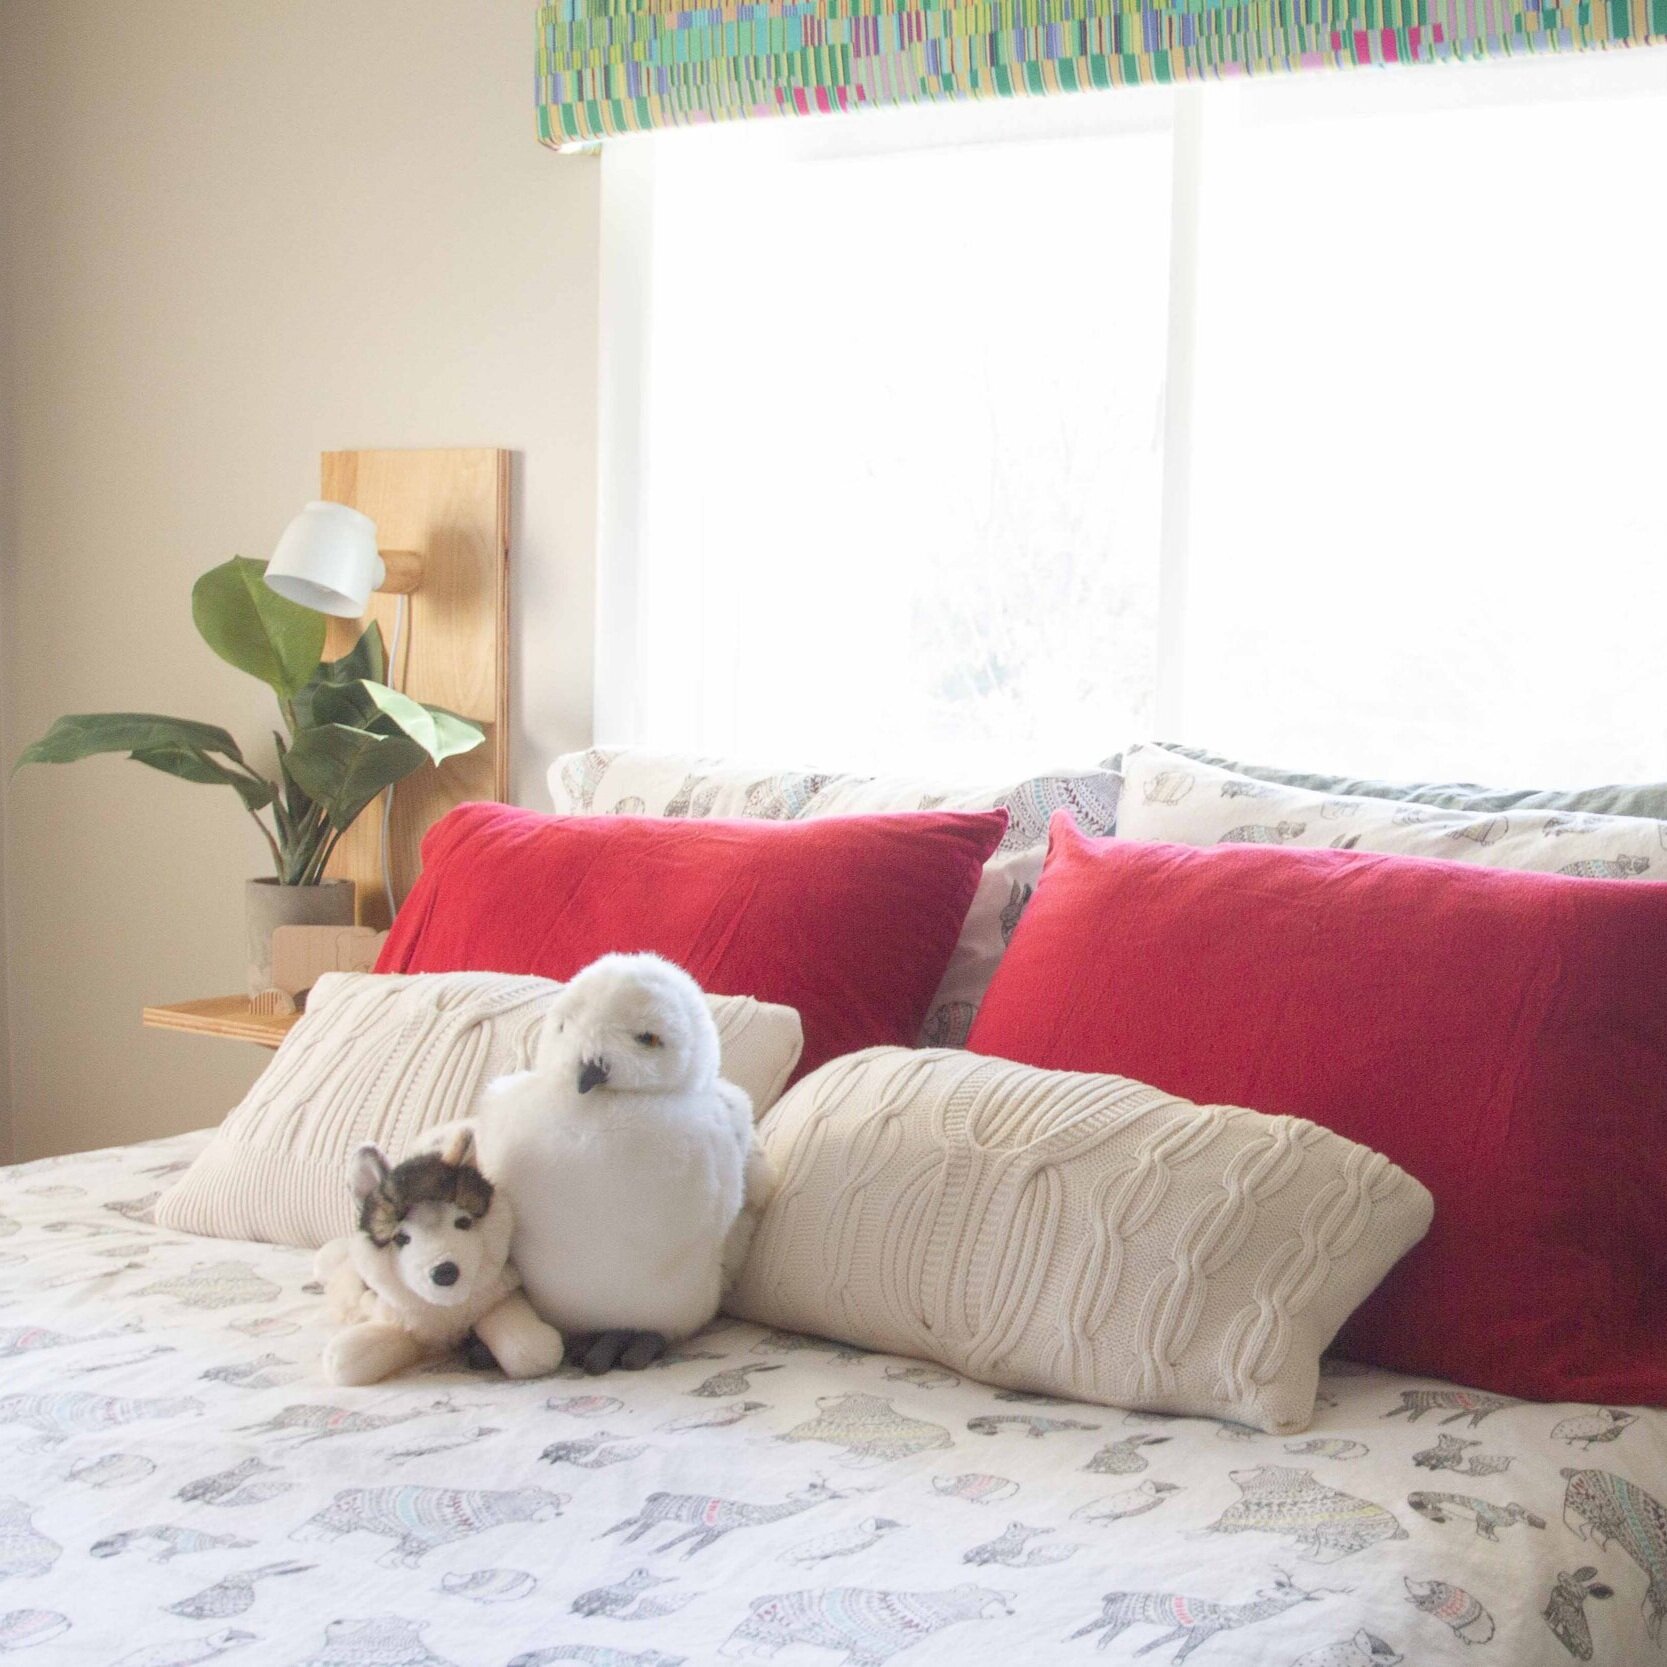
A cozy bed is central to any hygge bedroom. I chose a flannel duvet cover and sheets for the bed with the cutest animals wearing sweaters! The subtle touches of red, turquoise, green, and gold work with the other colors in the room. Bambino loves all creatures great and small, so this is the perfect winter bedding. In warmer months, his old linens with turtles and frogs will still work in this room, too.
We sleep Scandinavian-style — the coziest way to sleep! This means that we don’t use top sheets and sleep with duvets and duvet covers. And every sleeper gets their own duvet. My husband sleeps hot, so his duvet is much lighter weight than mine, for example. This makes our beds particularly cozy, and we all sleep better!
My husband, Romano, designed and built Bambino’s bed. One side features cubbies for toy storage. We already had the blue and green bins which I bought before Bambino was born. Romano built the cubbies to fit the bins.
The other long side is a gorgeous piece of birch plywood — the primary material in the entire room. The bed is high enough that Bambino needs a step stool to get up onto the bed, but that only makes it all more fun!
We designed a simple bedside table just big enough for a book. The inexpensive lamps are built into the table design which mimics the Cleat Wall and is built from the same birch plywood.
The most important feature of the bed, however, is the Book Nook. Bambino requested a cozy place to read and to hide during hide and seek. Romano designed the nook to accommodate a twin-size mattress from Ikea. Both Bambino and Ole, our dog, love to hang out inside. At some point we will add some LED fairy lights for a little light, but for now a book light is perfect.
When Bambino no longer finds hiding under the bed quite as fun, this area can be used for long-term storage. But I struggle to see when that may happen — probably never!
The Cleat Wall
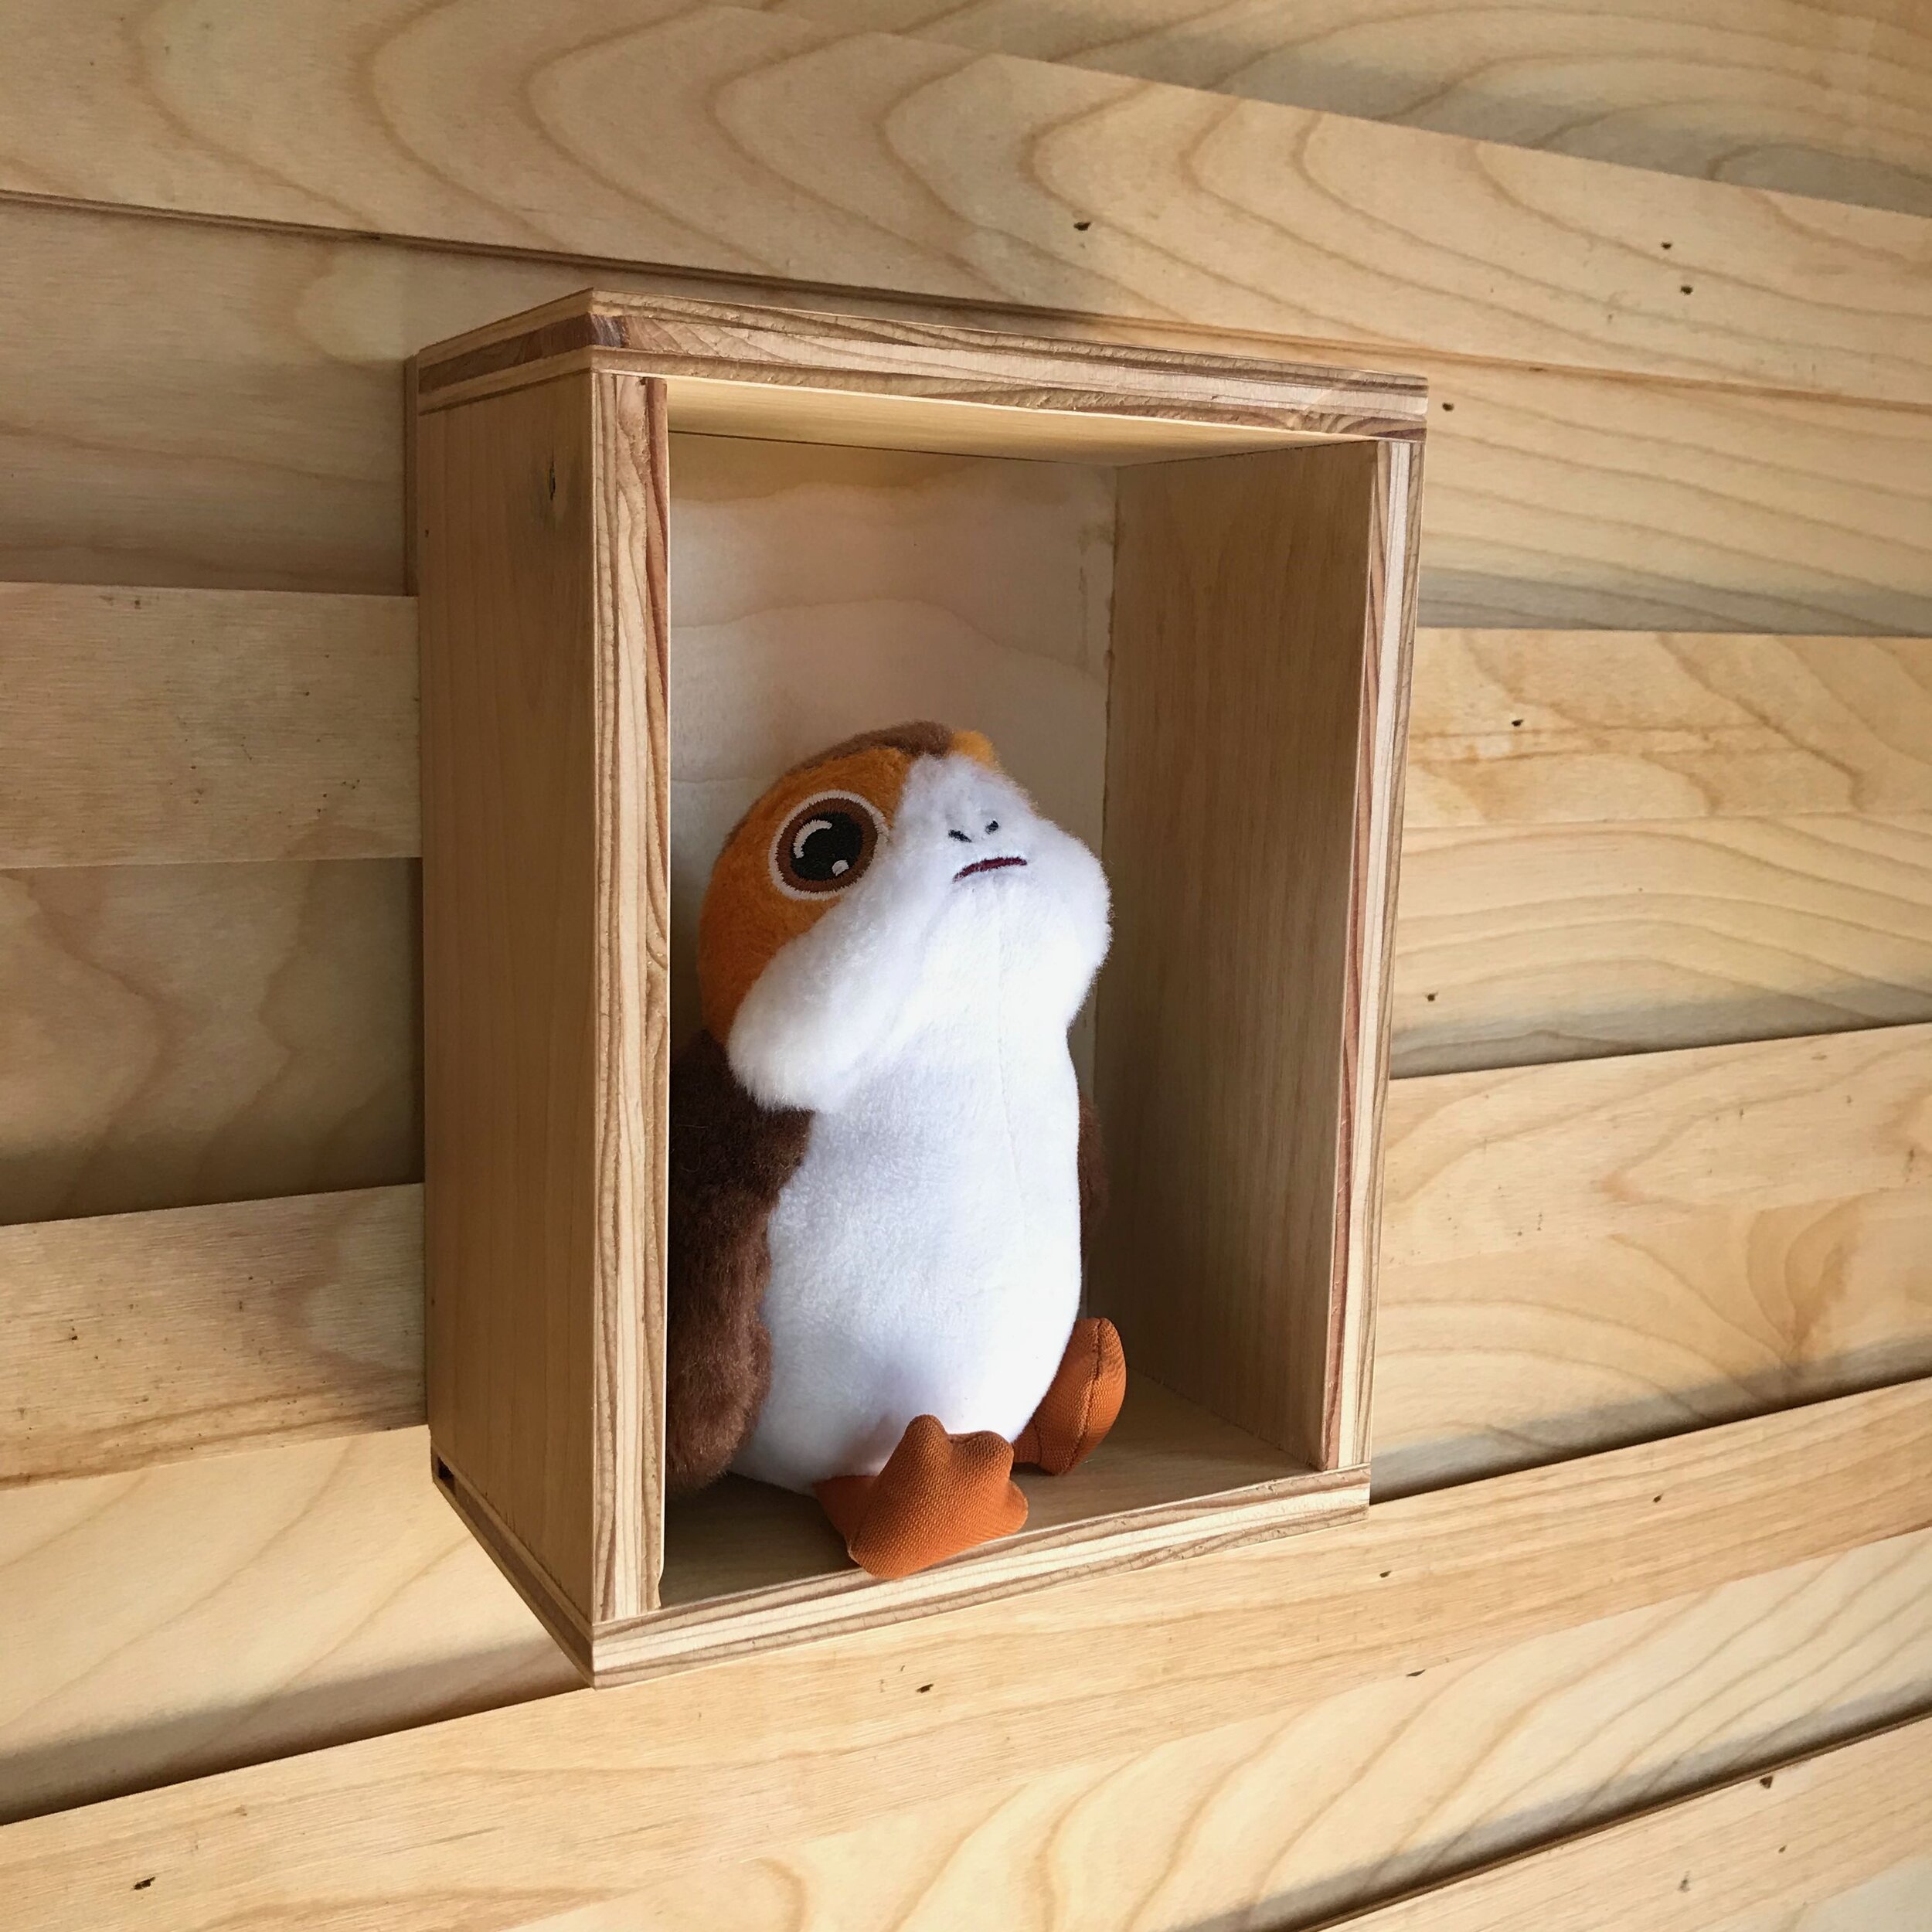
As I said before, the room’s design started with the Cleat Wall. This wall jogs in about 10 inches, and I wanted to fill that space with something special and functional. I started with the idea of boxes on the wall — specifically designed and built for toys and mementos that are both beautiful and meaningful. I had two items in mind: the vintage fire truck which had belonged to my father as a child and R2D2, a memento from Galaxy’s Edge.
But the wall couldn’t just be decorative. This isn’t a huge room, so it had to be functional as well. Bambino has a collection of PlayMobil sets but found playing with them frustrating. He didn’t have a good place to play without having to clean up every time he changed course. And on the floor, our dog often stole little pieces — sometimes chewing them up. Additionally, we needed shelves for Bambino’s growing collection of chapter books which don’t fit well on the Ikea cube book cases.
The Cleat Wall meets all of those needs, and it is completely adaptable as Bambino grows and changes.
The French cleats are mounted on birch plywood which is mounted to furring strips on the wall. All of the boxes and shelves — even the table top — rest on the cleats and can be moved and repositioned at any time. The table top can be raised as Bambino gets taller and could even be a standing desk at some point.
We chose items to display, and then Romano created customized boxes for each item.
I have had the vintage school chairs for several years. They bring a little Mid Century style to this room.
The Closet
When we moved into this house three years ago, we outfitted several closets with Ikea’s Algot closet organizing system. This is the second house where we have used it, and we love it. One of my favorite things: it is really easy to change things around. Three years is a long time in a child’s life. Bambino is taller. His clothes are bigger. And his interests have somewhat changed.
So, I spent some time working in the closet. I pulled everything out, rearranged some of the shelves and drawers, and put it all back in a more cohesive way. I added a few shelves, removed a few others, and switched some things around to make the closet even more functional.
When we moved in, we took off the sliding closet doors. They were terrible and wouldn’t stay on their tracks. We replaced them with dark green curtains which tuck back into the corners as needed. Honestly, they are rarely closed which is fine, but the closet needs to be neat and tidy as a result.
Storage Solutions
I work really hard not to buy more and more storage containers. That’s one of the biggest lessons I learned from using the KonMari Method in our home. When I did the Workroom Makeover, I only ended up buying four containers for my entire workroom — and two of them were just to match things I already had. For this room, I did buy a few more — largely because I wanted them to be attractive as well as useful.
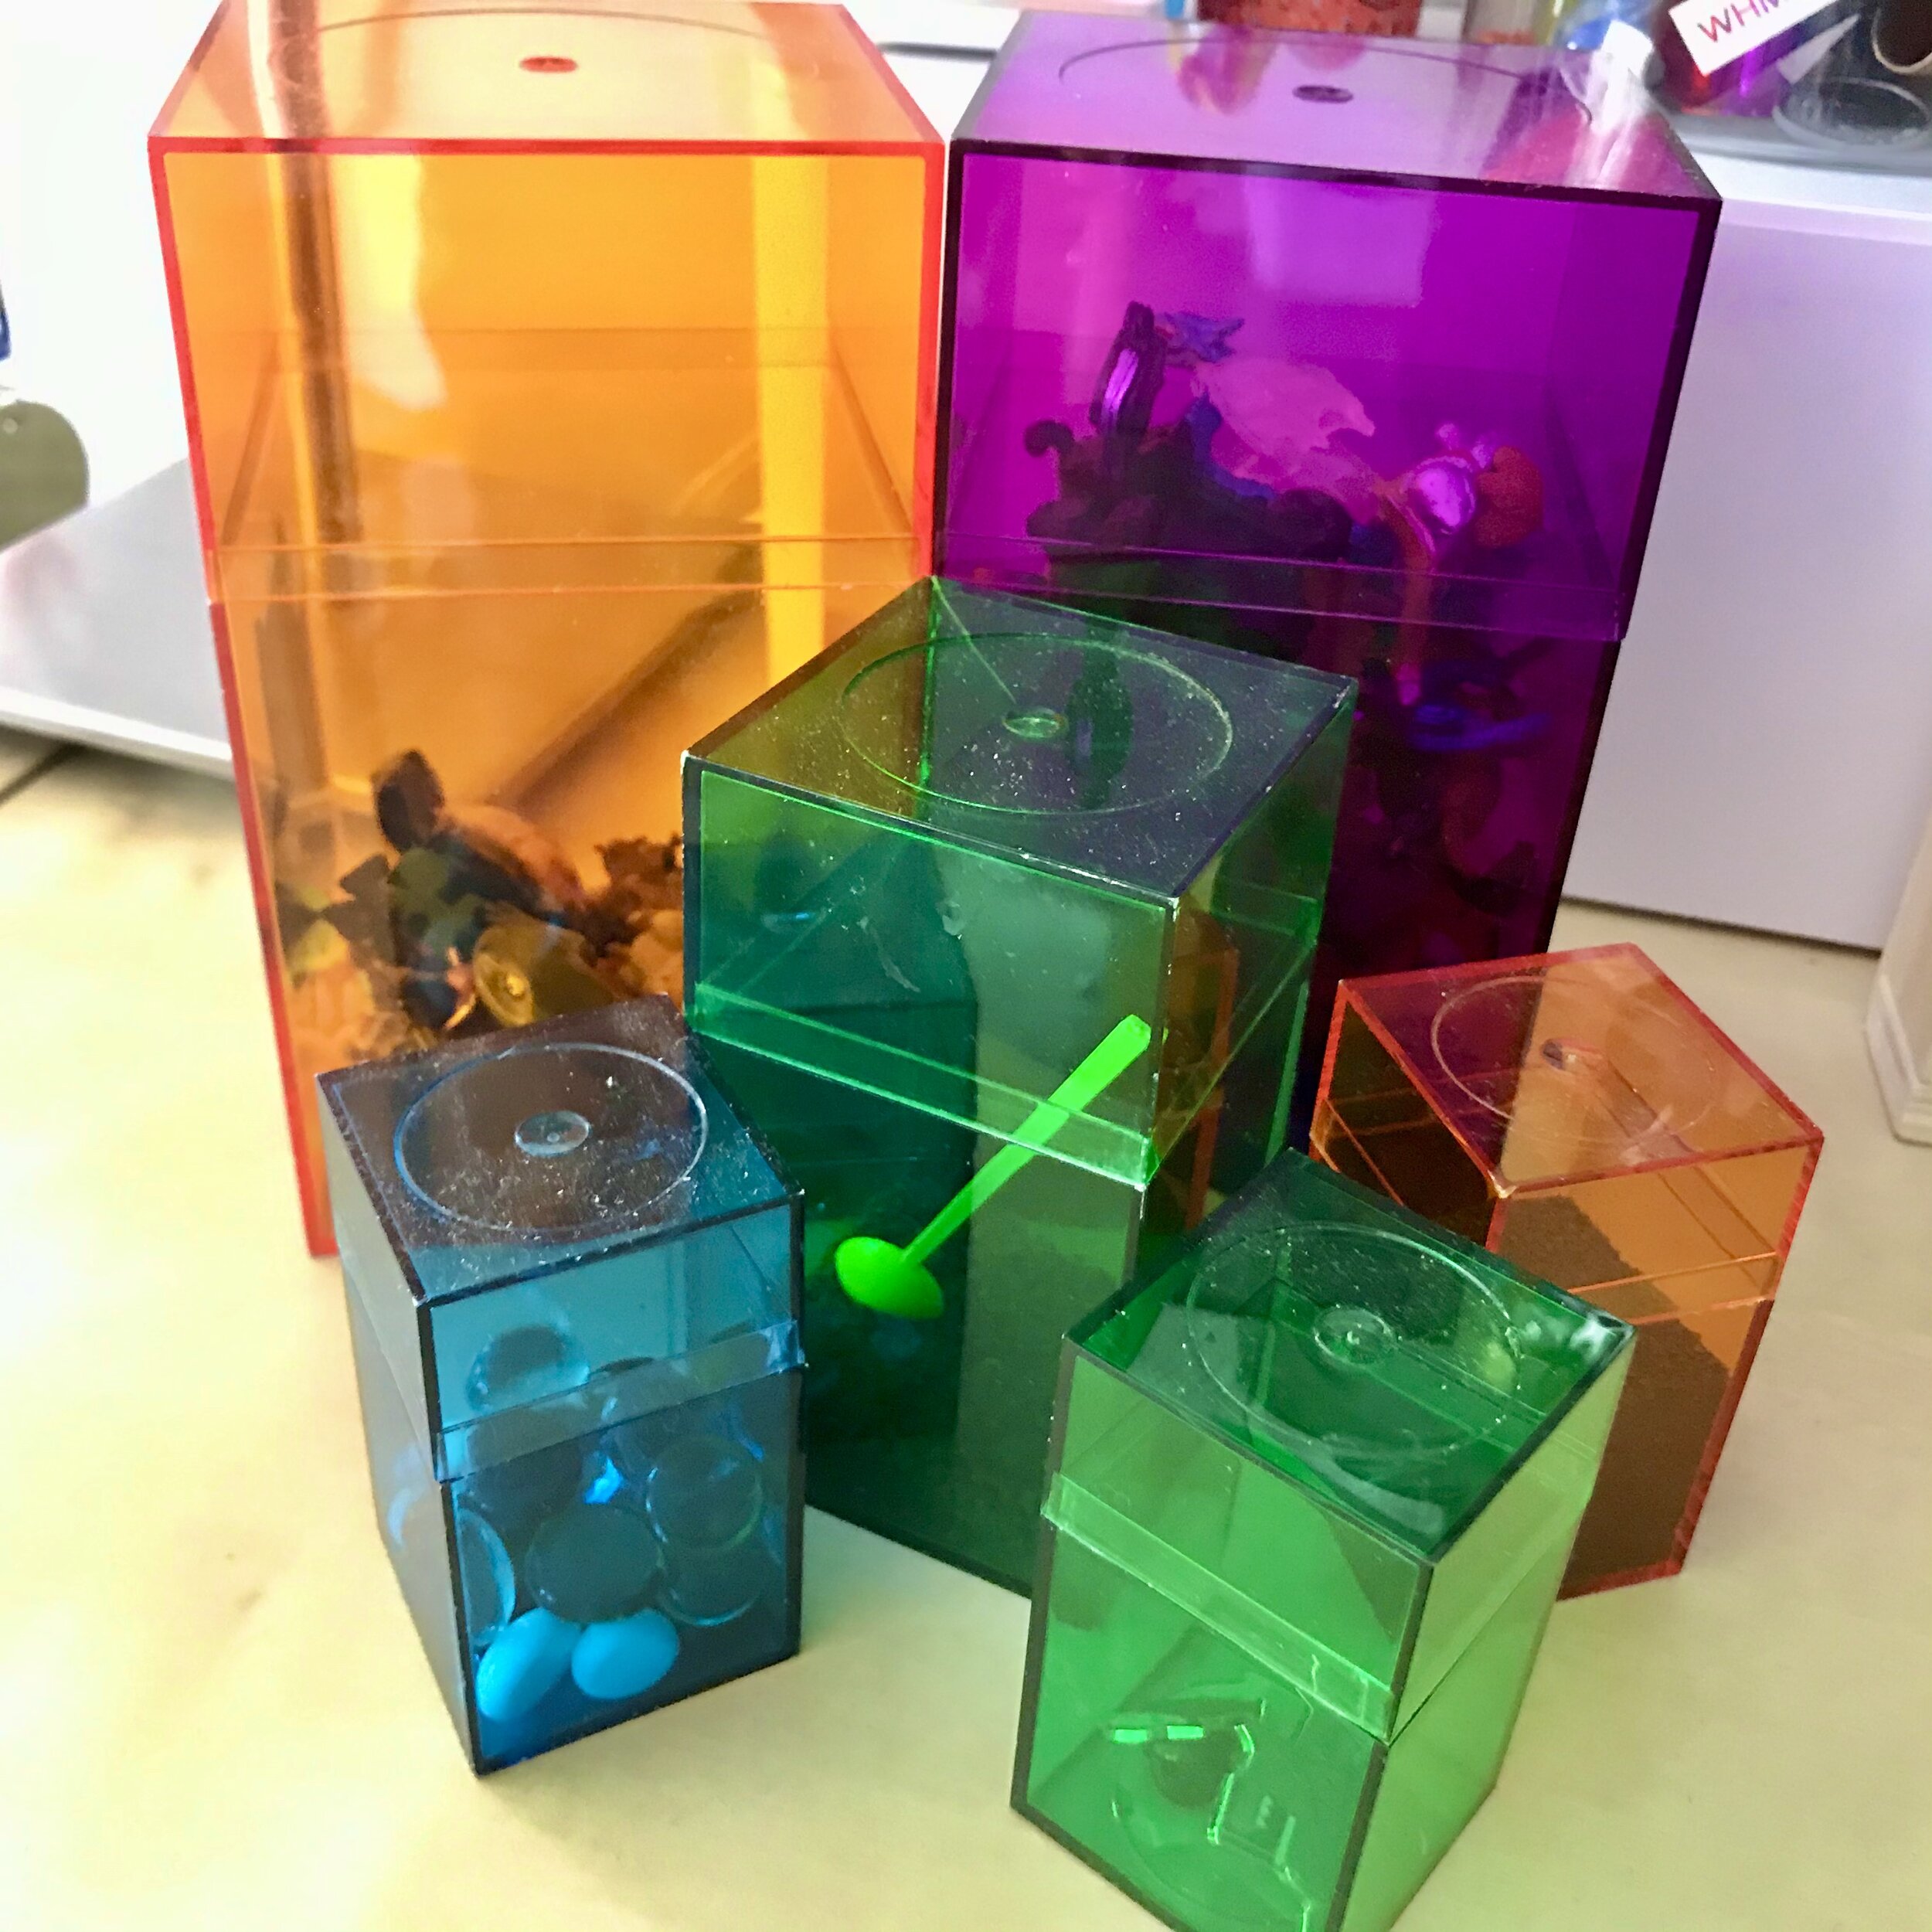
When I was a little girl, I loved the rainbow wall of Amac boxes at the Container Store. I longed for a wall of my own — colorful and yet precise. Here I am with a child whose second favorite color is rainbow and for whom tiny things spark joy, so the answer was obvious. The Container Store offers curbside delivery, so I ordered a rainbow of Amac boxes in various sizes. Bambino and I spent time together sorting and organizing his collections of tiny things — marbles, medals, buttons, and rocks as well as all of the little pieces that go with his PlayMobil sets. Now he has dedicated boxes and his small items that spark joy are sorted by type.
As I noted before, the bed has built in storage. To preserve floorspace in this room — and because the closet system keeps clothes neat and tidy — Bambino does not have a dresser. These cubbies are great for toy storage now, but they will work for clothes or other items as he grows up.
This may look like a beanbag chair, but it isn’t just any beanbag chair: it is stuffed with stuffed animals! This is my favorite storage solution ever!
The stuffed animals are all tucked away when they aren’t being played with, and the beanbag chair is fun for reading and lounging. Our dog LOVES sleeping on it, too. I love anything that does double-duty and looks cute. You could use any beanbag chair cover — just fill it with stuffies! The covers come in different sizes depending on how many animals you need to conceal.
I am fussy about books. I write them, and I find the trend of turning the spines inward — using books as props — to be morally abhorrent. However, I absolutely love a good rainbow bookcase! This has been a gamechanger for us, actually. Bambino has a good visual memory, and he has learned quickly where to find his favorite books by their spine color. This was particularly fabulous before he was reading, but it is still great even now! I highly recommend organizing kids books this way — plus they looks so cheerful and tidy.
Lighting: Vintage & New
The lighting in this room before left a LOT to be desired. We had a collection of lamps which were somewhat inadequate and a ceiling fan which didn’t offer good light either. In the winter here in Colorado, the sun sets by about 4:30, so this room needs good light for playing and reading as well as bedtime activities. Layering with a good overhead fixture as well as lamps and task lighting is the answer, and I’m pleased with the cozy scheme that resulted. And to tie so many light fixtures together I chose two simple elements: white and wood.
I mixed a combination of vintage and new fixtures in this room. My dad made the wooden lamp in middle school shop class in the 1960s. I added a new lampshade — the art is by Claire Desjardins and is from Anthropologie. The frog lamp was an ugly duckling from the FBMP. I spray painted it white, replaced the shade, and added a gold crown.
The Viking ship nightlight is a vintage TV lamp from the 1950s. I found it on Etsy, and my husband was sure I had lost my mind. But I rewired it and put it on a timer in the closet — it makes a wonderful nightlight.
Hot tip: put a lamp on a timer in your child’s room, and they will never be afraid of going into the room in the dark again! This has changed our lives — particularly during these days when it gets dark so early. I have lamps on timers all over the house.
I was also fortunate to have a lighting sponsor for this project. ColorCord is a Denver-based company that sells customizable light fixtures and lamp parts. You can use their products as is — or use them as the basis for great DIY projects.
I replaced the old ceiling fan with ColorCord’s 2 Inch Post Shade-Ready Pendant (in white) to which I added the Fabric Tapered Shade in White/Lime Green. But I wanted to customize the light a bit. We cut a disk of the same birch plywood, sanded it, and applied linseed oil. This DIY ceiling medallion brings just a bit of the wood up to the ceiling. Then I used my Cricut to cut out trees, squirrels, owls, and rabbits from birch veneer. I glued them to the inside of the shade. When the light is on, the shapes appear as shadows on the shade. It is so fun!
I also needed good task lighting at the Cleat Wall, and again ColorCord came to the rescue. I used ColorCord’s customizer tool to create the perfect pendant lights. Since they are made to order, I could specify the cord lengths, cord grips, sockets — even the type of plug! And ColorCord has an amazing selection of LED bulbs in all the cool shapes and sizes.
For the shades, I drilled holes through the bottoms of some tin cans painted white for a crisp, clean look. This also directs the light down to the play surface making it very good task lighting.
Finally, we designed the bedside tables around some Scandinavian-esque lamps. They plug in and are just the minimal look I wanted with wood accents.
Art & Photographs
Feeling as isolated as we do right now during the pandemic, I wanted to surround Bambino with reminders of the people who love him and who he loves. Here another sponsor, Simple Prints, jumped in to help. They provided me with a series of their Vibrant Metal Prints for this room, and I absolutely love them!
The two large prints we hung at the end of the Cleat Wall area together. The colors are beautiful, and I am really impressed with the print quality. Frankly, these would be perfect in a bathroom where moisture can be a problem with paper prints.
I also hung smaller metal prints from the Cleat Wall. This is a great alternative to framing, and as time passes, I can just order more prints using the Simple Prints app on my phone. So easy!
Bambino loves art and loves to draw, so I included two pieces by PD Murray. Murray is a modern expressionist — and is also my cousin. His work spans serious to silly and everything in between. “More Cowbell” is a numbered handmade linocut print available in his Etsy shop. “Frogs are Artists Too” is an original commissioned piece — mixed media on paper.
Original art does not have to be terribly expensive or precious. And children should be surrounded by good art — examples of what can be done. Supporting artists right now is particularly important, too.
Of course, sometimes we need a little kitsch as well. The Viking ship print is a vintage piece from the 1960s that I bought a few years ago. The original frame was warped and peeling, so my husband built a new frame for it. Now she sails majestically above the frog tank.
The orange shelves are actually four drawers I found by the side of the road years ago. I screwed them together, and they have served in several rooms in our homes over the years. This was one of the pieces I wanted to repaint, but, at least for now, Bambino needed it to stay the same. So I just refreshed the photos and mementos on display.
So is it hygge?
I am going to break all of the rules here. Here are a few photos taken at dusk with all of the lights on. Shocking, I know! But this room is snug and cozy, and when the snow flies, it will be one of the sweetest spots in the house. If that isn’t hygge, I don’t know what is! And I think in the end we know that yes, rainbows are hygge, too.
In the coming weeks, I will create tutorials for several of our projects from this room including the light fixture and the cleat wall. Be sure to subscribe to my newsletter so those arrive in your mailbox!
Thank You Notes
First and foremost, thank you to my husband, Romano. When I said, “I want to do this wall full of boxes and display space and a table…” he said, “Yes, and let’s build a custom bed, too!” And when it was all over he declared it all to have been fun! He’s the best carpenter/architect I could ask for! And thank you to Bambino, our sweet guy. Having construction happen in your bedroom during a pandemic is not fun, but we both hope you will love the results for years to come. And you helped so much with this project, too!
Thank you to ColorCord and Simple Prints, the sponsors for this project!
Thanks to Linda of The One Room Challenge for organizing the One Room Challenge! Thanks also to Better Homes and Gardens, the ORC media sponsor. On Instagram, check out #oneroomchallenge and #bhgorc to see all of the amazing room reveals, or visit the One Room Challenge Blog where you’ll find the link-up to all of the participating blogs. There are rooms of every kind, aesthetic, and design. It is an amazing thing to explore and get inspiration!
You can follow me on Instagram or like Mid Modern Mama on Facebook to keep in touch, too! Thanks for your support and enthusiasm for the One Room Challenge. This has been a wild round, but it has been fun nonetheless.
Ciao!
Also: The Nice List
Of course, in the midst of all of this, I launched the 2020 editions of The Nice List, my Christmas planner and organizer. It’s available in my shop in three versions — digital, printable PDF, and paper. Be sure to stop by and check it out! Also coming soon: The 2020 Nice List Thoughtful Giving Guide.
So no, there’s nothing else going on right now… ha!
Don’t miss a single update!
Sign up and each installment of the One Room Challenge will come directly to your email on Thursdays! And be sure to stop by the One Room Challenge Blog to check out the other creative renovations happening across the country. You can also follow #oneroomchallenge and #bhgorc on Instagram for more inspiration! Be sure to follow me as well!
Pin it!
Week Five and a Half | November 12 | Almost There
Week 5.5: Rainbows are hygge, right?
For the Fall 2020 One Room Challenge, I am giving my son’s bedroom a hygge-infused makeover. As a not-so-little boy but not-quite tween, this room needs to be adaptable, functional, and a great place for play. I’ll let you in on the inspiration board as well as plans for this multipurpose room where organization and storage are critical and coziness is the word of the day — everyday.
Well, today was supposed to be the deadline, but… like everyone else, getting it all done with delivery delays and school at home and a global pandemic and an election — well, we are behind. But the One Room Challenge deadline was extended to November 29, and I will definitely be done before then! My goal: early next week. I have a few labor-intensive DIY projects still underway which is delaying the entire process, but I am so excited about what is happening!
This has been a week of adjustments and managing expectations — things I’m not always good at! But I like where it is all going.
The Closet
When we moved into this house three years ago, we outfitted several closets with Ikea’s Boaxel closet organizing system. This is the second house where we have used it, and we love it. One of my favorite things: it is really easy to change things around. Three years is a long time in a child’s life. Bambino is taller. His clothes are bigger. And his interests have somewhat changed.
So, I spent a few days this week working in the closet. I pulled everything out, rearranged some of the shelves and drawers, and am working to put it all back in a more cohesive way. I added a few shelves, removed a few others, and switched some things around to make the closet even more functional.
When we moved in, we took off the sliding closet doors. They were terrible and wouldn’t stay on their tracks. We replaced them with curtains which tuck back into the corners as needed. Honestly, they are rarely closed which is fine, but the closet needs to be neat and tidy as a result.
It’s still in progress, but it is looking much better, and I’m excited to finish this project in the next day or so.
The Rug
One of the big delays on this project has been the rug. We had two green rugs in this room originally which are the wrong sizes for the new furniture layout. So I’ll be selling them on the FBMP this week. I wanted to do something green again — almost using green as the neutral in this hygge room. The original rug I chose is backordered and wouldn’t arrive in time. So I chose something else.
In the photos online, it looked much more monochromatic in tones of greens and blues. When it arrived it was definitely not monochromatic. This rug is a veritable rainbow — and Bambino loves it.
However, the rainbow rug takes this room in a very different direction than I had originally planned. My client’s opinions matter, though, and he loves the rug. So the room is taking a decidedly more colorful turn here at the end — less Scandinavian-modern and much more rainbow-Bambino. Rainbows are hygge, right? This Mama is just trying to adjust her expectations accordingly!
The Bed
So once the rug arrived, we were able to start assembling the bed. Bambino had requested a cozy spot for reading, and I wanted a little more designated storage. We got both. Under the bed is Bambino’s cozy Book Nook which will be outfitted with a twin mattress and will be a great place to read.
One of the last things we will do is clad the entire bed in birch plywood. It has been cut and sanded, and we have applied a boiled linseed oil finish. It’s outside curing. I am highly allergic to the fumes of boiled linseed oil. So despite our colder temperatures and snow this week, we are leaving everything we can outside to cure before bringing it into the house. This is also slowing things down — but it is better than getting sick as the alternative!
On the far side of the bed, Romano built cubbies for storage. We reused bins which I bought before Bambino was born, and he sized the cubbies accordingly.
I work really hard not to buy more and more storage containers. That’s one of the biggest lessons I learned from using the KonMari Method in our home. When I did the Workroom Makeover, I only ended up buying four containers for my entire workroom — and two of them were just to match things I already had.
At some point Bambino may think the bright colors aren’t his taste, and at that point I will swap out the green and blue bins for a different color scheme. But he still loves them, and these bins are still in great shape even after nine years of constant use. So they stay!
The Cleat Wall
The light fixtures for the Cleat Wall arrived, and we were in the backyard sanding for hours yesterday creating more bookshelves and boxes and brackets. We are very close to finishing it all — I keep saying that, but it is true!
Also: The Nice List
Of course, in the midst of all of this, I also launched the 2020 editions of The Nice List, my Christmas planner and organizer. It’s available in my shop in three versions — digital, printable PDF, and paper. Be sure to stop by and check it out! Also coming soon: The 2020 Nice List Thoughtful Giving Guide.
So no, there’s nothing else going on right now… ha!
DIY Pillows
I also made some throw pillows from an old sweater which was fun and really easy to do! It has me looking at all of my sweaters wondering which ones need to be repurposed next!
The next installment will be the final reveal. I can’t wait!
Week 6 | November ?? | Before & After
I’ll be sharing the how-to for all of our projects along the way as well as my favorite shopping sources for all things vintage and new.
Thanks to Linda of The One Room Challenge for organizing the One Room Challenge! Thanks also to Better Homes and Gardens, the ORC media sponsor. On Instagram, check out #oneroomchallenge and #bhgorc to see all of the amazing room reveals, or visit the One Room Challenge Blog where you’ll find the link-up to all of the participating blogs. There are rooms of every kind, aesthetic, and design. It is an amazing thing to explore and get inspiration!
You can follow me on Instagram or like Mid Modern Mama on Facebook for tips, tricks, and sneak peeks along the way, too.
Ok. Gotta get back to work!
Ciao!
Don’t miss a single update!
Sign up and each installment of the One Room Challenge will come directly to your email on Thursdays! And be sure to stop by the One Room Challenge Blog to check out the other creative renovations happening across the country. You can also follow #oneroomchallenge and #bhgorc on Instagram for more inspiration! Be sure to follow me as well!
Pin it!
Week Five | November 5 | The Homestretch
Week 5: updates on the custom bed, the cleat wall, and more!
For the Fall 2020 One Room Challenge, I am giving my son’s bedroom a hygge-infused makeover. As a not-so-little boy but not-quite tween, this room needs to be adaptable, functional, and a great place for play. I’ll let you in on the inspiration board as well as plans for this multipurpose room where organization and storage are critical and coziness is the word of the day — everyday.
I hope you all had a very happy Halloween! I made a chameleon costume. We carved jack o’lanterns. And we had some candy, but we stayed home, lights out, and watched a movie which we all agreed was a lot of fun in the end!
With Halloween over we transitioned from pumpkins to gourds, and November, I am loving you! And now for the penultimate One Room Challenge update…
Lighting
In addition to the changes of the seasons, it’s been busy here in many, many ways! In a few days I’ll have more about the 2020 edition of The Nice List (but stop by my store for a sneak peek!). In the meantime, I’ve been working on lighting for this room.
A child’s room presents a special challenge when it comes to lighting. Most bedrooms don’t need a lot of light for different scenarios. You read. You sleep. You get dressed. The challenges aren’t all that great. But in a child’s room, play must also be a consideration, and those lighting needs change over time. So I am working to be particularly thoughtful about lighting in here.
I am still on the fence about the red lamps I bought off the FBMP. I have taken one apart and am trying to figure out how to modify it so that I like it more. Stay tuned for that! But another lamp has found its perfect mate! My father made this wooden lamp in middle school shop class sometime in the early 1960s. So it is era-appropriate for our house, it works beautifully, and topped with a new lamp shade, it is fantastic in this room! Hooray!
I also have some lights coming from a sponsor — ColorCord — which should arrive this week — I am crazy-excited about them!
The Bed
One of Bambino’s requests for his room was a hidden reading spot. He loves to hide, and a cozy reading nook sounds perfectly hygge to me! However, given all of the other space demands in the room, we had to get a little creative. Enter: the Book Nook Bed! Bambino already had a queen-sized bed, and this custom-made bed will have storage on one side and a cozy nook for reading on the other — all under the mattress.
The entire bed is cut and ready for assembly on the workshop deck, but we have to wait for the new rug to arrive before we can assemble it in the room. That should happen soon… I hope!
The Cleat Wall
I am absolutely in love with The Cleat Wall. Romano has created prototypes for several types of boxes and shelves to hang on the wall. Now it is a matter of identifying the treasures which will get their own nooks and building boxes or shelves to fit them. The boxes go together quickly and easily, and it’s all looking very, very cool!
The boxes and shelves hang from French cleats attached to the back, and they can be moved anywhere on the wall as needs change and adapt.
We just need another delivery of birch plywood to finish this project which should arrive tomorrow.
While we are waiting for rugs and some of the finishing touches, I also can start to hang the art. Usually that’s the last thing you do, but packages from another sponsor, Simple Prints, have arrived, and I am anxious to get started!
One more week! Will we make it by next Thursday? I’m not convinced, but we will do our best!
Week 6 | Nov 11 | Before & After
I’ll be sharing the how-to for all of our projects along the way as well as my favorite shopping sources for all things vintage and new.
Thanks to Linda of The One Room Challenge for organizing the One Room Challenge! Thanks also to Better Homes and Gardens, the ORC media sponsor. On Instagram, check out #oneroomchallenge and #bhgorc to see all of the amazing room reveals, or visit the One Room Challenge Blog where you’ll find the link-up to all of the participating blogs. There are rooms of every kind, aesthetic, and design. It is an amazing thing to explore and get inspiration!
You can follow me on Instagram or like Mid Modern Mama on Facebook for tips, tricks, and sneak peeks along the way, too.
Ok. Gotta get back to work! Last week — here we go!
Ciao!
Don’t miss a single update!
Sign up and each installment of the One Room Challenge will come directly to your email on Thursdays! And be sure to stop by the One Room Challenge Blog to check out the other creative renovations happening across the country. You can also follow #oneroomchallenge and #bhgorc on Instagram for more inspiration! Be sure to follow me as well!
Pin it!
Week Four | October 29 | What week is it?
Week 4: some second-hand lighting and the start of the cleat wall
For the Fall 2020 One Room Challenge, I am giving my son’s bedroom a hygge-infused makeover. As a not-so-little boy but not-quite tween, this room needs to be adaptable, functional, and a great place for play. I’ll let you in on the inspiration board as well as plans for this multipurpose room where organization and storage are critical and coziness is the word of the day — everyday.
I don’t miss deadlines. That’s just not in my DNA. But last week was a mess, and I missed my ORC post deadline. It just sailed past. The good news: we got a new roof, new gutters, and replacement skylights! But the chaos and noise at our home simply made getting the post done impossible.
So here we are! A very different update than I had planned. I was supposed to be writing about beds and linens this week. Evidently, in a global pandemic, that was rather optimistic, too! But I do have some fun things to show you. Let’s get to it.
First up:
Some ugly Lamps
I have been scouring the Facebook Marketplace for all things vintage and gently used. I always try to buy vintage before new — especially when it comes to furniture and accessories. First and foremost, buying vintage means that we aren’t consuming more resources. It’s a greener way to go. We don’t buy everything vintage, but when we can, it is a great green step. Additionally, I don’t want my home to look like every other home. I am after a unique, individual aesthetic, and vintage pieces are key to achieving that. And, frankly, I work on a tight budget. Buying second-hand or vintage items helps keep things under budget. The Facebook Marketplace and Craigslist are fantastic places to look for gently-used pieces, and I have been able to arrange for porch pick-up with every seller which has made doing so safe and easy.
So what have I found? Mostly, lamps. This room needs some more interesting and thoughtfully-chosen lighting, and I have found a few second-hand lamps that will work. I haven’t found exactly what I was looking for, and if I had more time, I would probably just keep looking, but the blessing and the curse of the One Room Challenge is a deadline. I need to get it done, and waiting around for perfection isn’t going to get the room done. So, I’ll do a little work and attempt to turn these frogs into princes.
First up: my red lamps. There are two of them. I like the shape and the color, but the base is Asian-inspired which really won’t work in this room, so I will replace it — and possibly the shades, too.
And now for one of the ugliest lamp I’ve ever seen… but Bambino loves it! He loves all things frogs, and this was really cheap. So now I have to see if I can turn this frog into a prince. A new shade, some paint, and a little work with the scroll saw should help (I hope!).
I know. I know. It is horrid. But I am hopeful that I can do a little magic and make it better! Stay tuned!
Oh, and while I was looking for the elusive perfect lamps, I found these fixtures! Someday we will renovate our kitchen and when we do, these will hang over the island. They are amazing! They came out of an old jewelry store in a small town not far from here, and I love them! But that will be a project for another time. For now, they will get packed away.
The Cleat Wall
But it hasn’t all been shopping around here. There’s been a LOT of cutting, sanding, and staining, too. We are nearly done with the cleat wall which just makes my heart go pitter patter!
What is a cleat wall?
Why, I am so glad you asked! A cleat wall is a wall covered in French cleats. In this case: lots and lots of them! In the end, we will use the cleats to hang bookshelves and display boxes for Bambino’s treasures. They will be modular and moveable, so the whole thing will be flexible for his changing needs as he continues to grow up.
Is there any way to stop that process, by the way? This Mama really loves her sweet little boy, and he just keeps growing!
Anyway, I will have a step-by-step tutorial for this project once it is done, but here’s the general idea.
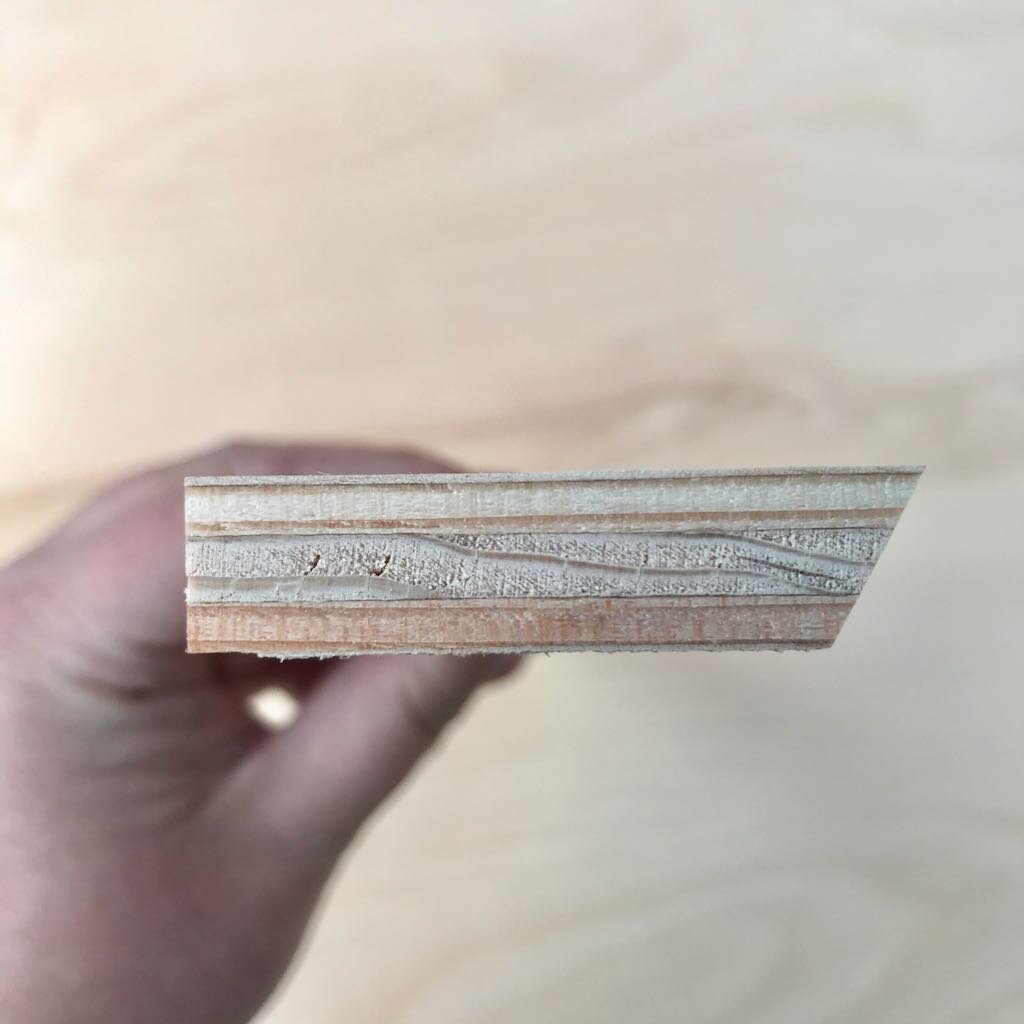
First, we prepped the plywood. We cut strips of plywood for the cleats and used full sheets for the walls. All of the plywood and the cleats were sanded and finished with boiled linseed oil before we brought it into the house.
A French cleat has one edge cut at an angle. Another cleat is mounted on the back of whatever you want to hang, and the pieces lock together because of those angles. It is ingenious, actually, and we have hung all kinds of heavy items from the walls very securely using French cleats. In fact, when we lived in California, almost everything hung on our walls was on a cleat — and nothing ever fell off in an earthquake — and we had many earthquakes over 16 years.
I’ll have full instructions for making French cleats. If you can’t wait, check out my post about a DIY Headboard from our Guest Room Refresh. We used a French cleat to hang it, too!
Once all of the wood was cut and ready to go, we hauled it all inside and started assembling. First we installed blocking on the walls — screwed into the studs. This gave us an easy place to attach the plywood sheeting and creates a chase behind the plywood for cords.
Next we put up the plywood. It is mounted horizontally and is secured with screws.
While we worked inside, the snow flew outside. Perfect for working on a hygge project!
Once the sheeting was up, we started working on the cleats. Each cleat was glued and secured with nails. The nail gun got a workout!
Eventually, the cleats will go to the floor for a neat, uniform look. But we need to create access to the electrical outlet before that happens — a small project for this week.
Our workshop is an old, converted garden shed in the backyard. It is fabulous, but small, so when we are working on big projects like this, we work outside on the deck. This week it was snowing. A lot. So, the dining room became the workshop. Not ideal. But Romano had precut all of the pieces for assembling the tabletop which will hang on the cleat wall, so he and Bambino assembled it on the floor of the dining room.
And here it is hung in place. It still needs to be sanded and finished — a project for a sunny day outside! But we hung it up to see how it will look. Because it hangs on the cleat system, the height is adjustable as Bambino grows. He could even use it as a standing desk someday. And it can be removed completely if a table is no longer needed in this room.
This isn’t a remote school setup — we have a classroom in a more central part of the house for that. At least for now this is intended to be a place for play, and Bambino has scoped it out as a great spot for his Playmobil guys. It’s up out of the reach of a curious puppy, and is a place where an imaginative game can be left set up for days without annoying Mama! Once we get the table height set for the current configuration, we will also put some drawers or something beneath for storage of little parts and pieces.
There’s lots more to do on the cleat wall, but we have a great start, and Bambino is ready to move his Playmobil dragons into place.
Our goal for this week: to finish the cleat wall and to build the bed. Yes, we are building this boy a bed, and it’s going to be fun! There’s no snow in the forecast this week, so we should have a productive week.
As a reminder, here’s where we are headed…
Two weeks left! Yikes!
Here’s my proposed schedule for the coming weeks:
Week 5 | Nov 4 | Built-Ins & Furniture
Week 6 | Nov 11 | Before & After
I’ll be sharing the how-to for all of our projects along the way as well as my favorite shopping sources for all things vintage and new.
Thanks to Linda of The One Room Challenge for organizing the One Room Challenge! Thanks also to Better Homes and Gardens, the ORC media sponsor. On Instagram, check out #oneroomchallenge and #bhgorc to see all of the amazing room reveals, or visit the One Room Challenge Blog where you’ll find the link-up to all of the participating blogs. There are rooms of every kind, aesthetic, and design. It is an amazing thing to explore and get inspiration!
You can follow me on Instagram or like Mid Modern Mama on Facebook for tips, tricks, and sneak peeks along the way, too.
Ok. Gotta get back to work! Things should look dramatically different by this time next week!
Ciao!
Don’t miss a single update!
Sign up and each installment of the One Room Challenge will come directly to your email on Thursdays! And be sure to stop by the One Room Challenge Blog to check out the other creative renovations happening across the country. You can also follow #oneroomchallenge and #bhgorc on Instagram for more inspiration! Be sure to follow me as well!
Pin it!
Week Two | October 15 | KonMari and Storage
Week Two | Oct 15 | Toys & Clothes Storage
Week 2 of the One Room Challenge with lots of KonMari-ing and sorting.
For the Fall 2020 One Room Challenge, I am giving my son’s bedroom a hygge-infused makeover. As a not-so-little boy but not-quite tween, this room needs to be adaptable, functional, and a great place for play. I’ll let you in on the inspiration board as well as plans for this multipurpose room where organization and storage are critical and coziness is the word of the day — everyday.
If you, like me, were hoping there would be huge changes this week, sorry! We had a very busy weekend, but there’s not much to show you at the moment. Why? Well, we largely spent the weekend sorting and getting rid of the things Bambino has outgrown and no longer plays with. That’s good work, but its not something that photographs well.
I got to the end of the weekend and thought: we did absolutely nothing! But we really did. And now we are ready to pull the room apart and do construction projects with a lot of sorting out of the way.
I do have two posts about organizing a kids room with insights into how to KonMari a child’s room and some of my favorite storage solutions which we will be using in Bambino’s room.
I have a huge bin of clothes which I’ll list to sell sometime soon. I’m a devotee of Marie Kondo’s KonMari Method, and I’ve written quite a bit about how the KonMari Method has helped bring more order to our lives. Check it out!
The Floor Plan
Our big task this weekend, aside from sorting, was rearranging Bambino’s room. Before committing to moving furniture around, we worked in a different medium: Lego. We put together a scale model of Bambino’s room and his larger furniture. We left this on the coffee table for a few days and took turns moving things around. We photographed arrangements that we liked and finally came to a consensus.
This was a very effective way to involve Bambino in the design process in a way he could see and imagine, too. He got to do some measuring as well. Plus, anything with Lego is fun!
So here’s where we started…
And this is the new floor plan. We have created a zone for playing as well as some more open play space. I also have plans for more book shelves for chapter books. And there will be some storage under the new bed we are building.
The Inspiration Board
And here’s where we are headed bit by bit…
So over the next four weeks I will be working to transform this room. We have some ambitious furniture-building plans, and I am scouring the FBMP for vintage items. As always, my goal is to be thrifty as well as eco-friendly.
Here’s my proposed schedule for the coming weeks:
Week 3 | Oct 21 | Lighting & Windows
Week 4 | Oct 28 | The Bed & Linens
Week 5 | Nov 4 | Built-Ins & Furniture
Week 6 | Nov 11 | Before & After
I’ll be sharing the how-to for all of our projects along the way as well as my favorite shopping sources for all things vintage and new.
Thanks to Linda of The One Room Challenge for organizing the One Room Challenge! Thanks also to Better Homes and Gardens, the ORC media sponsor. On Instagram, check out #oneroomchallenge and #bhgorc to see all of the amazing room reveals, or visit the One Room Challenge Blog where you’ll find the link-up to all of the participating blogs. There are rooms of every kind, aesthetic, and design. It is an amazing thing to explore and get inspiration!
You can follow me on Instagram or like Mid Modern Mama on Facebook for tips, tricks, and sneak peeks along the way, too.
Ok. Gotta get back to work! Things should look dramatically different by this time next week!
Ciao!
Don’t miss a single update!
Sign up and each installment of the One Room Challenge will come directly to your email on Thursdays! And be sure to stop by the One Room Challenge Blog to check out the other creative renovations happening across the country. You can also follow #oneroomchallenge and #bhgorc on Instagram for more inspiration! Be sure to follow me as well!
Pin it!
Week One | October 8 | The Bedroom Before
Week One | Oct 3 | The “Before” Tour
I am tackling the room where I spend more time than any other: my Workroom. This room functions in many ways — home office, art studio, craft room, sewing room, and library — so function, storage, and light are key.
For the Fall 2020 One Room Challenge, I am giving my son’s bedroom a hygge-infused makeover. As a not-so-little boy but not-quite tween, this room needs to be adaptable, functional, and a great place for play. I’ll let you in on the inspiration board as well as plans for this multipurpose room where organization and storage are critical and coziness is the word of the day — everyday.
Hello! And welcome to the Fall 2020 One Room Challenge! This is my third ORC, and I am ready for another design adventure. I am so excited about the people I will meet and the incredible designs that will emerge from the Featured and Guest Participants.
So who are these participants? We come from all over the world and every walk of life. Some are design professionals. Some are influencers. And then there are all of the others — people like me who need to get a room of their home DONE. We all commit to making it happen in six weeks, and we cheer each other on. Honestly, that’s the best part! When do you get a cheering section for a home improvement project? Well, for the One Room Challenge, that’s exactly what you get, and it is fabulous!
I am taking on our child’s room for this round. Bambino is nine years old and is in third grade. He is in that not-so-little child but not-a-tween stage of life. So this is a room that needs to grow with him. He needs storage for both story books and chapter books. There are lots of toys and dress-up clothes and stuffed animals in his room which need some better storage solutions. And I must plan for a child’s growth and maturation which means this room will need to grow and change with him.
Oh, and we are in the middle of a global pandemic. If you are reading this several years from now: hooray! We all survived! But if you are in this right along with me, there are some serious shipping and procurement challenges right now. So that may make the whole thing even more interesting!
We love working on our home — and it needs a lot of work. But this room is a relatively easy project. No electrical work. No walls to move. No plumbing. The Hygge Bedroom Makeover is all about design, storage, and organization to create a cozy room for our sweet boy. My husband, an architect with mad power-tool skills, is here to help along the way.
Want to know more about what we have done in the past? Check out these projects.
The Before Pictures
Our home was built in 1958. It is a split-level house in a whole neighborhood of Mid Century Modern single-family homes. However, the last sixty years have not been kind to this house, and it needs a lot of love. But that’s what we do! We have always purchased the worst house in the best neighborhood — and then worked our magic a bit at a time.
Bambino’s room is like all of the bedrooms in this house: basic. He has hardwood floors which were refinished before we bought the house and are a dark brown. He also has two good-sized windows.
Dimensions: 11’ x 14” | 154 sq. feet
The room is a mushroom grey with white trim. In fact, all of the rooms in our house are the same color. It is almost identical to the guest room which we transformed for the first One Room Challenge. But it does not have built-in shelves.
However, that’s what it looked like before we moved in. Here’s what it looked like a few weeks ago…
Can you guess what Bambino’s favorite color is? Green! And he loves frogs and turtles and sequins and dragons and rainbows. So we have lots of ideas to work with in this room.
Can you KonMari a child’s toys ?
Parting with toys is hard for Bambino. Everything is a treasure. But we spent several days this summer doing just that — touching every toy and donating, selling, or recycling everything that didn’t make the cut. In the same way that I treated my Workroom as an apartment — using the full KonMari Method on just one room in our house — Bambino and I did the same with his room. And I’ll have more insights on how to do that coming soon.
The Furniture
Bambino’s furniture has grown with him over the years, but it’s time for some of it to be repurposed. The little table and chairs are too small for my boy who is already closing in on five feet tall. And the play kitchen and doll house are largely used for storage now, so they will find new homes.
We have plans for a new bed frame in the design as well as a new table surface at a better height for keeping his Playmobil figures out of the clutches of our puppy.
I’ll be reconfiguring the Ikea bookcases which are still in good shape and have served us well. And the trunk full of dress-up clothes will get a facelift, too.
Book Storage
We aren’t quite done with story books, so our rainbow bookshelves will stay. However, these deep cubes are terrible for chapter books, so I’ll be building some book shelves for our avid reader to house his growing collection. Eventually, the story books will be tucked away, and we will bring in a larger book case. This is one of those places where I know this room will adapt and change again over the next few years. But for now, we will live into this in-between time and accommodate both.
Lighting
Like most bedrooms, Bambino’s room has one fixture in the center of the room. It’s a very basic ceiling fan that doesn’t light the room well. Fortunately, I’m married to an architect who is helping me design good, functional lighting for this space. This is one of the places I will infuse a little Mid Century style into the room — and I’m keenly thinking about lighting for multiple purposes: play, reading, studying (someday), and bedtime stories.
windows
We have been living with the cheapest, most basic roller shades in this room for years. They are truly terrible. We will be replacing them and bringing a little style to the windows, too.
The Inspiration Board
I started with the word “hygge” — a Danish word which roughly means “cozy.” As we head into true fall and then winter in this pandemic year, nothing sounds more appealing to me than to be hygge. But this isn’t just my room. Bambino has clear ideas and important input on this project as well, and I am working to incorporate those ideas as much as possible. The color scheme is pulled from his favorite colors, heavily leaning into shades of green. And no room for Bambino would be complete without lots of animals. So animals there will be!
We have taken several trips in the last few years which will inform the design of this room — a Thanksgiving spent at the Gunflint Lodge in Minnesota’s Boundary Waters area and a summer trip to Yellowstone National Park, in particular. We love watching wildlife and being in the great outdoors, so I will be bringing a bit of those two happy places into this room as well.
Central to a hygge aesthetic are natural materials — wood, particularly. Bambino and my husband have spent a lot of time in our workshop this summer. Amongst other things, they have built a treehouse and a deck together. So bringing natural wood into the room is also a nod to their passion projects and something which our family deeply enjoys.
Additionally, the concept of hygge should not be cluttered or overwhelming, but should be clean, crisp. That can be tricky in a child’s room. We don’t have a playroom, so most of Bambino’s toys and belongings are here. I don’t want it to feel cramped or cluttered, so closed storage is the way to go with a carefully-designed display for a few chosen, precious items.
So over the next five weeks I will be working to transform this room. We have some ambitious furniture-building plans, and I am scouring the FBMP for vintage items. As always, my goal is to be thrifty as well as eco-friendly.
Here’s my schedule for the coming weeks:
Week 2 | Oct 14 | Toy & Clothes Storage
Week 3 | Oct 21 | Lighting & Windows
Week 4 | Oct 28 | The Bed & Linens
Week 5 | Nov 4 | Built-Ins & Furniture
Week 6 | Nov 11 | Before & After
I’ll be sharing the how-to for all of our projects along the way as well as my favorite shopping sources for all things vintage and new.
Thanks to Linda of The One Room Challenge for organizing the One Room Challenge! Thanks also to Better Homes and Gardens, the ORC media sponsor. On Instagram, check out #oneroomchallenge and #bhgorc to see all of the amazing room reveals, or visit the One Room Challenge Blog where you’ll find the link-up to all of the participating blogs. There are rooms of every kind, aesthetic, and design. It is an amazing thing to explore and get inspiration!
You can follow me on Instagram or like Mid Modern Mama on Facebook for tips, tricks, and sneak peeks along the way, too.
Ok. Gotta get back to work!
Ciao!
Don’t miss a single update!
Sign up and each installment of the One Room Challenge will come directly to your email on Thursdays! And be sure to stop by the One Room Challenge Blog to check out the other creative renovations happening across the country. You can also follow #oneroomchallenge and #bhgorc on Instagram for more inspiration! Be sure to follow me as well!