Week Eight | November 21 | The Greenhouse Reveal
Take a peek into my latest One Room Challenge project: the DIY Greenhouse
For the Fall 2021 One Room Challenge we are building a whole room — a greenhouse! And we will be racing the snow to get it done, too. I’ll let you in on the inspiration board as well as plans for my dream greenhouse — a place for starting seedlings, overwintering tender perennials, and extending our short Colorado growing season. Be sure to check in on all of the other ORC projects on the ORC blog here.
I have never been the person who squeaks in at the very last minute. But this is the first One Room Challenge where we have built the room from the ground up. If you are just joining me, this was a family project. My husband, Romano, is an architect. Last winter as I was planning our gardening projects for the spring, I mused a bit about having a greenhouse — and now it is a reality.
When we bought our house it had been empty for more than a year and neglected for much longer than that. The backyard was largely an expanse of weeds, a few neglected trees, and more weeds.
In the spring of 2020, at the start of the pandemic, my husband ordered a load of lumber. He figured we would do some home improvement projects while we were stuck at home. And since we also spent that summer without air conditioning (because COVID), we started making the back yard a more livable place. Between the summers of 2020 and 2021, we built a treehouse, a stage, and a pergola as well as dozens of garden beds — all in an effort to give our yard some structure and to create rooms within the large, flat space.
And so we end this season of building with The Greenhouse…
I have always been a little sad that our 1958 Atomic Ranch doesn’t have a butterfly roof, so we gave The Greenhouse a butterfly roof. It turned out to be an incredibly practical solution for two reasons: a central gutter to collect rain water, and very high ceilings for tall plants.
The siding is beetle-kill pine from the forests here in Colorado. We bought this lumber to use for our fence which we replaced last spring. When we purchased the lumber, we also bought some extra knowing we would have future projects to do. The lumber was rough-cut, however, so Romano had to plane every piece of siding for The Greenhouse. The boards are still fairly fresh and haven’t weathered yet — thus the vast variation in color. I want to stain The Greenhouse, but if we did it now, the stain wouldn’t take and cover evenly because the wood hasn’t weathered and dried. So we will do the staining next spring. Until then, it looks a bit like a log cabin — rather appropriate for Colorado, I suppose.
The South and East sides of The Greenhouse have coldframes — enclosed garden beds where I can garden year-round and begin seedlings for transplanting in the spring. I’m so excited to have this great gardening tool!
The Greenhouse Interior
Ok. Let’s go inside! The Greenhouse is 8 ft by 12 ft — a snug little space filled with light and greenery. The South end of The Greenhouse is the work station with a countertop, potting area, and propagation center.
The Potting Bench
One of the most important parts of The Greenhouse is the potting bench — a simple work area where I can prepare seeds, repot plants, and pot up the cuttings that I am growing. I wanted to replicate one of the most critical elements of my potting bench that’s outside — a sink. It’s not plumbed. There’s no need. But it’s the perfect arrangement!
This is an antique enamel sink from my favorite architectural salvage yard in Denver. When potting plants, I can place them in the sink, fill the pots, and any dirt which spills can be swept down the drain into the soil bin below — nothing is wasted!
Underneath the sink I have a trashcan filled with my favorite potting mix (equal parts manure and compost mixed with perlite — perfect for our dry climate). I also have smaller bins filled with horticultular grit and perlite as well as an empty bucket for miscellaneous tasks.
But the sink isn’t just for potting. It will be used daily for bottom watering plants. We live in Colorado where it is unbelievably dry. Bottom watering has proven to be the best way to keep my plants from drying out too quickly. I simply fill the sink with plants and plug the drain. Then I add 4 inches of water from the rain barrels. I leave the plants to soak up the water for anywhere from an hour to overnight. I leave a garden trug under the drain in case there are drips. I pull the plants out of the sink and either put a new batch in for a drink or drain the sink into the trug below. If there’s water left, I use it to water the plants on The Greenhouse floor. Water is too precious to waste!
The Backsplash
Most of the materials we used in The Greenhouse are very utilitarian and inexpensive. The walls are highly insulated with two layers of insulation, but they are covered in OSB painted white which is a little rough. That’s fine! This is really just a fancy shed, afterall. But I wanted something special as a backsplash above the work surface.
Using some materials I already had, I created a backsplash utilizing a technique called “sunprinting.” One of the first means of photography, sunprinting uses chemicals which react when exposed to the sun. I painted the sunprinting solution on strips of plywood. Then I arranged leaves and flowers from my garden on top, wrapped the whole thing in cling film to keep the plants from blowing away, and exposed it to the sun for a few hours. There’s a rinsing step that follows, and I let it dry. Then voila! I had a beautiful sunprinted backsplash!
I used the same technique with a different solution to create some smaller pieces which I used to mount my hand tools to the wall, too.
The backsplash runs around the three walls of The Greenhouse’s South end.
I used the same sunprinting technique on the top of a flower press which I made to keep in The Greenhouse. I have a full tutorial for how to make a flower press as well as how to do sunprinting on wood or on fabric, too. The backsplash in The Greenhouse uses the same sunprinting principles — just on a much larger scale!
Heat & Water
The North end of The Greenhouse holds two rain barrels which collect water and melting snow from the roof so that I can water plants inside without having to run a hose in the winter. The Greenhouse is at the far end of the yard, so running water out here isn’t easy. Occasionally, I will probably need to run a hose out and top off the rain barrels, but that’s work for a warm day. When it is cold, the stored water will be warmer and will add to the building’s thermal mass helping to keep The Greenhouse warmer, too.
The floor is composed of five inches of gravel — just some of the 5 tons of gravel we hauled during this construction process. The gravel serves two purposes: it absorbs heat during the day and radiates that heat out into the room again at night helping to keep The Greenhouse warmer during the winter. And it also is a permeable floor which allows me to water plants directly on the floor without worrying about protecting a precious surface.
I have a collection of plants overwintering on the floor of The Greenhouse including my agapanthus and a huge geranium from which I am growing cuttings for next summer. Embedded in the South and East walls are seven 55-gallon steel barrels. Each is filled with water, and through those openings they sit half inside the cold frames and half inside The Greenhouse. These barrels will act as a heat sink or a solar battery — warming during the day and then helping to keep the ambient temperature higher at night. Our hope is that once the barrels warm up sufficiently, we won’t need to heat The Greenhouse except on very cold nights. This is a big science experiment, and I’ll let you know how that goes!
The Shelves & Up
The shelves run around the entire room at two heights. They are simple pieces of lumber. I painted the edge green for some contrast. There’s nothing precious about them, though, so if a plant has a wet bottom, it’s not going to ruin anything. They are wide enough, too, that they will hold seed trays when the time comes to start seedlings for spring.
Not only does the butterfly roof provide an easy way to collect rain water, it also gives great height at both ends of the building. So plants have a lot of room to grow on the upper shelves, particularly. And I have room for at least six hanging baskets — all without anyone having to worry about hitting their heads!
The Desk
It may seem a little silly to have a work area in The Greenhouse, but actually I am looking forward to being able to work in the sunshine on cold days. With a clear roof, The Greenhouse will be the perfect source of Vitamin D even on the coldest days, and we have 300 days of sunshine here in Colorado, so I expect to enjoy working here quite a bit.
The desk and chair together cost $40 on the Facebook Marketplace, and it is exactly the right size. I love the lift-up top, too, which will keep all of my supplies clean and dry when I am not using them. I’ve outfitted it with basics for journaling, letter writing, and watercoloring — three of my favorite things to do!
Vintage Accessories
If you’ve followed me for long, you know I love to use vintage accessories. They are less expensive, stylish, and they already exist — so they are more eco-friendly. I didn’t have to shop much for The Greenhouse, frankly. My plants do most of the work, and I shopped my house quite a bit, too. But I did buy a few key items for this special spot.
To store my seeds, I found a vintage makeup case which holds them perfectly. I have moved my collection of vintage bottles the The Greenhouse which work beautifully for rooting cuttings — and catching the afternoon light. And I found an incredible architectural element from an old building at the salvage yard which now holds a gorgeous fern.
Is it done?
The short answer is: no. As for so many others, the supply chain has been a problem and has made finishing The Greenhouse harder. Eventually there will be a layer of polycarbonate panels under the roofing, and the windows — which my husband made himself — will be double-glazed. But the polycarbonate panels have been hard to come by, and we were lucky to get enough to finish out the windows. Additionally, we need to make a cover for the round vents near the roof — also from polycarbonate. There are some finishing details inside which are also delayed and can’t be done until the polycarbonate is installed.
Additionally, as I said before, next spring we will stain The Greenhouse once all of the wood has weathered evenly.
Having said that, The Greenhouse is snug and secure. It is functional and beautiful. And it represents a huge amount of work in a very short time — a labor of love. And we did it ALL ourselves including building the windows and doors, milling the timber — everything except hauling about half of the gravel. We hired two guys to come and finish the gravel work, because we were afraid we would never finish it otherwise. They were fast and efficient, and I’m so thankful they were available! Eventually all of the paths in our garden will be the same pea gravel which I absolutely love.
I installed solar-powered cafe lights inside The Greenhouse. They provide enough light to putter in the evenings, but they also make the entire building glow — like a lantern at the end of our yard.
This project could not have happened without the tireless work of my whole family. My 10 year-old knows a lot more than your average child about DIY and construction — whether he wants to or not. And my husband has done nothing but work on this gift for the last two months. He is both talented and generous, and I’m so very blessed. Thank you both! I love you so much!
To Linda Weinstein, the creator of the One Room Challenge, I offer my most sincere thanks. Thank you for offering this kind of opportunity and for opening it up to anyone. And to Better Homes and Gardens, the ORC media sponsor: thank you for making this possible! And to all of the other ORC participants: I’ll be sure to stop by to admire your work! It is always fun to do this together!
To my sponsors: O’Toole’s Garden Centers here in Colorado and Owl & Ember, the cutest little store on Etsy — thank you for placing your faith in me.
And now we will rest. Phew! Be sure to follow along on Instagram for updates as the seasons change. And if you haven’t already, subscribe to my newsletter below so the weekly updates will pop right into your inbox.
Thanks for your kind support week after week. Your comments and notes of encouragement are so meaningful — and so appreciated.
Cheers!
Angela
Thanks to my sponsors for this project!
Pin it!
Don’t miss a single update!
Sign up and each installment of the One Room Challenge will come directly to your email on Thursdays! And be sure to stop by the One Room Challenge Blog to check out the other creative renovations happening across the country. You can also follow #oneroomchallenge and #bhgorc on Instagram for more inspiration! Be sure to follow me as well!
Pin it!
Week Seven | November 11 | The Penultimate Week!
Take a peek into my latest One Room Challenge project: the DIY Greenhouse
For the Fall 2021 One Room Challenge we are building a whole room — a greenhouse! And we will be racing the snow to get it done, too. I’ll let you in on the inspiration board as well as plans for my dream greenhouse — a place for starting seedlings, overwintering tender perennials, and extending our short Colorado growing season. Be sure to check in on all of the other ORC projects on the ORC blog here.
Here we are: the penultimate week of the Fall 2021 One Room Challenge! It’s been a really busy week, too. We made lots of progress on the Greenhouse. It probably doesn’t look all that different, but it is. So much of the work this last week has been fiddly, highly-customized work — making windows and one of the doors, making windows for the cold frames, finishing the insulation and interior sheething.
So. Much. Sawdust.
One of the things which has made this project slower than we had hoped is the fact that almost every piece of wood we are using has to be milled first. If you are new to these updates, I should explain. Last spring we installed a new fence. Fencing supplies were in short demand which made getting them difficult and costly. So we opted for locally-harvested beetle-kill pine from a local supplier. But the wood had not been milled — great for a fence, but not ready-to-go for this project. So we have planed and finished every piece of wood in addition to everything else we have done. I’m so happy with the finished product, but it has meant more time and lots more effort.
A happy by-product of that milling: tons of sawdust. And that came in handy this weekend when I dug up, divided, and stored all of my dahlia tubers, canna lily rhisomes, and gladiolus bulbs. They are all packed away in soft layers of sawdust and wood shavings, ready to be stored in the greenhouse and then replanted in the spring.
DIY Flower Press
The flowers may be nearly gone, but I certainly still have them on my mind. I haven’t had as many tutorials as usual during this round. Frankly, I just haven’t written most of them up yet, but they will come. This one, though, is really fun! I made a flower press — something I have always wanted. We actually needed a book press for Owl and Ember, so I made two: one for books and one for flowers. I have the whole DIY tutorial for you this week, and I think they both turned out so well! The flower press will live in The Greenhouse, too. Right now it is filled with the last blooms of summer which need just another week or two to dry out. I can’t wait to open it!
I also created a tutorial for the sunprinting process that I used to decorate the top of the press. It is so easy and fun! Enjoy!
Creative Siding Solutions
Another issue we have encountered: we are running out of 6” wide wood! When we did the fence, we ordered extra wood knowing other projects would come along. However, we didn’t calculate precisely as The Greenhouse wasn’t even a dream at that point. We just knew we would use the wood somehow, and since wood was hard to get and expensive, buying extra made sense. Well, we are down to only a few 6” wide boards at this point — and a good stack of 4” boards. So we will have to get a little creative using up scraps and shorter pieces for the siding on the Greenhouse. It isn’t a big deal. We have enough — but it is going to be a bit of a jigsaw puzzle making it all work.
This just makes the whole process more fun, right?
And if anyone happens to have a time-turner on hand, I could use one. Not only do we have to finish The Greenhouse this weekend, but our spring bulbs are arriving, so I will be busy busy busy planting this weekend, too. I’m really excited, though! We haven’t planted any bulbs in the ground at this house yet, and I’m excited to have some early spring color next year!
I don’t mean to be coy, but I think that’s all I want to say about this week. Next week is the big reveal, and I am excited to lift the curtain at last! And to get it all done, too!
The Nice List
I am just going to tuck this right here: The Nice List is now available! Buy a copy! Give a copy! It makes a great gift, and there are gift packs available with 3 and 5 bundles, too.
Goals for this Week:
Finish it!
Move the plants in!
Take photos!
Be done!
Will we make it? We have never been this far behind before, but then again, we have never built a One Room Challenge room from the ground up before. Watch my Instagram for updates, and next week will be the final reveal! Hooray!
The Greenhouse Design Considerations
Heat: a greenhouse that doesn’t require heating except perhaps on the coldest of nights as we won’t be running power to the Greenhouse -- at least initially
Hail: We get frequent hail storms here on the Front Range, so a glass roof is pretty-much out of the question. It must be plastic.
Space: I want to be able to overwinter some plants in the greenhouse as well as starting seedlings and plants from cuttings.
Sunlight: I hope to be able to retreat to this warm, sunny spot on cold days -- allowing me to be outside without being freezing. Perhaps even being able to work on a laptop while soaking in some Vitamin D.
Water: I’ll need to be able to water plants in the winter -- preferably without having to use the hose.
Given all of those constraints, we did a lot of research on keeping greenhouses warm -- and cool. We have worked to maximize the amount of sunlight all day and will be using several layers of plastic to create an insulating layer. We will also be creating a Trombe Wall of sorts to store heat during the day and then radiate that heat into the Greenhouse at night. Any space not needed for sun exposure will be heavily insulated to keep heat in during the winter and out during the summer. We have designed a water-collection system to fill two rain barrels inside the Greenhouse which can then be used to water plants as needed. And the interior has been space-planned for storage as well as work area and spaces for plants of all sizes. More details on all of this and how it works to come!
The DIY Greenhouse will be part science experiment, part engineering problem -- and there will be some fun design challenges, too. I am really looking forward to getting all of these pieces in place and letting them work their magic!
To Linda Weinstein, the creator of the One Room Challenge, I offer my most sincere thanks. Thank you for offering this kind of opportunity and for opening it up to anyone. And to Better Homes and Gardens, the ORC media sponsor: thank you for making this possible! And to all of the other ORC participants: I’ll be sure to stop by to admire your work! It is always fun to do this together!
Ok. Gotta get back to work! Be sure to follow along on Instagram for daily updates. And if you haven’t already, subscribe to my newsletter below so the weekly updates will pop right into your inbox.
Cheers!
Angela
The Fall 2021 ORC Schedule
Week One | Sept 30 | The Before
Week Two | Oct 7 | My Gardening Guru
Week Three | Oct 14 | Garden Beds
Week Four | Oct 21 | Materials & Methods
Week Five | Oct 28 | Construction & Gardening
Week Six | Nov 4 | Making it Beautiful
Week Seven | Nov 11 | Water-Wise Gardening
Week Eight | Nov 18 | Before & After
Thanks to my sponsors for this project! Interested in being a sponsor? Let me know!
Don’t miss a single update!
Sign up and each installment of the One Room Challenge will come directly to your email on Thursdays! And be sure to stop by the One Room Challenge Blog to check out the other creative renovations happening across the country. You can also follow #oneroomchallenge and #bhgorc on Instagram for more inspiration! Be sure to follow me as well!
Pin it!
Week Six | November 4 | Seasons Change
Take a peek into my latest One Room Challenge project: the DIY Greenhouse
For the Fall 2021 One Room Challenge we are building a whole room — a greenhouse! And we will be racing the snow to get it done, too. I’ll let you in on the inspiration board as well as plans for my dream greenhouse — a place for starting seedlings, overwintering tender perennials, and extending our short Colorado growing season. Be sure to check in on all of the other ORC projects on the ORC blog here.
Happy November! How did we get HERE already? Yikes, and here we are, so let’s get to it! I have lots for you today including, of course, an update on The Greenhouse. But I also have some other gardening tidbits and news as well.
I hope you all had a happy Halloween! Our big news: we grew and carved our own jack o’lantern! That was one of the coolest parts of Halloween this year, actually.
We grew three varieties of pumpkins this summer, but the jack o’lantern was a Big Bertha, and it lived up to its name. It made a wonderful carved pumpkin — and now the wildlife is enjoying it, too!
Our pumpkin patch was a bit of an experiement this year, actually. When we lived in LA, I learned about Urban Homestead in Pasadena, an incredible urban farm focused on sustainability and water conservation. They were teaching about using ollas in the garden, an ancient technique for watering crops used by native peoples in the Americas for millennia. I have been wanting to use ollas since, and this year I tested them out with our pumpkins and watermelons. I made some ollas, buried them, and then kept them filled all summer — usually twice per week. I didn’t do any other watering in those beds all summer.
This week I pulled the pumpkin and watermelon plants out of the beds, and pulled the ollas out of the dirt. This is what I found:
Each olla was surrounded by a dense mat of roots from the melons and pumpkin plants. The wicking action of the water through the terracotta sustained each plant and produced multiple melons and pumpkins. Now that I know how well they worked at our altitude, I’ll write up a post about making your own ollas. And you can be sure that I’ll be doing LOTS of ollas from here on out! So often the low-tech solutions are the best, and that is certainly true in this case!
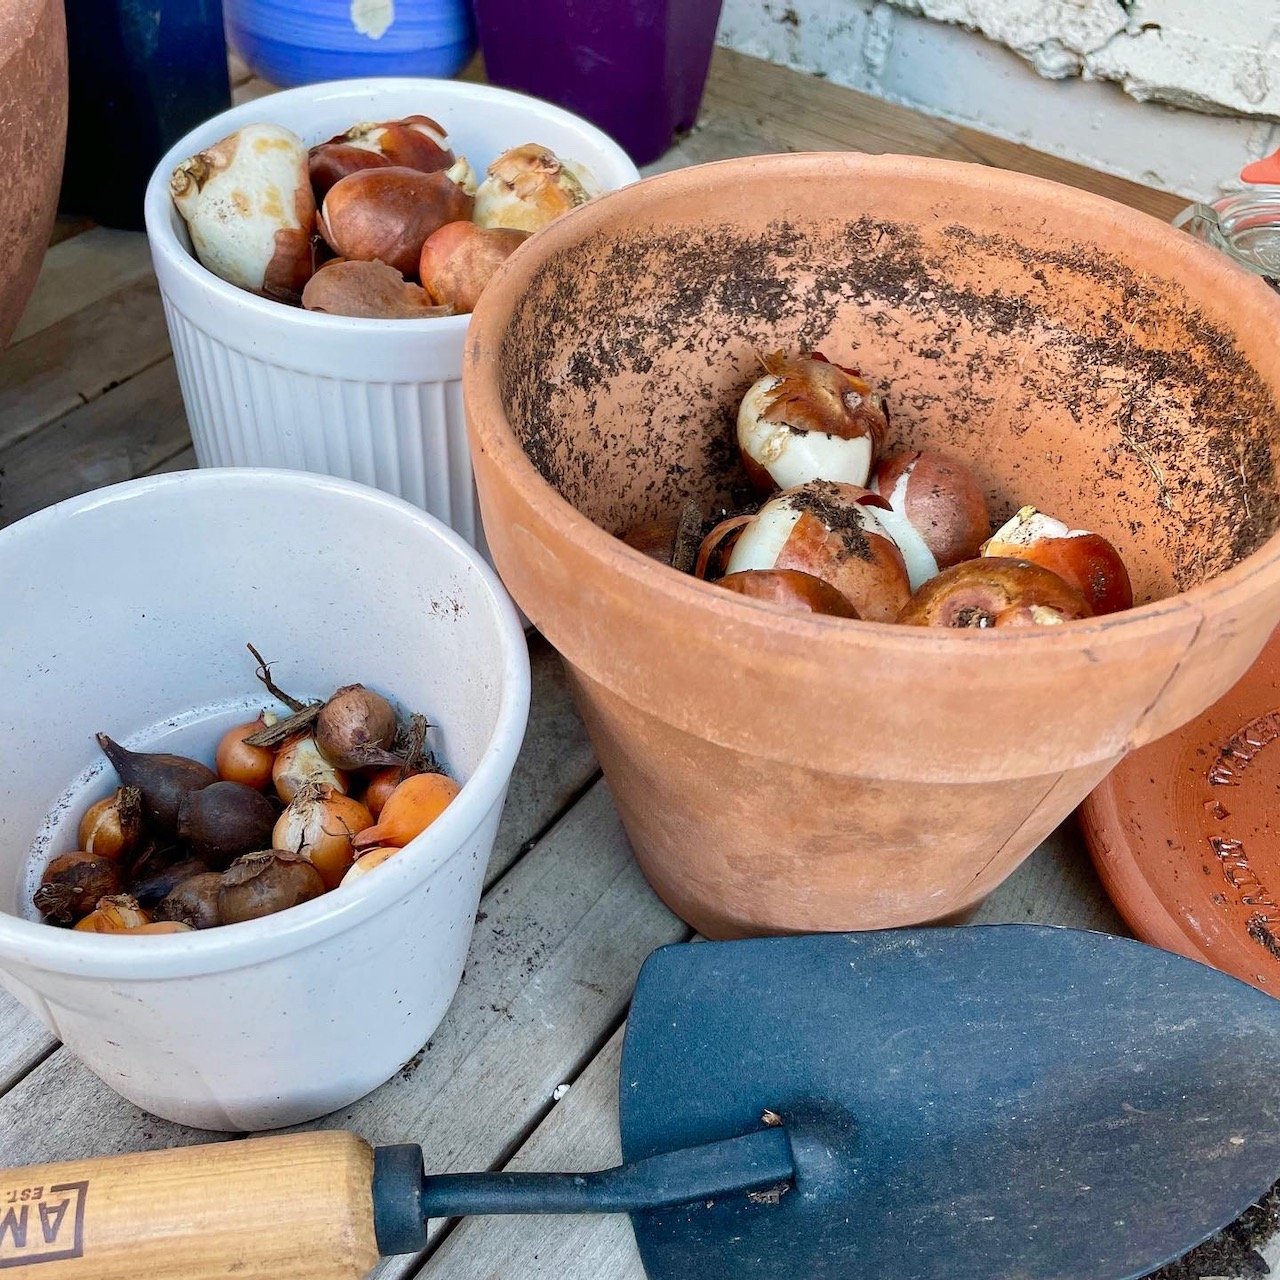
In other gardening news, I am waiting for my big shipment of bulbs, but I potted up some bulbs in containers this week. I’m excited to have a little early spring color — something we haven’t had yet in this yard.
And I planted out peonies! Honestly, peonies might be my favorite flower (don’t tell the others), and I’m so excited to try them next year. I bought some from SheGrows over in Arvada. Gina has an incredible, sustainable flower farm not far from us. And when we picked up our tubers, she gave us a crash course in planting and growing peonies in Colorado. I learned a ton, and I’m excited to get going.
No matter where you are, there are probably small-scale farmers like SheGrows and Urban Homestead near you. Supporting local farmers and learning from them might be the best part of Instagram! Here are a few of the flower farmers I’m learning from lately:
I don’t intend to become a flower farmer! But I appreciate all of the guidance, tips, and ideas these gracious people — and so many others — share.
The Nice List
I am just going to tuck this right here in the middle: The Nice List is now available! Buy a copy! Give a copy! It makes a great gift, and there are gift packs available with 3 and 5 bundles, too.
The Greenhouse
And The Greenhouse! Heavens! It has been a busy week! While I write, my husband is outside working on The Greenhouse, so this won’t even be accurate when I hit “publish.” But he has been focused on the cold frames which includes doing the siding behind them as well. It feels like the same story over and over — they are nearly done. But they are nearly done as are so many other elements of the Greenhouse. I can’t wait to get things inside, but we still aren’t there yet.
We decided to ease one of the cold frame corners which makes for some complicated geometry, but it will allow me to get one of our garden carts into this back corner of the yard, so I think it was worth it in the end. That funky corner won’t open, but I’ll be able to get to it through the next bay. I’m thinking a bigger plant will just live there permanently.
As we are putting the tops on the cold frames, they get two layers: one of the same polycarbonate we’ve made the windows from and then over that a layer of the roofing material. The polycarbonate will keep it warm. The roofing will keep it dry.
Goals for this Week:
Finish the roof.
Finish the windows.
Build the cold frames along the back and side wall.
Install the water barrels.
Build the door and install.
Hopefully by next week things will be water-tight. I keep saying that, but maybe this week it is true? We will see!
The Greenhouse Design Considerations
Heat: a greenhouse that doesn’t require heating except perhaps on the coldest of nights as we won’t be running power to the Greenhouse -- at least initially
Hail: We get frequent hail storms here on the Front Range, so a glass roof is pretty-much out of the question. It must be plastic.
Space: I want to be able to overwinter some plants in the greenhouse as well as starting seedlings and plants from cuttings.
Sunlight: I hope to be able to retreat to this warm, sunny spot on cold days -- allowing me to be outside without being freezing. Perhaps even being able to work on a laptop while soaking in some Vitamin D.
Water: I’ll need to be able to water plants in the winter -- preferably without having to use the hose.
Given all of those constraints, we did a lot of research on keeping greenhouses warm -- and cool. We have worked to maximize the amount of sunlight all day and will be using several layers of plastic to create an insulating layer. We will also be creating a Trombe Wall of sorts to store heat during the day and then radiate that heat into the Greenhouse at night. Any space not needed for sun exposure will be heavily insulated to keep heat in during the winter and out during the summer. We have designed a water-collection system to fill two rain barrels inside the Greenhouse which can then be used to water plants as needed. And the interior has been space-planned for storage as well as work area and spaces for plants of all sizes. More details on all of this and how it works to come!
The DIY Greenhouse will be part science experiment, part engineering problem -- and there will be some fun design challenges, too. I am really looking forward to getting all of these pieces in place and letting them work their magic!
To Linda Weinstein, the creator of the One Room Challenge, I offer my most sincere thanks. Thank you for offering this kind of opportunity and for opening it up to anyone. And to Better Homes and Gardens, the ORC media sponsor: thank you for making this possible! And to all of the other ORC participants: I’ll be sure to stop by to admire your work! It is always fun to do this together!
Ok. Gotta get back to work! Be sure to follow along on Instagram for daily updates. And if you haven’t already, subscribe to my newsletter below so the weekly updates will pop right into your inbox.
Cheers!
Angela
The Fall 2021 ORC Schedule
Week One | Sept 30 | The Before
Week Two | Oct 7 | My Gardening Guru
Week Three | Oct 14 | Garden Beds
Week Four | Oct 21 | Materials & Methods
Week Five | Oct 28 | Construction & Gardening
Week Six | Nov 4 | Making it Beautiful
Week Seven | Nov 11 | Water-Wise Gardening
Week Eight | Nov 18 | Before & After
Thanks to my sponsors for this project! Interested in being a sponsor? Let me know!
Don’t miss a single update!
Sign up and each installment of the One Room Challenge will come directly to your email on Thursdays! And be sure to stop by the One Room Challenge Blog to check out the other creative renovations happening across the country. You can also follow #oneroomchallenge and #bhgorc on Instagram for more inspiration! Be sure to follow me as well!
Pin it!
Week Five | October 28 | Garden & Giveaway!
Take a peek into my latest One Room Challenge project: the DIY Greenhouse
For the Fall 2021 One Room Challenge we are building a whole room — a greenhouse! And we will be racing the snow to get it done, too. I’ll let you in on the inspiration board as well as plans for my dream greenhouse — a place for starting seedlings, overwintering tender perennials, and extending our short Colorado growing season. Be sure to check in on all of the other ORC projects on the ORC blog here.
I hope you are all doing well this week. I have Greenhouse news, garden news, and news about The Nice List, too. Oh, and my sponsor, O'Toole’s Garden Centers, is sponsoring a giveaway this week! So let’s get to it. It’s been crazy-busy lately!
Let’s start with the really fun part…
The Giveaway
O’Tooles Garden Centers, here in Colorado, are sponsoring a $100 giveaway on my Instagram this week! I hope you will stop by my feed to enter. This week I went to O’Tooles for some spring bulbs and potted up what I hope will be gorgeous pots of tulips and crocus. And now we wait… but it’s not too late to plant bulbs for spring. In fact, with the warm fall we have had, now is just about perfect. I’ll be doing a LOT of bulb planting this weekend, too. I’m excited to get that going soon. Stop by my feed for all the giveaway details: @MidModernMama on Instagram
The Garden
I have been struck by the changes in our garden as the season shifts more and more rapidly. In particular, the Stumpery has come into its own in the last few weeks. The grasses are changing color, the mums are blooming again, and the acid green of the Heuchera is glorious! We have had frost several times so far, but all of these plants are hardy, so I should get a few more weeks of fall color before the cold truly gets them. And the Stumpery is just an all-around delight! I’ll write up a tutorial for making one sometime soon. They are so easy, so good for encouraging biodiversity in your yard, and really beautiful, too.
The Greenhouse
Unlike our other One Room Challenges, this one doesn’t require much shopping and decorating. I’m not waiting for fixtures or knobs. It’s a very strange feeling, actually. But it won’t be devoid of character or charm, and I’ve been doing a little vintage shopping to give it the cozy feel I aspire to create.
I want to incorporate as much terracotta and green as I can along with some vintage pieces and the utilitarian tools of a working greenhouse. My inspiration board includes several beautiful greenhouses — goals, indeed.
Since so much of this project has required purchasing new items — lumber, insulation, etc. — I hope to buy as many of the decorative elements from second-hand sources as possible.
My resident architect has been working every spare minute on The Greenhouse. Some days it feels like nothing is happening, but the progress is steady and sure. The windows are nearly done. The cold frames are nearly done. Which means the building is nearly closed in. Nearly. We have the possibility of snow in the forecast early next week, so this weekend has to be a serious push to get the building enclosed. We are going to make it happen!
The cold frames are achingly close to being enclosed, and one is even filled with compost. The windows are also almost done. It is tantalizing!
The Nice List
Orders for The Nice List begin on Monday, but for those of you who are on my mailing list, you’ll have early access this weekend.
We also have a free gift with purchase as long as supplies last — an upcycled, handmade traveler’s notebook-style cover which holds both The Nice List All Year and The Nice List Christmas Workbook! There aren’t very many of the covers available, so be sure you order early so you get one!
I’m so excited about this new iteration of The Nice List. I hope you are, too!
Goals for this Week:
Finish the roof.
Finish the windows.
Build the cold frames along the back and side wall.
Install the water barrels.
Build the door and install.
Hopefully by next week things will be water-tight. I keep saying that, but maybe this week it is true? We will see!
The Greenhouse Design Considerations
Heat: a greenhouse that doesn’t require heating except perhaps on the coldest of nights as we won’t be running power to the Greenhouse -- at least initially
Hail: We get frequent hail storms here on the Front Range, so a glass roof is pretty-much out of the question. It must be plastic.
Space: I want to be able to overwinter some plants in the greenhouse as well as starting seedlings and plants from cuttings.
Sunlight: I hope to be able to retreat to this warm, sunny spot on cold days -- allowing me to be outside without being freezing. Perhaps even being able to work on a laptop while soaking in some Vitamin D.
Water: I’ll need to be able to water plants in the winter -- preferably without having to use the hose.
Given all of those constraints, we did a lot of research on keeping greenhouses warm -- and cool. We have worked to maximize the amount of sunlight all day and will be using several layers of plastic to create an insulating layer. We will also be creating a Trombe Wall of sorts to store heat during the day and then radiate that heat into the Greenhouse at night. Any space not needed for sun exposure will be heavily insulated to keep heat in during the winter and out during the summer. We have designed a water-collection system to fill two rain barrels inside the Greenhouse which can then be used to water plants as needed. And the interior has been space-planned for storage as well as work area and spaces for plants of all sizes. More details on all of this and how it works to come!
The DIY Greenhouse will be part science experiment, part engineering problem -- and there will be some fun design challenges, too. I am really looking forward to getting all of these pieces in place and letting them work their magic!
To Linda Weinstein, the creator of the One Room Challenge, I offer my most sincere thanks. Thank you for offering this kind of opportunity and for opening it up to anyone. And to Better Homes and Gardens, the ORC media sponsor: thank you for making this possible! And to all of the other ORC participants: I’ll be sure to stop by to admire your work! It is always fun to do this together!
Ok. Gotta get back to work! Be sure to follow along on Instagram for daily updates. And if you haven’t already, subscribe to my newsletter below so the weekly updates will pop right into your inbox.
Cheers!
Angela
The Fall 2021 ORC Schedule
Week One | Sept 30 | The Before
Week Two | Oct 7 | My Gardening Guru
Week Three | Oct 14 | Garden Beds
Week Four | Oct 21 | Materials & Methods
Week Five | Oct 28 | Construction & Gardening
Week Six | Nov 4 | Making it Beautiful
Week Seven | Nov 11 | Water-Wise Gardening
Week Eight | Nov 18 | Before & After
Thanks to my sponsors for this project! Interested in being a sponsor? Let me know!
Don’t miss a single update!
Sign up and each installment of the One Room Challenge will come directly to your email on Thursdays! And be sure to stop by the One Room Challenge Blog to check out the other creative renovations happening across the country. You can also follow #oneroomchallenge and #bhgorc on Instagram for more inspiration! Be sure to follow me as well!
Pin it!
Week Four | October 21 | Keeping The Greenhouse Warm
Take a peek into my latest One Room Challenge project: the DIY Greenhouse
For the Fall 2021 One Room Challenge we are building a whole room — a greenhouse! And we will be racing the snow to get it done, too. I’ll let you in on the inspiration board as well as plans for my dream greenhouse — a place for starting seedlings, overwintering tender perennials, and extending our short Colorado growing season. Be sure to check in on all of the other ORC projects on the ORC blog here.
Happy Fall! It is crisp and glorious here -- my favorite season! I made applesauce and my husband baked ginger cookies. I’m drinking hot tea again. Life is good!
So here we are in Week 4 -- the half-way point for the One Room Challenge. Things are moving along. Sometimes fast. Sometimes more slowly. But always moving forward. I keep thinking that by next week we will have everything closed up. Nope. So I am going to stop making THAT prediction. But we do keep moving forward, and that’s what really matters.
Today I want to talk a bit about the heating and cooling elements we have incorporated into The Greenhouse design. Last winter as I dreamed about building a Greenhouse, I did a lot of reading. A lot. Keeping a greenhouse cool in the summer and warm in the winter can be a massive challenge -- particularly in a climate like ours.
Here in Colorado, between Denver and Boulder, we live at an elevation of about 5400 feet above sea level which means we get more UV exposure than anywhere else I have ever lived. Frankly, I can feel it -- and I’m always wearing sunscreen to protect myself, too. The elevation coupled with our proximity to the Rocky Mountains means that we can get some extreme weather with big temperature swings, howling winds, hail, and lots of snow. We also get 300 days of sunshine every year, so frankly, I find the weather here to be pretty darn fabulous! But it makes gardening a challenge, and maintaining a greenhouse can be a challenge, too.
Additionally, we aren’t running electricity out to The Greenhouse -- at least not initially. I want to try to keep it warm and cool without having to resort to using power. Lots of greenhouse growers have to use heaters, fans, and other electrical means to maintain a consistent temperature.
Now, I am not building a hot house. I won’t be raising rare orchids or exotic plants. I would LOVE to be able to have a lemon tree and a plumeria -- but we will see. So it doesn’t have to be a consistent temperature all year nor does it need to be 70℉ all winter long. My goal: keep it above 40℉ during the winter. In the summer, if it is too hot, I will just move everything outside.
But keeping a greenhouse warm when we do have weeks at or below zero will be a challenge. I’m realistic about that. And I consider this first winter to be a test run.
So what are we doing to stabilize temperatures in The Greenhouse?
A Trombe Wall: Put the Sun to Work
We are employing the sun. Like I said, we have 300 sunny days here, and we are going to put the sun to work. And we are doing it in several different ways. The Greenhouse has been designed to employ a Trombe Wall. The idea behind a Trombe Wall is simple: create a wall which collects and stores energy from the sun in the form of heat during the day and then releases that heat back into The Greenhouse at night.
When building a traditional Trombe Wall, you build a black wall of stone or masonry facing the equator. Then, a few feet in front of that wall, a wall of glass is erected. The space between is filled with air which is then circulated through the building. And the wall radiates the stored energy, like a battery, into the space.
Our Trombe Wall will be a little different. Technically we have two Trombe Walls. We are deploying this technique on both the south-east and south-west facing walls of The Greenhouse to capture as much sunlight as possible. But the walls are only half-height as there are windows above.
Taking the place of the stone or masonry: steel barrels filled with water. First of all: this is cheaper. The barrels were $15 each on the Facebook Marketplace. We are using a total of 7 in the Trombe Wall for a total of $105. The barrels have an added bonus, too: water holds heat energy better and releases it more slowly than stone or concrete. So the Trombe Wall will be more efficient than if it were built out of another material, too.
Taking the place of the wall of glass: cold frames. Technically, this is still a wall of glass -- or in this case polycarbonate panels. But we are also putting it to good use. Cold frames are a great way to extend the gardening season anywhere, and in some climates -- including places in Colorado -- you can garden in a cold frame all winter long. But our cold frames create the structure for the barrels-turned-battery. And I get some additional gardening space.
Many greenhouses are designed with a water battery of some kind -- a water tank located in a particularly sunny spot to heat up and then radiate heat. Some gardeners use their water batteries as places to do hydroponic gardening, too. Because The Greenhouse is on the smaller end -- 8’ x 12’ -- to do that sacrificed too much floorspace. And making The Greenhouse any larger just isn’t possible on this site. So, the Trombe Wall/Cold Frame solution evolved.
You’ll notice in the photographs: the barrels are dark blue. Frankly, they should be black -- and I might yet paint them. But the difference between black and dark blue isn’t that much in terms of energy absorption, and the paint coating on the barrels is very durable. I don’t want to paint them if I don’t have to. I’m going to wait until the last minute to decide, but I suspect we will be embedding blue barrels into the wall. I can always paint them later if it really is a problem (but it won’t be).
The barrels will be filled with water once the structure is all in place. I’ll add some bleach, and then we will seal them up.
Insulation & Ventilation
In addition to the Trombe Wall, we are also insulating every inch of the Greenhouse possible. Just like in a home, insulation is a tremendous help in maintaining temperature controls. We are using two layers of rigid insulation in every nook and crevice -- and we will fill in with spray foam insulation where needed, too. Many greenhouse kits don’t include insulation at all. So this should help. We will sacrifice some sunlight, but on balance, we should come out to the better.
For the Trombe Wall to work properly, air needs to circulate in The Greenhouse. To that end, there are vents near the roof, all of the windows are operable, and the doors will be able to be propped open as needed. Additionally, the cold frames can be opened to create air circulation, too.
So that’s a lot of technical information, but it is really important. Building a greenhouse, as I have said before, is both an engineering problem as well as a science experiment. Hopefully all of the research we have done will lead to a fantastic, warm greenhouse where our plants will flourish. There are so many great examples of gardeners who are doing just that!
Goals for this Week:
Finish the roof.
Finish the windows.
Build the cold frames along the back and side wall.
Install the water barrels.
Build the door and install.
Hopefully by next week things will be water-tight. I keep saying that, but maybe this week it is true? We will see!
The Greenhouse Design Considerations
Heat: a greenhouse that doesn’t require heating except perhaps on the coldest of nights as we won’t be running power to the Greenhouse -- at least initially
Hail: We get frequent hail storms here on the Front Range, so a glass roof is pretty-much out of the question. It must be plastic.
Space: I want to be able to overwinter some plants in the greenhouse as well as starting seedlings and plants from cuttings.
Sunlight: I hope to be able to retreat to this warm, sunny spot on cold days -- allowing me to be outside without being freezing. Perhaps even being able to work on a laptop while soaking in some Vitamin D.
Water: I’ll need to be able to water plants in the winter -- preferably without having to use the hose.
Given all of those constraints, we did a lot of research on keeping greenhouses warm -- and cool. We have worked to maximize the amount of sunlight all day and will be using several layers of plastic to create an insulating layer. We will also be creating a Trombe Wall of sorts to store heat during the day and then radiate that heat into the Greenhouse at night. Any space not needed for sun exposure will be heavily insulated to keep heat in during the winter and out during the summer. We have designed a water-collection system to fill two rain barrels inside the Greenhouse which can then be used to water plants as needed. And the interior has been space-planned for storage as well as work area and spaces for plants of all sizes. More details on all of this and how it works to come!
The DIY Greenhouse will be part science experiment, part engineering problem -- and there will be some fun design challenges, too. I am really looking forward to getting all of these pieces in place and letting them work their magic!
To Linda Weinstein, the creator of the One Room Challenge, I offer my most sincere thanks. Thank you for offering this kind of opportunity and for opening it up to anyone. And to Better Homes and Gardens, the ORC media sponsor: thank you for making this possible! And to all of the other ORC participants: I’ll be sure to stop by to admire your work! It is always fun to do this together!
Ok. Gotta get back to work! Be sure to follow along on Instagram for daily updates. And if you haven’t already, subscribe to my newsletter below so the weekly updates will pop right into your inbox.
Cheers!
Angela
The Fall 2021 ORC Schedule
Week One | Sept 30 | The Before
Week Two | Oct 7 | My Gardening Guru
Week Three | Oct 14 | Garden Beds
Week Four | Oct 21 | Materials & Methods
Week Five | Oct 28 | Construction & Gardening
Week Six | Nov 4 | Making it Beautiful
Week Seven | Nov 11 | Water-Wise Gardening
Week Eight | Nov 18 | Before & After
Thanks to my sponsors for this project! Interested in being a sponsor? Let me know!
Don’t miss a single update!
Sign up and each installment of the One Room Challenge will come directly to your email on Thursdays! And be sure to stop by the One Room Challenge Blog to check out the other creative renovations happening across the country. You can also follow #oneroomchallenge and #bhgorc on Instagram for more inspiration! Be sure to follow me as well!
Pin it!
Week Three | October 14 | The Greenhouse and Gardening
Take a peek into my latest One Room Challenge project: the DIY Greenhouse
For the Fall 2021 One Room Challenge we are building a whole room — a greenhouse! And we will be racing the snow to get it done, too. I’ll let you in on the inspiration board as well as plans for my dream greenhouse — a place for starting seedlings, overwintering tender perennials, and extending our short Colorado growing season. Be sure to check in on all of the other ORC projects on the ORC blog here.
Here we are at Week Three! This week has been all about making windows. I know. Making windows seems a little crazy! But it’s what my husband wanted to do — he liked the challenge, and we saved thousands of dollars doing it this way. He wanted them to be a particular size and shape — something which would have been prohibitively expensive to purchase new and impossible to find at a salvage yard. So, he has been making windows. They are gorgeous!
When we replaced our fence early last spring, lumber was very hard to come by and incredibly expensive. But our fence, which was original to our house — so 63 years old — was literally falling down. It had to be done! We also wanted to source our lumber locally — reducing the carbon footprint — and use a local business, many of which were hurting because of the pandemic.
Our solution: Beetle-Kill Pine.
It makes for a beautiful fence! And we bought extra lumber to have on hand for other projects, because finding wood was so difficult at the time. Buying Beetle-Kill Pine cost about 1/3 of what standard fencing materials would have been, and it is a higher quality product.
So guess what we will be using on The Greenhouse: Beetle-Kill Pine! The framing is all from standard lumber, but the cladding and the windows are made from the same materials as our fencing. My husband has been milling wood as he works and creating beautiful windows.
The glazing is cut from Multiwall Polycarbonate Sheets specifically designed for greenhouses. They will be double-glazed with two layers of the polycarb to improve the thermal insulating value of each window. It makes for difuse light, but I don’t think that will be an issue, even in the winter.
A few months ago I read about Philip Kafka, a real estate developer in Detroit who described what he does as “Home Depot architecture.” This describes my husband, Romano’s, work on our home so well, too. Romano is a licensed architect who specializes in medical architecture — hospitals, medical office buildings, surgery centers. But his passion is Lean architecture — finding efficiency and eliminating waste in all kinds of projects. For example, he once helped a client eliminate several millions of dollars in spending just by reconfiguring the porta-potties for the construction workers on a job site.
His approach to the design at our house, whether it is a raised garden bed, our new pergola, or now The Greenhouse, is much the same: how to use standard materials in a way that maximizes efficiency and eliminates waste. After all waste in materials is financial waste — and ecological waste as well.
So, the dimensions of The Greenhouse — 8’ x 12’ — are also the dimensions of standard lumber which made framing very simple. The windows are sized so that he can get two windows from each sheet of polycarb with only one cut. The examples go on and on…
I will tell you: my brain does not work like this! I would have spent more money on a greenhouse kit with no customization options, and I would have been done. But I am so thankful that his brain does these gymnastics!
OUr Backyard Garden Beds
All of the raised beds are another example of Romano’s practical design skills at work in our yard. We live on what used to be short grass prairie, home to bison and pronghorn, prairie dogs, wolves, grizzly bears, ferrets, lizards, owls, hawks, turtles, and snakes. Over time the land was converted to ranch and farm land and then developed into a typical 1950s subdivision.
We take our stewardship of this little piece of land very seriously, and part of that stewardship is understanding the history. We are working to repair generations of neglect by gardening organically, removing the turf, welcoming biodiversity, and planting for a more sustainable, diverse, and environmentally-responsible future. Yes, I love my non-native species, but I am working to balance them with native prairie plants, too.
It is a small gesture, but I see gardening as a step toward restitution. Better care of our land. Healing.
So one of the things we have done over the last two years, is add LOTS of raised beds in our backyard using these same principles — creating beds made from lumber with simple cuts and dimensions that are standard and eliminate waste.
Why use raised beds?
We live in Colorado, and the soil on this little plot of land is not great. The topsoil is only a few inches deep and sits on heavy clay below — great for a prairie, not so great for other plants.
So the raised beds are filled with a mixture of top soil, compost, and manure. The compost and manure help it to hold on to moisture (critical here in the high desert) and nourish the plants. I am experimenting with no-dig gardening in these beds — simply adding fresh compost each year, but not mixing or turning the beds.
While many plants may end up rooting down into the ground below the beds, they have several inches of lovely, rich soil before getting into our native soils. The beds don’t have a bottom, so water can flow through and into the ground, and microbes, worms, and fungi can move freely to inhabit the new soil, too.
In all, this summer we built 19 raised beds plus a stumpery and have improved the 4 beds which were here originally. I have plans for more come spring! That’s a lot of beds to fill. I planted perennials almost exclusively this year, and I’m looking forward to starting all kinds of plants from seed and cuttings over the winter.
Raised Beds around our Home
The Greenhouse Progress
We are expecting frost this week, and while we have been working hard, the plants will have to come inside at night, because The Greenhouse just isn’t quite ready for occupants, yet. As I said before, the big progress this week has been on windows. Each window takes about 90 minutes to make — start to finish. And Romano has made 9 of the 12 windows so far.
Here’s how you build a window in just over one minute:
We did have rain this week, the inside was nice and dry, and the central gutter appears to be working perfectly, so that’s a good thing.
I have been thinking and rethinking and planning and replanning the layout for the inside — storage, work area, shelving, and water storage. I spent all day Monday digging up plants to overwinter, and getting them settled into pots. I will be taking some cuttings, too, and getting them started in the kitchen window until I can move them into The Greenhouse.
Important considerations as I space-plan my little oasis:
a potting area with a dry sink
two rain barrels for runoff from the gutters — these must be raised off the ground for water pressure/drainage
a clean work area so I can bring a laptop out and work in the space
shelving across each window for pots
hooks for hanging baskets
storage under the counters for empty pots, soil, etc.
a large planter for “mother plants” from which to take cuttings regularly
I think I have it all figured out, but I’m not positive about that. Once we have the Trombe Wall in place, I’ll be able to start working in the space.
Goals for this Week:
Finish the roof.
Finish the windows.
Build the cold frames along the back and side wall.
Install the water barrels.
Build the door and install.
Hopefully by next week things will be water-tight. We will see!
The Greenhouse Design Considerations
Heat: a greenhouse that doesn’t require heating except perhaps on the coldest of nights as we won’t be running power to the Greenhouse -- at least initially
Hail: We get frequent hail storms here on the Front Range, so a glass roof is pretty-much out of the question. It must be plastic.
Space: I want to be able to overwinter some plants in the greenhouse as well as starting seedlings and plants from cuttings.
Sunlight: I hope to be able to retreat to this warm, sunny spot on cold days -- allowing me to be outside without being freezing. Perhaps even being able to work on a laptop while soaking in some Vitamin D.
Water: I’ll need to be able to water plants in the winter -- preferably without having to use the hose.
Given all of those constraints, we did a lot of research on keeping greenhouses warm -- and cool. We have worked to maximize the amount of sunlight all day and will be using several layers of plastic to create an insulating layer. We will also be creating a Trombe Wall of sorts to store heat during the day and then radiate that heat into the Greenhouse at night. Any space not needed for sun exposure will be heavily insulated to keep heat in during the winter and out during the summer. We have designed a water-collection system to fill two rain barrels inside the Greenhouse which can then be used to water plants as needed. And the interior has been space-planned for storage as well as work area and spaces for plants of all sizes. More details on all of this and how it works to come!
The DIY Greenhouse will be part science experiment, part engineering problem -- and there will be some fun design challenges, too. I am really looking forward to getting all of these pieces in place and letting them work their magic!
To Linda Weinstein, the creator of the One Room Challenge, I offer my most sincere thanks. Thank you for offering this kind of opportunity and for opening it up to anyone. And to Better Homes and Gardens, the ORC media sponsor: thank you for making this possible! And to all of the other ORC participants: I’ll be sure to stop by to admire your work! It is always fun to do this together!
Ok. Gotta get back to work! Be sure to follow along on Instagram for daily updates. And if you haven’t already, subscribe to my newsletter below so the weekly updates will pop right into your inbox.
Cheers!
Angela
The Fall 2021 ORC Schedule
Week One | Sept 30 | The Before
Week Two | Oct 7 | My Gardening Guru
Week Three | Oct 14 | Garden Beds
Week Four | Oct 21 | Materials & Methods
Week Five | Oct 28 | Construction & Gardening
Week Six | Nov 4 | Making it Beautiful
Week Seven | Nov 11 | Water-Wise Gardening
Week Eight | Nov 18 | Before & After
Thanks to my sponsors for this project! Interested in being a sponsor? Let me know!
Don’t miss a single update!
Sign up and each installment of the One Room Challenge will come directly to your email on Thursdays! And be sure to stop by the One Room Challenge Blog to check out the other creative renovations happening across the country. You can also follow #oneroomchallenge and #bhgorc on Instagram for more inspiration! Be sure to follow me as well!
Pin it!
Week Two | October 7 | Greenhouse Inspiration
Week Two | October 7 | Greenhouse Inspiration & Update
Take a peek into my latest One Room Challenge project: the DIY Greenhouse
For the Fall 2021 One Room Challenge we are building a whole room — a greenhouse! And we will be racing the snow to get it done, too. I’ll let you in on the inspiration board as well as plans for my dream greenhouse — a place for starting seedlings, overwintering tender perennials, and extending our short Colorado growing season. Be sure to check in on all of the other ORC projects on the ORC blog here.
Week Two. I have been struggling all week with how to write this post, because it isn’t actually Week Two for us. We started this project about four weeks early for several reasons. First, snow. Last year we had a huge snowstorm on September 9, and while that is unusual, we needed to be far enough into the project that a big storm like that wouldn’t derail the entire thing. Additionally, because we are working outside, our working hours are shorter. We can’t do much late-night work for fear of offending our neighbors. Plus, it gets dark quite early now, and the days will only get shorter as we go along. So this is truly a weekend project.
Given all of that, we started early.
So, how to catch you up on where we are and tell the story going forward? I’ve decided to do it thematically week-to-week. You’ll see where we are, but in a few weeks, for example, I will do a lengthy post about making our greenhouse warm in the winter and keeping it cool in the summer — and at that time I’ll show you everything we are doing toward that effort even though some of that is already done now.
All of that is to say, over the next six weeks some of what I write will be chronological and some will be thematic.
Why Build a Greenhouse?
So why are we building a greenhouse? Honestly, it’s kind of Monty Don’s fault. Last fall I started watching the BBC’s venerable gardening show, Gardener’s World. Until then I thought of greenhouses as follies for the wealthy and for collectors of rare plants. I never imagined I would build one!
But Monty changed all of that.
Monty Don is the host of Gardener’s World which is, quite frankly, the best gardening show on television. Of course, it’s a little hard to find here in the US, but between BritBox and Amazon Prime, there are several seasons available to gardeners in the US. And Monty’s books are fantastic. I devoured The Complete Gardener — and then turned around and read it again. It is beautifully written, impossibly helpful, and deliciously organized.
But it is his weekly teaching about cultivation — growing from seeds and cuttings — that convinced us to build a greenhouse. We don’t have a garage or a basement — natural places to begin seedlings. Nor do we have sunny windowsills. Our spring comes quite late, and growing many things from seed here challenging as a result. So to have the beautiful garden I seek within a reasonable budget, I need a place for cultivation. Thus: the greenhouse.
Monty has three greenhouses and a five acre garden. I won’t begin to compete with the master, but I have watched keenly as he talks about how he uses his greenhouses — truly tools, not follies at all.
My greenhouse will be the same. I’ll have a place to begin plants from seed in February and March while snow is still thick on the ground and our temperatures are quite cold. But come May and June, I’ll have small plants to bring instant color as the rest of the garden emerges from a winter’s sleep. I’ll also be able to take cuttings, root them, and propagate my own plants — turning one plant into many. I’m particularly excited about this prospect! Additionally, I’ll be able to store tender plants like my dahlia tubers in the greenhouse over winter.
Building a greenhouse is an investment, but over many years it should pay off, too.
I’ve written more about Monty, what I have learned from him, and why he is the gardening mentor America needs here.
Greenhouse Inspiration
I am fortunate to have an in-house architect, my husband, who designed the Greenhouse, but since he had never designed one before, we looked far and wide for both inspiration and technical knowledge. I collected many of those ideas on a Pinterest board which you can enjoy as well.
Additionally, I found some beautiful greenhouses on Instagram which also informed what we designed. The hastags #greenhouses , #greenhouseinspiration , and #greenhousegoals are filled with beautiful greenhouses from the modest to the majestic. I spent many happy hours admiring the work of others.
The Greenhouse Progress
So, where are we now in building our Greenhouse? Actually, we are pretty far along. We have been working on this project in every spare moment, and I’m excited about the progress.
What have we done to date?
Foundation: trenches dug, filled with gravel, pressure-treated sleepers in place and tied together and secured into the ground
Framing: done!
Sheathing: all four walls covered in OSB then we cut out the window openings.
Roof Framing: we have a butterfly roof. Done!
Framing for ventilation: panels with round openings. More on this later!
Fitting & Installing Central Gutter: the roof will drain into a central gutter which will then fill two rain barrels to be used for watering in the greenhouse.
Cladding: we have begun to install the cladding — beetle kill pine just like our new fencing. The upper portion is done, and the lower portions will be done as the windows are installed.
Interior Sheathing: in progress. We painted more OSB white and installed the two largest panels. Smaller portions will be installed as we go.
Insulation: almost done. We have installed two layers of rigid insulation in most of the recesses inside the greenhouse.
Interior Bracing: two braces were installed in the center of the greenhouse to support the central gutter and to brace for snow loads.
Roof: installed! There’s just one more step for the roof — securing the far ends on the butterfly “wings,” but otherwise the roof is installed.
Windows: we’ve made 2 of the 12 windows so far
We are working to get the Greenhouse enclosed as quickly as possible. That way if we have a cold snap and a freeze, I can move tender plants inside quickly. According to the forecast, next week it will get down into the mid-30s at night, so it will be time to start thinking about moving plants around. I have some work to do to get things ready this weekend!
I think the best way to bring you up to speed, though, is through a video. So here you go: let’s raise a greenhouse from the ground in under a minute!
Goals for this Week:
Finish the roof.
Finish the windows.
Build the cold frames along the back and side wall.
Install the water barrels.
Build the door and install.
Prep garden beds for the first frost.
Pot up any plants that are frost-tender.
Lots to do! I certainly have my Jobs for the Weekend!
The Greenhouse Design Considerations
Heat: a greenhouse that doesn’t require heating except perhaps on the coldest of nights as we won’t be running power to the Greenhouse -- at least initially
Hail: We get frequent hail storms here on the Front Range, so a glass roof is pretty-much out of the question. It must be plastic.
Space: I want to be able to overwinter some plants in the greenhouse as well as starting seedlings and plants from cuttings.
Sunlight: I hope to be able to retreat to this warm, sunny spot on cold days -- allowing me to be outside without being freezing. Perhaps even being able to work on a laptop while soaking in some Vitamin D.
Water: I’ll need to be able to water plants in the winter -- preferably without having to use the hose.
Given all of those constraints, we did a lot of research on keeping greenhouses warm -- and cool. We have worked to maximize the amount of sunlight all day and will be using several layers of plastic to create an insulating layer. We will also be creating a Trombe Wall of sorts to store heat during the day and then radiate that heat into the Greenhouse at night. Any space not needed for sun exposure will be heavily insulated to keep heat in during the winter and out during the summer. We have designed a water-collection system to fill two rain barrels inside the Greenhouse which can then be used to water plants as needed. And the interior has been space-planned for storage as well as work area and spaces for plants of all sizes. More details on all of this and how it works to come!
The DIY Greenhouse will be part science experiment, part engineering problem -- and there will be some fun design challenges, too. I am really looking forward to getting all of these pieces in place and letting them work their magic!
To Linda Weinstein, the creator of the One Room Challenge, I offer my most sincere thanks. Thank you for offering this kind of opportunity and for opening it up to anyone. And to Better Homes and Gardens, the ORC media sponsor: thank you for making this possible! And to all of the other ORC participants: I’ll be sure to stop by to admire your work! It is always fun to do this together!
Ok. Gotta get back to work! Be sure to follow along on Instagram for daily updates. And if you haven’t already, subscribe to my newsletter below so the weekly updates will pop right into your inbox.
Cheers!
Angela
The Fall 2021 ORC Schedule
Week One | Sept 30 | The Before
Week Two | Oct 7 | My Gardening Guru
Week Three | Oct 14 | Garden Beds
Week Four | Oct 21 | Materials & Methods
Week Five | Oct 28 | Construction & Gardening
Week Six | Nov 4 | Making it Beautiful
Week Seven | Nov 11 | Water-Wise Gardening
Week Eight | Nov 18 | Before & After
Thanks to my sponsors for this project! Interested in being a sponsor? Let me know!
Don’t miss a single update!
Sign up and each installment of the One Room Challenge will come directly to your email on Thursdays! And be sure to stop by the One Room Challenge Blog to check out the other creative renovations happening across the country. You can also follow #oneroomchallenge and #bhgorc on Instagram for more inspiration! Be sure to follow me as well!
Pin it!
Week One | September 30 | Building a Greenhouse
Week One | Sept 30 | DIY Greenhouse
Take a peek into my latest One Room Challenge project: the DIY Greenhouse
For the Fall 2021 One Room Challenge we are building a whole room — a greenhouse! And we will be racing the snow to get it done, too. I’ll let you in on the inspiration board as well as plans for my dream greenhouse — a place for starting seedlings, overwintering tender perennials, and extending our short Colorado growing season. Be sure to check in on all of the other ORC projects on the ORC blog here.
Here we are. After the last one I said I would never do a Fall ORC again. But guess what? Yep. This is the Fall One Room Challenge, and I’m in. Again!
Actually, I am super-crazy excited about this project, and I hope you are, too. This round we are building an entire room from the ground up — a DIY Greenhouse!
Let me start by saying: I used to think greenhouses were frivolous follies for the wealthy and decadent. They were for people who collected rare orchids and lived a somewhat Victorian life. I grew up in Texas where gardening is a 10-month sport, frankly. Why have a greenhouse, right? And then I spent years in California where everything is perennial, and with a little water most things will flourish.
But Miss Havisham, I was wrong!
A greenhouse can be a powerful tool for a gardener, and four years of living at the feet of the Rocky Mountains has shown me just how important a greenhouse can be if you want to grow anything that isn’t native to Colorado. In the four years we have lived here we have had snow as early as September 9 — last year — and as late as May 26. Snow! Not just frost, but snow!
Now, I might not be embarking upon this project at all if we had a garage where plants could be overwintered and brought in for freakish cold snaps. But, as we all saw in the Mid Modern Mudroom — this house does not have a garage. And I don’t have a good storage solution for things like dahlia tubers (Oh, how I LOVE dahlias!) and canna lilies and caladiums and....
So, we are building a greenhouse! Actually I need to be very clear: my husband is building a greenhouse. When we got married, our pastor preached about the marriage of The Poet and the Eagle Scout. If we ever were stranded on a desert island, Romano would build a shelter and resourcefully keep us fed and warm while I would feed our spirits with poetry and storytelling. Pastor Swanson wasn’t all that far off, frankly. It just was a pandemic -- not a desert island.
Romano and I designed the greenhouse together, but he has been working on it for several weeks. It is clearly a love and a joy for him — and I’m so thankful for it! Once it is enclosed, I’ll get to be more than an assistant, working on the interior finishes, painting, and outfitting it to be functional and beautiful, too.
That’s another thing: we are racing the snow here! Frankly, as I write this I am shocked we haven’t had even a frost yet. But we started work on the Greenhouse a few weeks ago in hopes that we will have it enclosed before the first frost. So far Mother Nature has been kind! And just in case you are wondering, that’s just fine per the ORC rules. I will update the project as it progresses. Oh, and one more thing: due to COVID delays and precautions, we have 8 weeks for this ORC instead of the standard six. Phew!
The Greenhouse Location
We bought our house a little over four years ago. When we bought it, there was nothing in the yard except a falling down fence, a falling down shed, four falling down raised beds, and a LOT of weeds. Seriously, think thistles 8 feet tall and bindweed running rampant. Our lot also slopes toward the far corner. It’s dry and our neighbors’ trees suck every drop of moisture out of the clay soil. We have almost no shade, and we don’t have a sprinkler system.
When my mom first came to visit a few weeks after we moved in, she asked, “Why did you buy this house?” Yep. It was that bad. And the yard was absolutely the worst.
So what solves bad yard problems? Pirate ships! Our first full summer here, we built a pirate ship. It is epic -- the HMS Lucifrix. It is the centerpiece of every game when we have kids over to play.
The next summer, we did some minor gardening projects including shoring up the four existing raised beds, but the focus was on the shed. My husband spent months tearing apart, shoring up, and retrofitting the falling down shed into a workshop. That workshop allows us to do all of the other projects around the house and is an institution now.
The following summer, 2020, was the first summer of the pandemic. In a fit of prescient insanity, my husband ordered a big load of lumber at the beginning of lockdown -- before things got scarce -- thinking we might do some projects around the house. During the summer of 2020 we worked on the gardens and built a deck off of the workshop, a stock tank pool, a treehouse, and a stage for musical and theatrical productions -- someday, when it is safer for such things again.
The stage was the beginning of our hardscaping solution. The axis running from our house toward the far corner of our yard is the driest, hottest, barest area of our yard. There is no shade ever -- not even from neighboring trees. So it bakes in the sun and by mid-summer most years even weeds won’t grow here. But without even weeds, when rain does come, the water makes a little mud and runs down the slope. In winter, the snow evaporates here before any other part of the yard. It’s barren.
After seasons of work and editing, the backyard master plan finally came together. We will build a pergola, the stage, and the Greenhouse -- all on this dry, barren axis off of the house. The pergola will provide shade in the middle of the yard. The stage is great for movies at night and theatrical performances and all kinds of play. And the Greenhouse will allow us to both overwinter plants and to extend our short growing season by starting seeds early. Together they divide up the yard creating zones, and eventually what isn’t grass will be covered in pea gravel -- permeable to allow rain to soak in when it comes, but not requiring watering.
We have had a mammoth summer of backyard projects again this year starting with having our fence replaced. The large pergola is about half done and the pond has been added. The changing room by the pool is also underway. Additionally, we built 21 new raised beds — mostly planted out with flowers. Oh, and I built a stumpery out of logs, too. I have worked really hard planting and cultivating perennials this year with the intention that I’ll fill in with annuals grown in the greenhouse moving forward. Additionally, we have covered a long stretch of our yard with black plastic in a bid to kill off the weeds flourishing there. In a year or two we will remove the plastic and begin work on that area.
The Greenhouse Plan
All of my images of greenhouses have been shaped by the beautiful Victorian and Edwardian greenhouses of England. But we live in a Mid Modern suburban home. Filigree ironwork and fancy embellishment would simply look out of place -- as much as I love it. Plus, those kinds of greenhouses are definitely outside of our budget. And my architect husband loves a good design challenge.
The Greenhouse Design Considerations
Heat: a greenhouse that doesn’t require heating except perhaps on the coldest of nights as we won’t be running power to the Greenhouse -- at least initially
Hail: We get frequent hail storms here on the Front Range, so a glass roof is pretty-much out of the question. It must be plastic.
Space: I want to be able to overwinter some plants in the greenhouse as well as starting seedlings and plants from cuttings.
Sunlight: I hope to be able to retreat to this warm, sunny spot on cold days -- allowing me to be outside without being freezing. Perhaps even being able to work on a laptop while soaking in some Vitamin D.
Water: I’ll need to be able to water plants in the winter -- preferably without having to use the hose.
Given all of those constraints, we did a lot of research on keeping greenhouses warm -- and cool. We have worked to maximize the amount of sunlight all day and will be using several layers of plastic to create an insulating layer. We will also be creating a Trombe Wall of sorts to store heat during the day and then radiate that heat into the Greenhouse at night. Any space not needed for sun exposure will be heavily insulated to keep heat in during the winter and out during the summer. We have designed a water-collection system to fill two rain barrels inside the Greenhouse which can then be used to water plants as needed. And the interior has been space-planned for storage as well as work area and spaces for plants of all sizes. More details on all of this and how it works to come!
The DIY Greenhouse will be part science experiment, part engineering problem -- and there will be some fun design challenges, too. I am really looking forward to getting all of these pieces in place and letting them work their magic!
I will talk a bit next week about my primary inspiration for this project, but here’s the design board filled with greenhouse loveliness and dreamy horticultural fabulousness.
Will this all work the way it is supposed to? We should find out very soon! But in the meantime, I have a lot of work to get done. Thanks for coming along for this my ORC #5! It’s certain to be interesting!
To Linda Weinstein, the creator of the One Room Challenge, I offer my most sincere thanks. Thank you for offering this kind of opportunity and for opening it up to anyone. And to Better Homes and Gardens, the ORC media sponsor: thank you for making this possible! And to all of the other ORC participants: I’ll be sure to stop by to admire your work! It is always fun to do this together!
Ok. Gotta get back to work! Be sure to follow along on Instagram for daily updates. And if you haven’t already, subscribe to my newsletter below so the weekly updates will pop right into your inbox.
Cheers!
Angela
The Fall 2021 ORC Schedule
Week One | Sept 30 | The Before
Week Two | Oct 7 | My Gardening Guru
Week Three | Oct 14 | Garden Beds
Week Four | Oct 21 | Materials & Methods
Week Five | Oct 28 | Construction & Gardening
Week Six | Nov 4 | Making it Beautiful
Week Seven | Nov 11 | Water-Wise Gardening
Week Eight | Nov 18 | Before & After
Thanks to my sponsors for this project! Interested in being a sponsor? Let me know!
Don’t miss a single update!
Sign up and each installment of the One Room Challenge will come directly to your email on Thursdays! And be sure to stop by the One Room Challenge Blog to check out the other creative renovations happening across the country. You can also follow #oneroomchallenge and #bhgorc on Instagram for more inspiration! Be sure to follow me as well!