
Dream Deck Makeover
How to Build & Furnish Your Perfect Outdoor Space
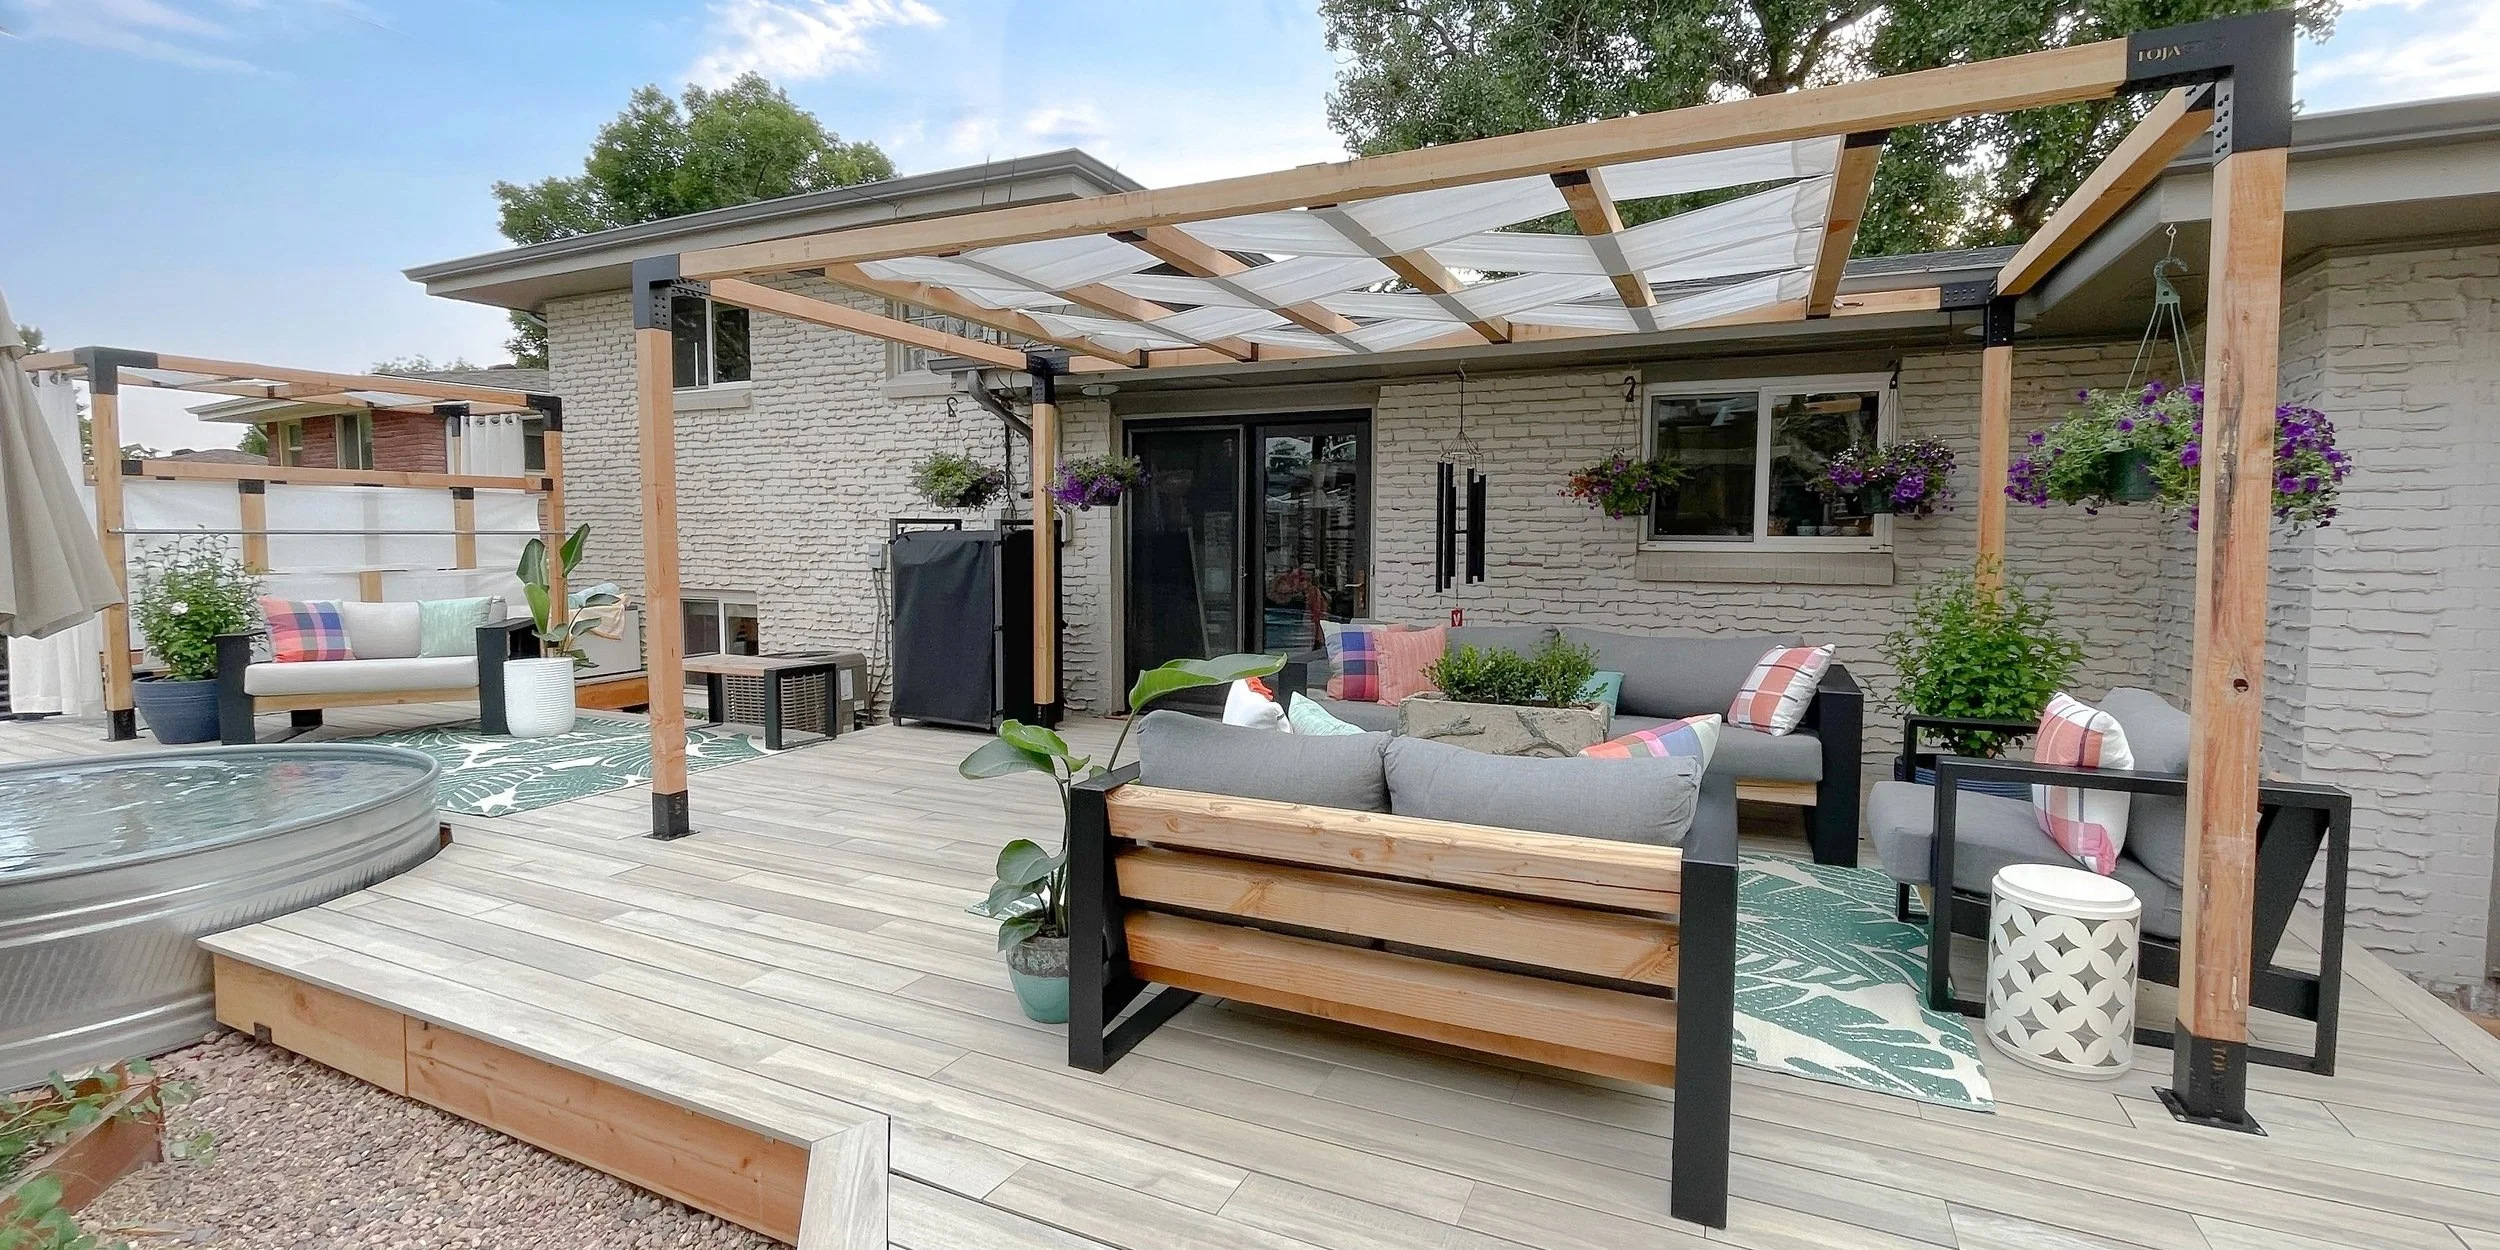
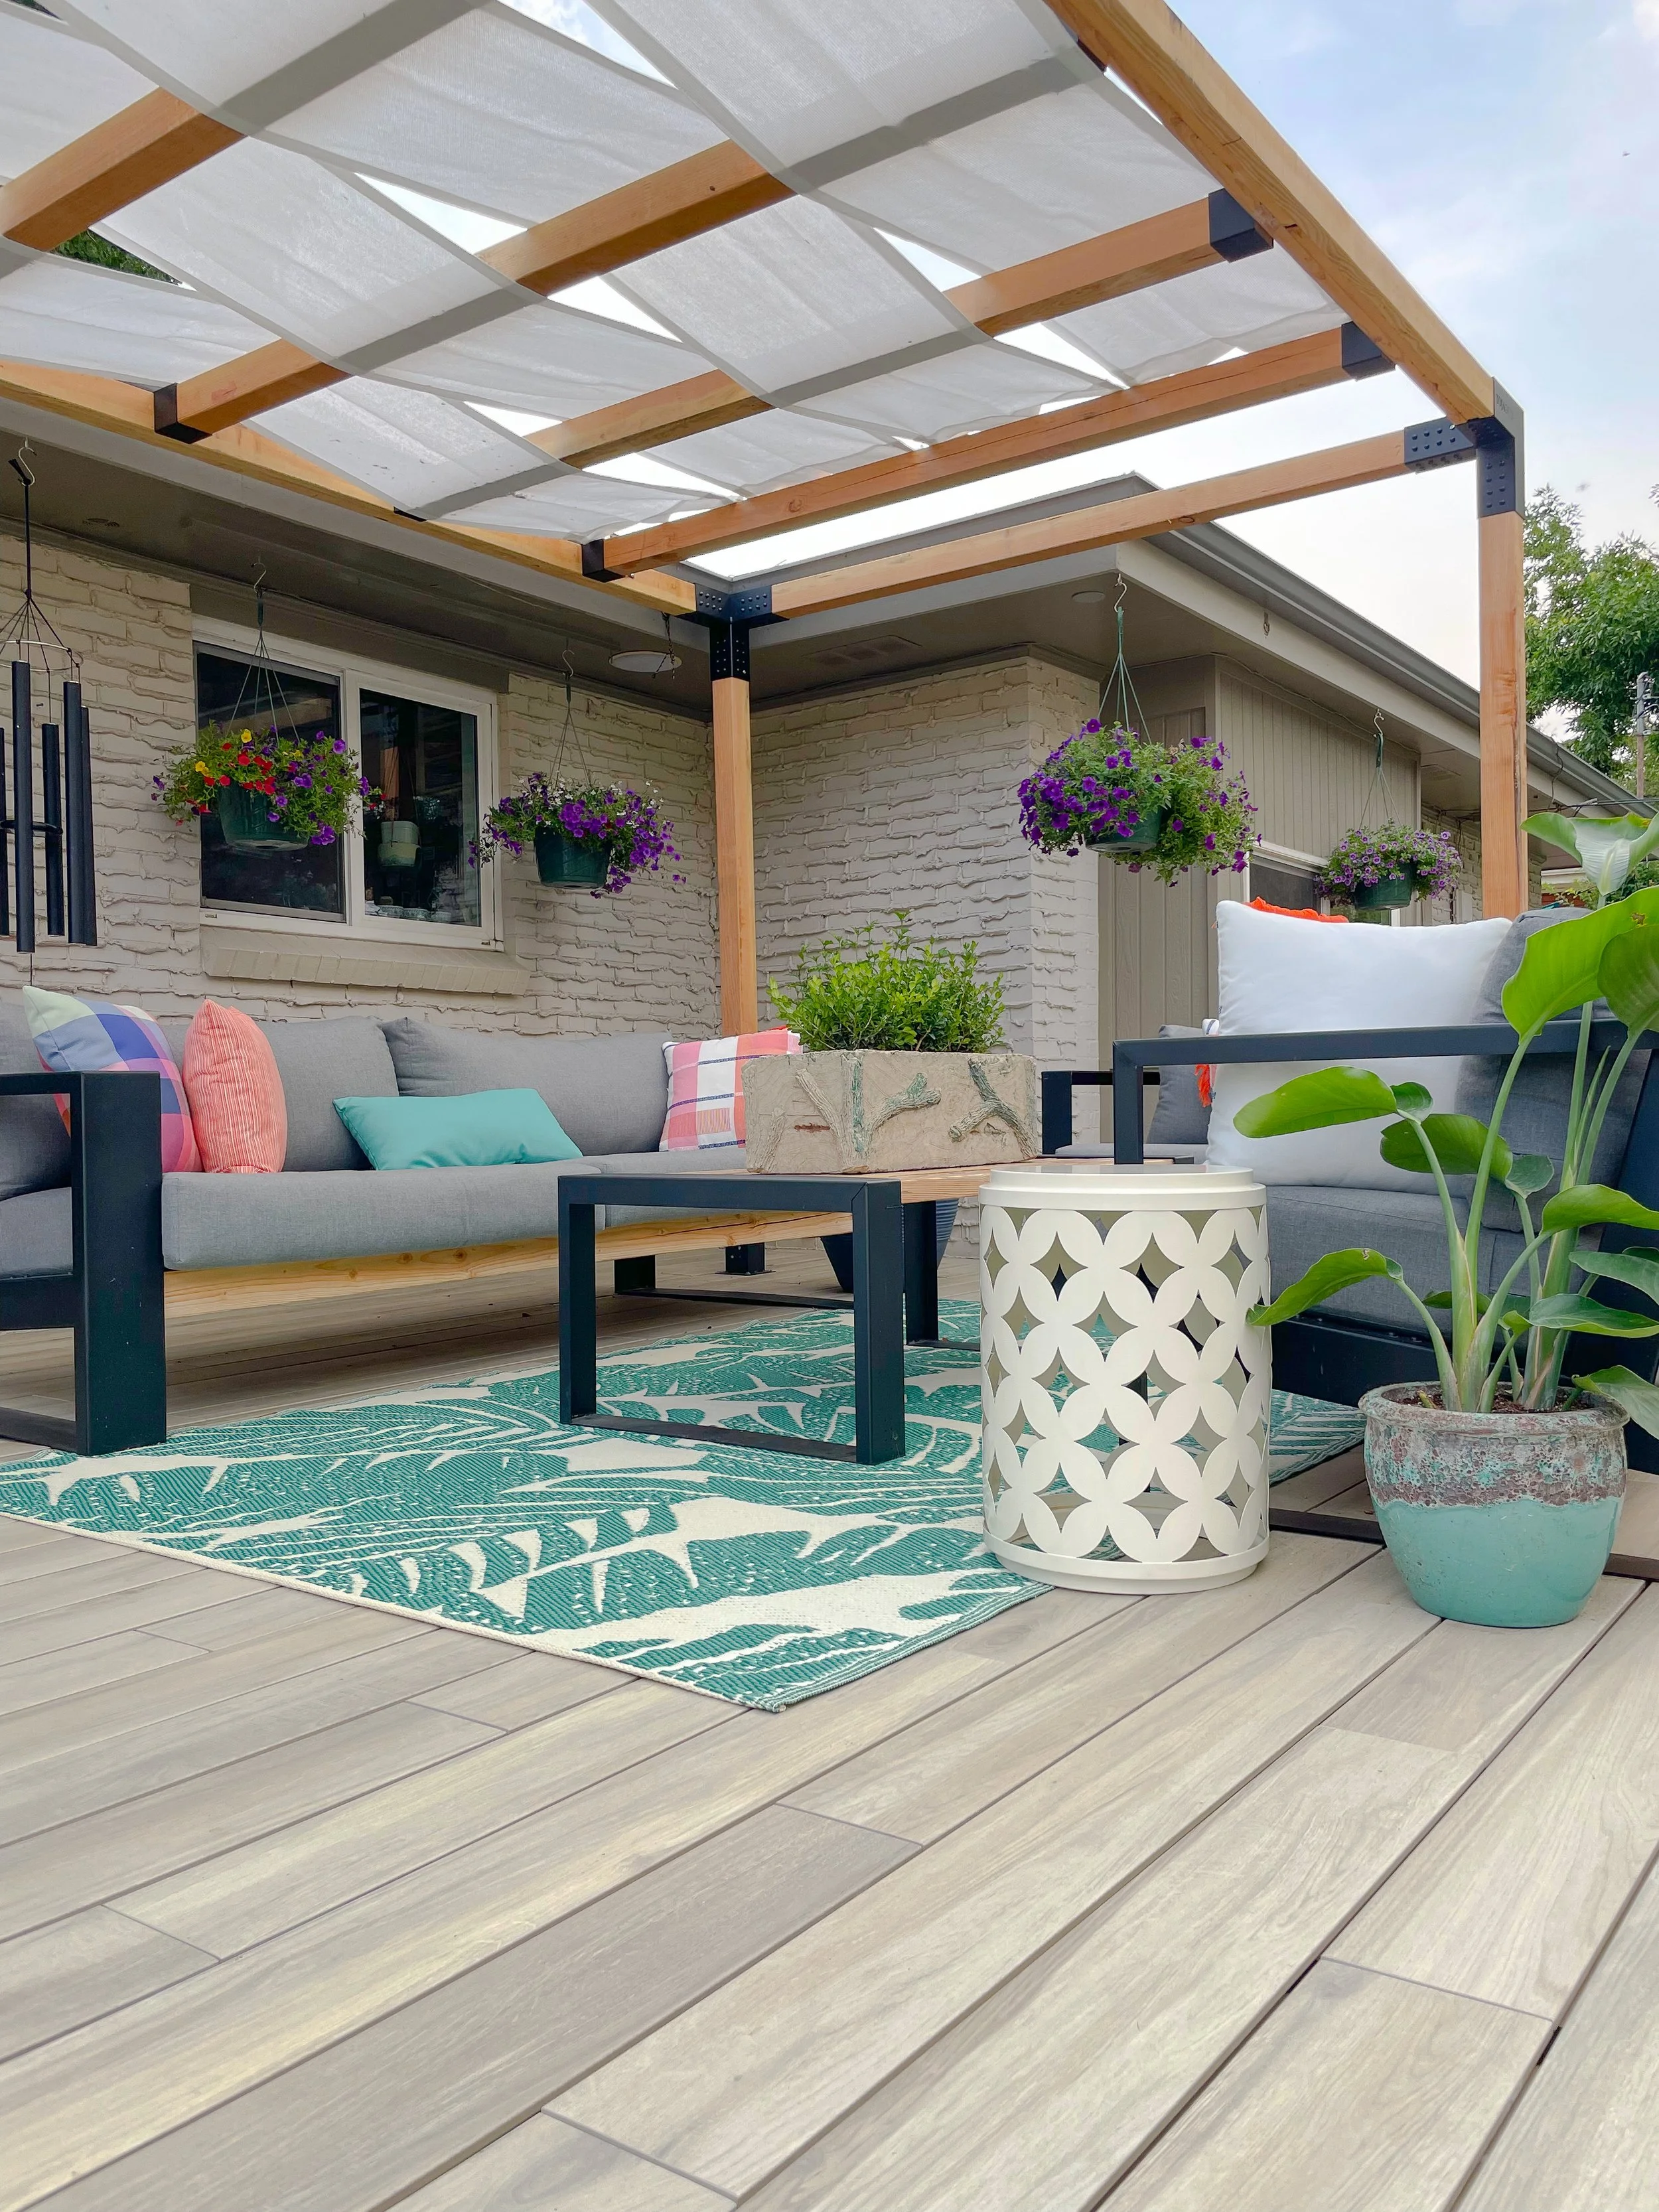
Our new deck with a seating area, the stock tank pool, and a changing area, too.
This summer we built a deck! And it was not a small project, I will tell you. But this DIY deck project is worth all of the blood, sweat, and tears — yep, all three — that we poured into it. The deck was the last big piece in our backyard master plan, and it was the largest single project on that plan, too. I am excited to walk you through the project step-by-step and to show you all of the materials we used, the design choices we made, and the furnishings we chose, too. I'm also going to give you some deck building tips and ideas that you can use at your home.
If you are thinking about creating a beautiful and inviting outdoor area at your home, a place where you can relax and entertain everyday, well, you are in the right place!
Note: materials for this deck project were provided by Tanzite Stone Decks, Toja Grid, and Lowe’s.
The opinions expressed in this guide are entirely mine.
The Before and After
So before we start talking tips and materials, let’s take a look at the before…
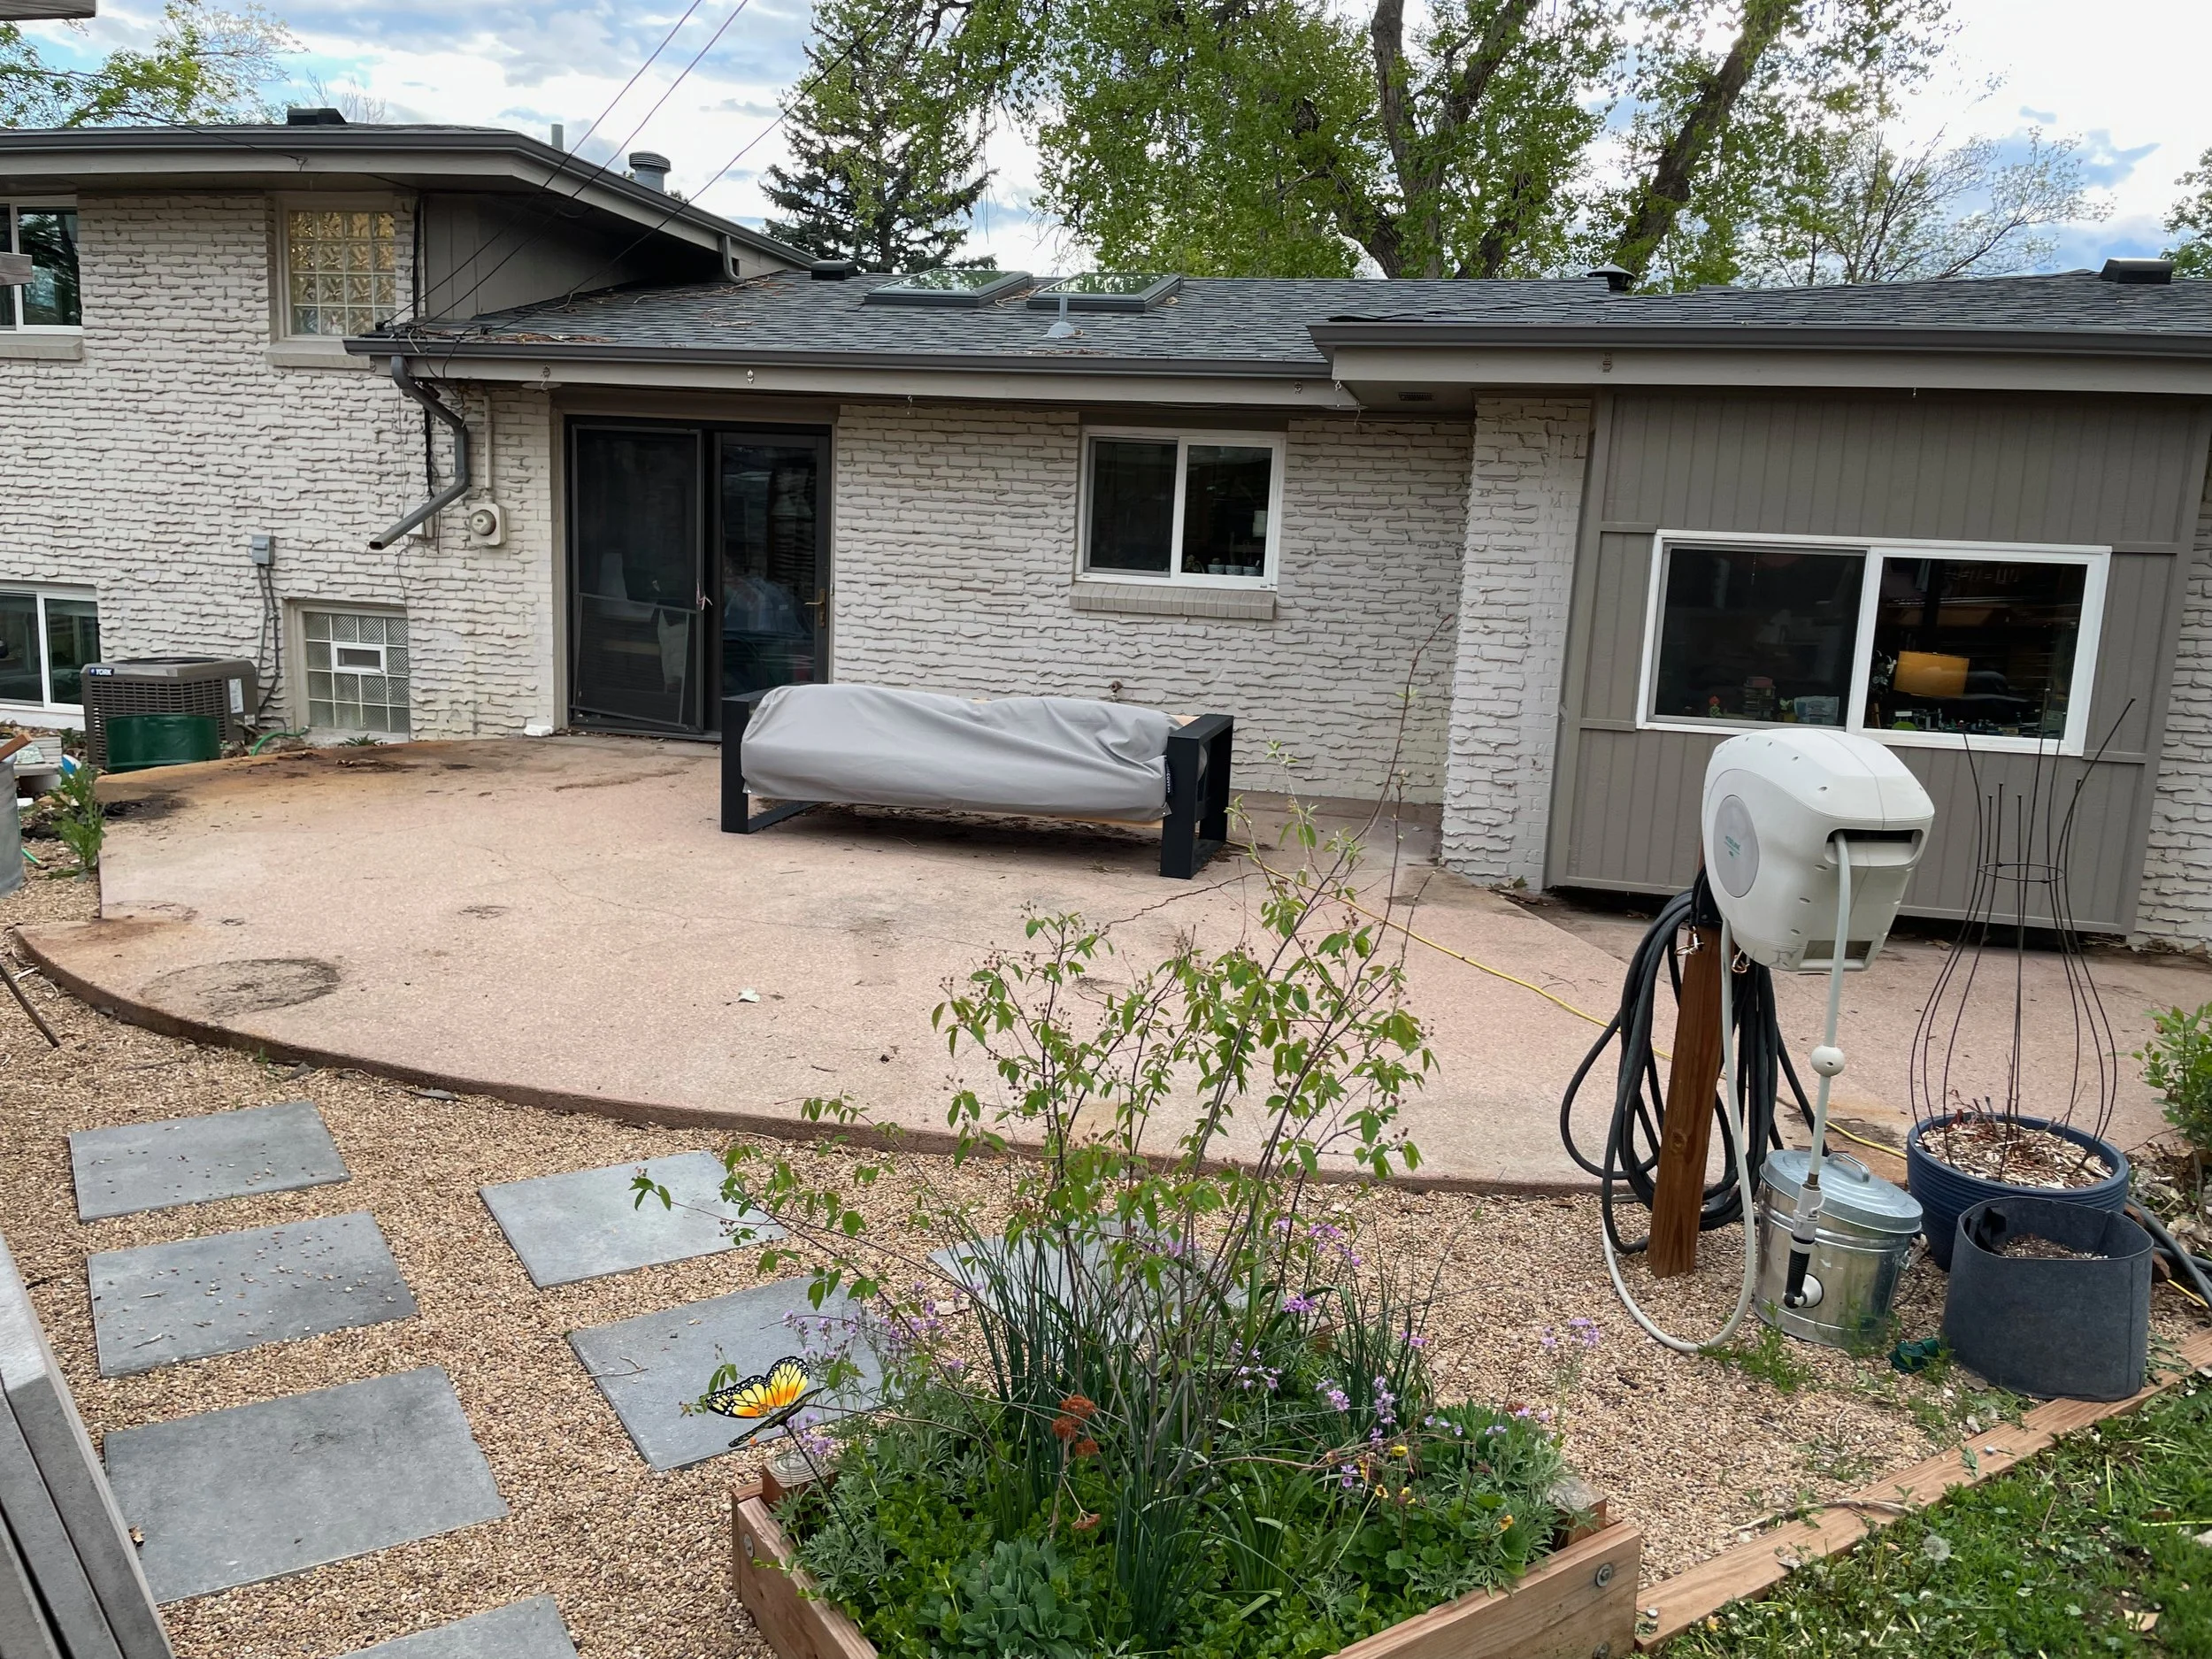
Before: cracked, cramped, and unattractive.
Before, we had a basic concrete patio with a curved front. It was too small, deeply cracked, and PINK. not ideal.
So here is the after…
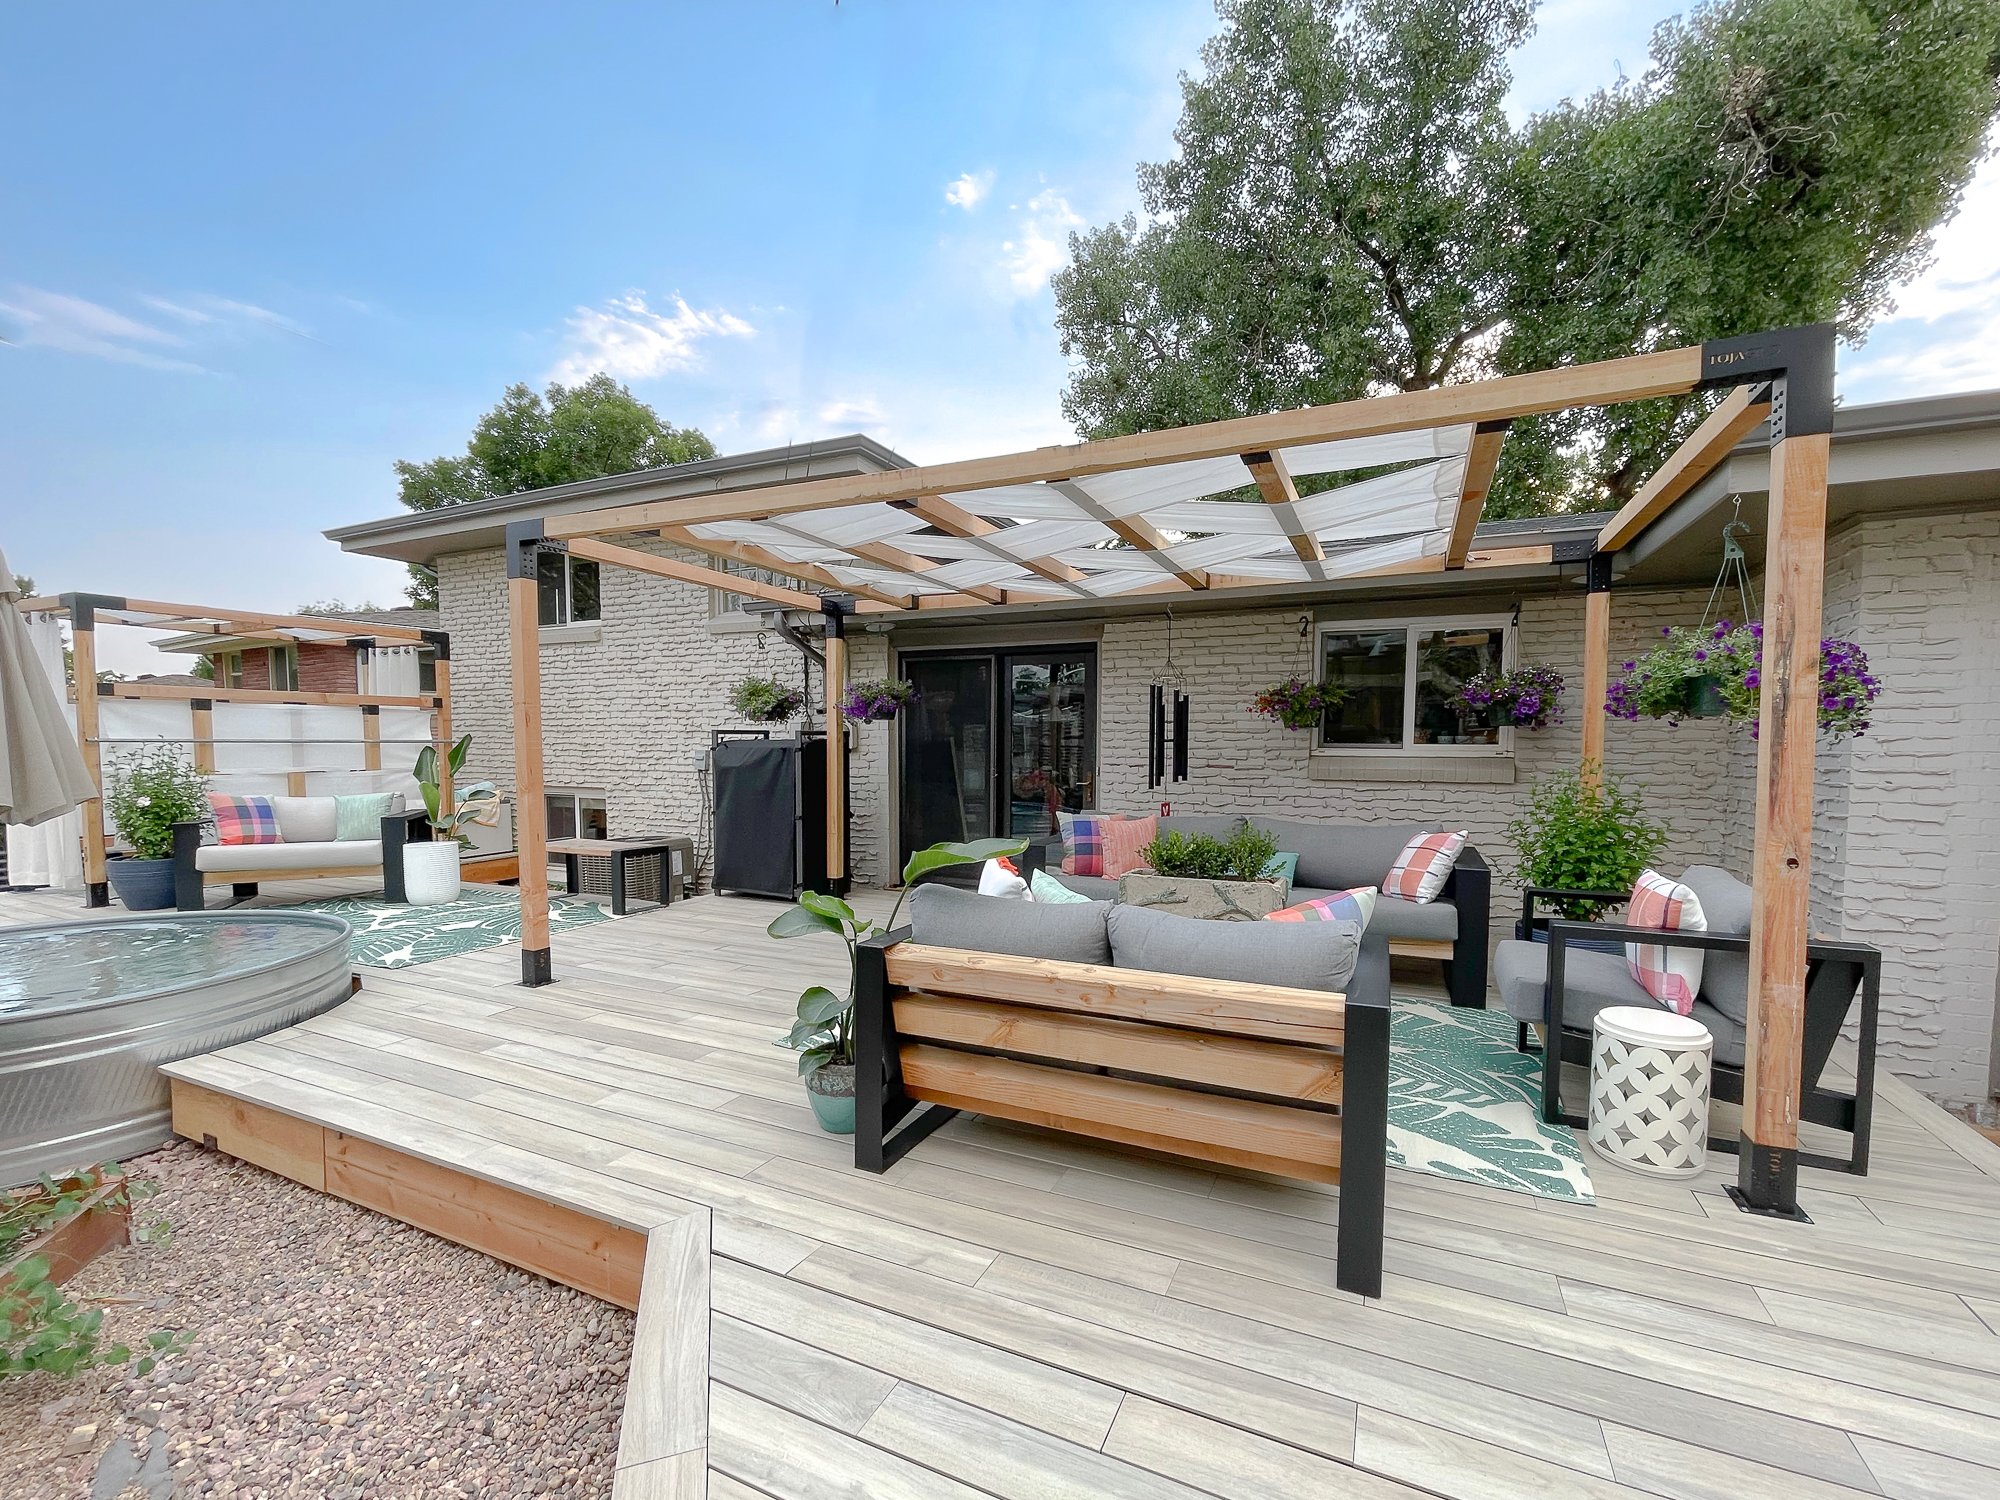
After: spacious, clean, and functional!
It’s a huge difference! For more before, during, and after looks, check out this video, too:
Planning your DIY Deck: Key Considerations

You will find me or my husband working at this seating area frequently throughout the day.
Before you do anything, of course, you have to consider your budget for a deck project. And that budget should take into account everything: demolition, disposal fees, permits, materials, labor (if you are hiring someone to do parts of the work), furniture, plants and landscaping, as well as annual maintenance schedules. And as you are planning, you should consider HOW you will use the space. If you are hoping for an area for dining, for example, you will need to plan for a space big enough for a table, chairs, and room for people to move around them as well.
Honestly, it may be a deck, but thinking about that deck as a room can be very helpful! While it may not have walls, a deck has the same space planning considerations as any room in your home. If you have already chosen furniture for the space or will reuse something you already have, use those measurements as a guide. If not, look at the furniture that you like — and use those measurements. Even if buying those pieces right now is out of reach, planning for them when building allows you to add them at a later date.
Design Tip: Design to use full lengths of materials. Curves and angles mean cuts and every cut means waste. A rectangular deck is the most efficient shape as it will result in the least waste. So as you are designing – or having it designed – take into account standard lengths of lumber and the lengths of your decking materials. Use multiples of those lengths to avoid waste. Every scrap that you can't use is your own money being thrown away.
Choosing the Right Deck Materials
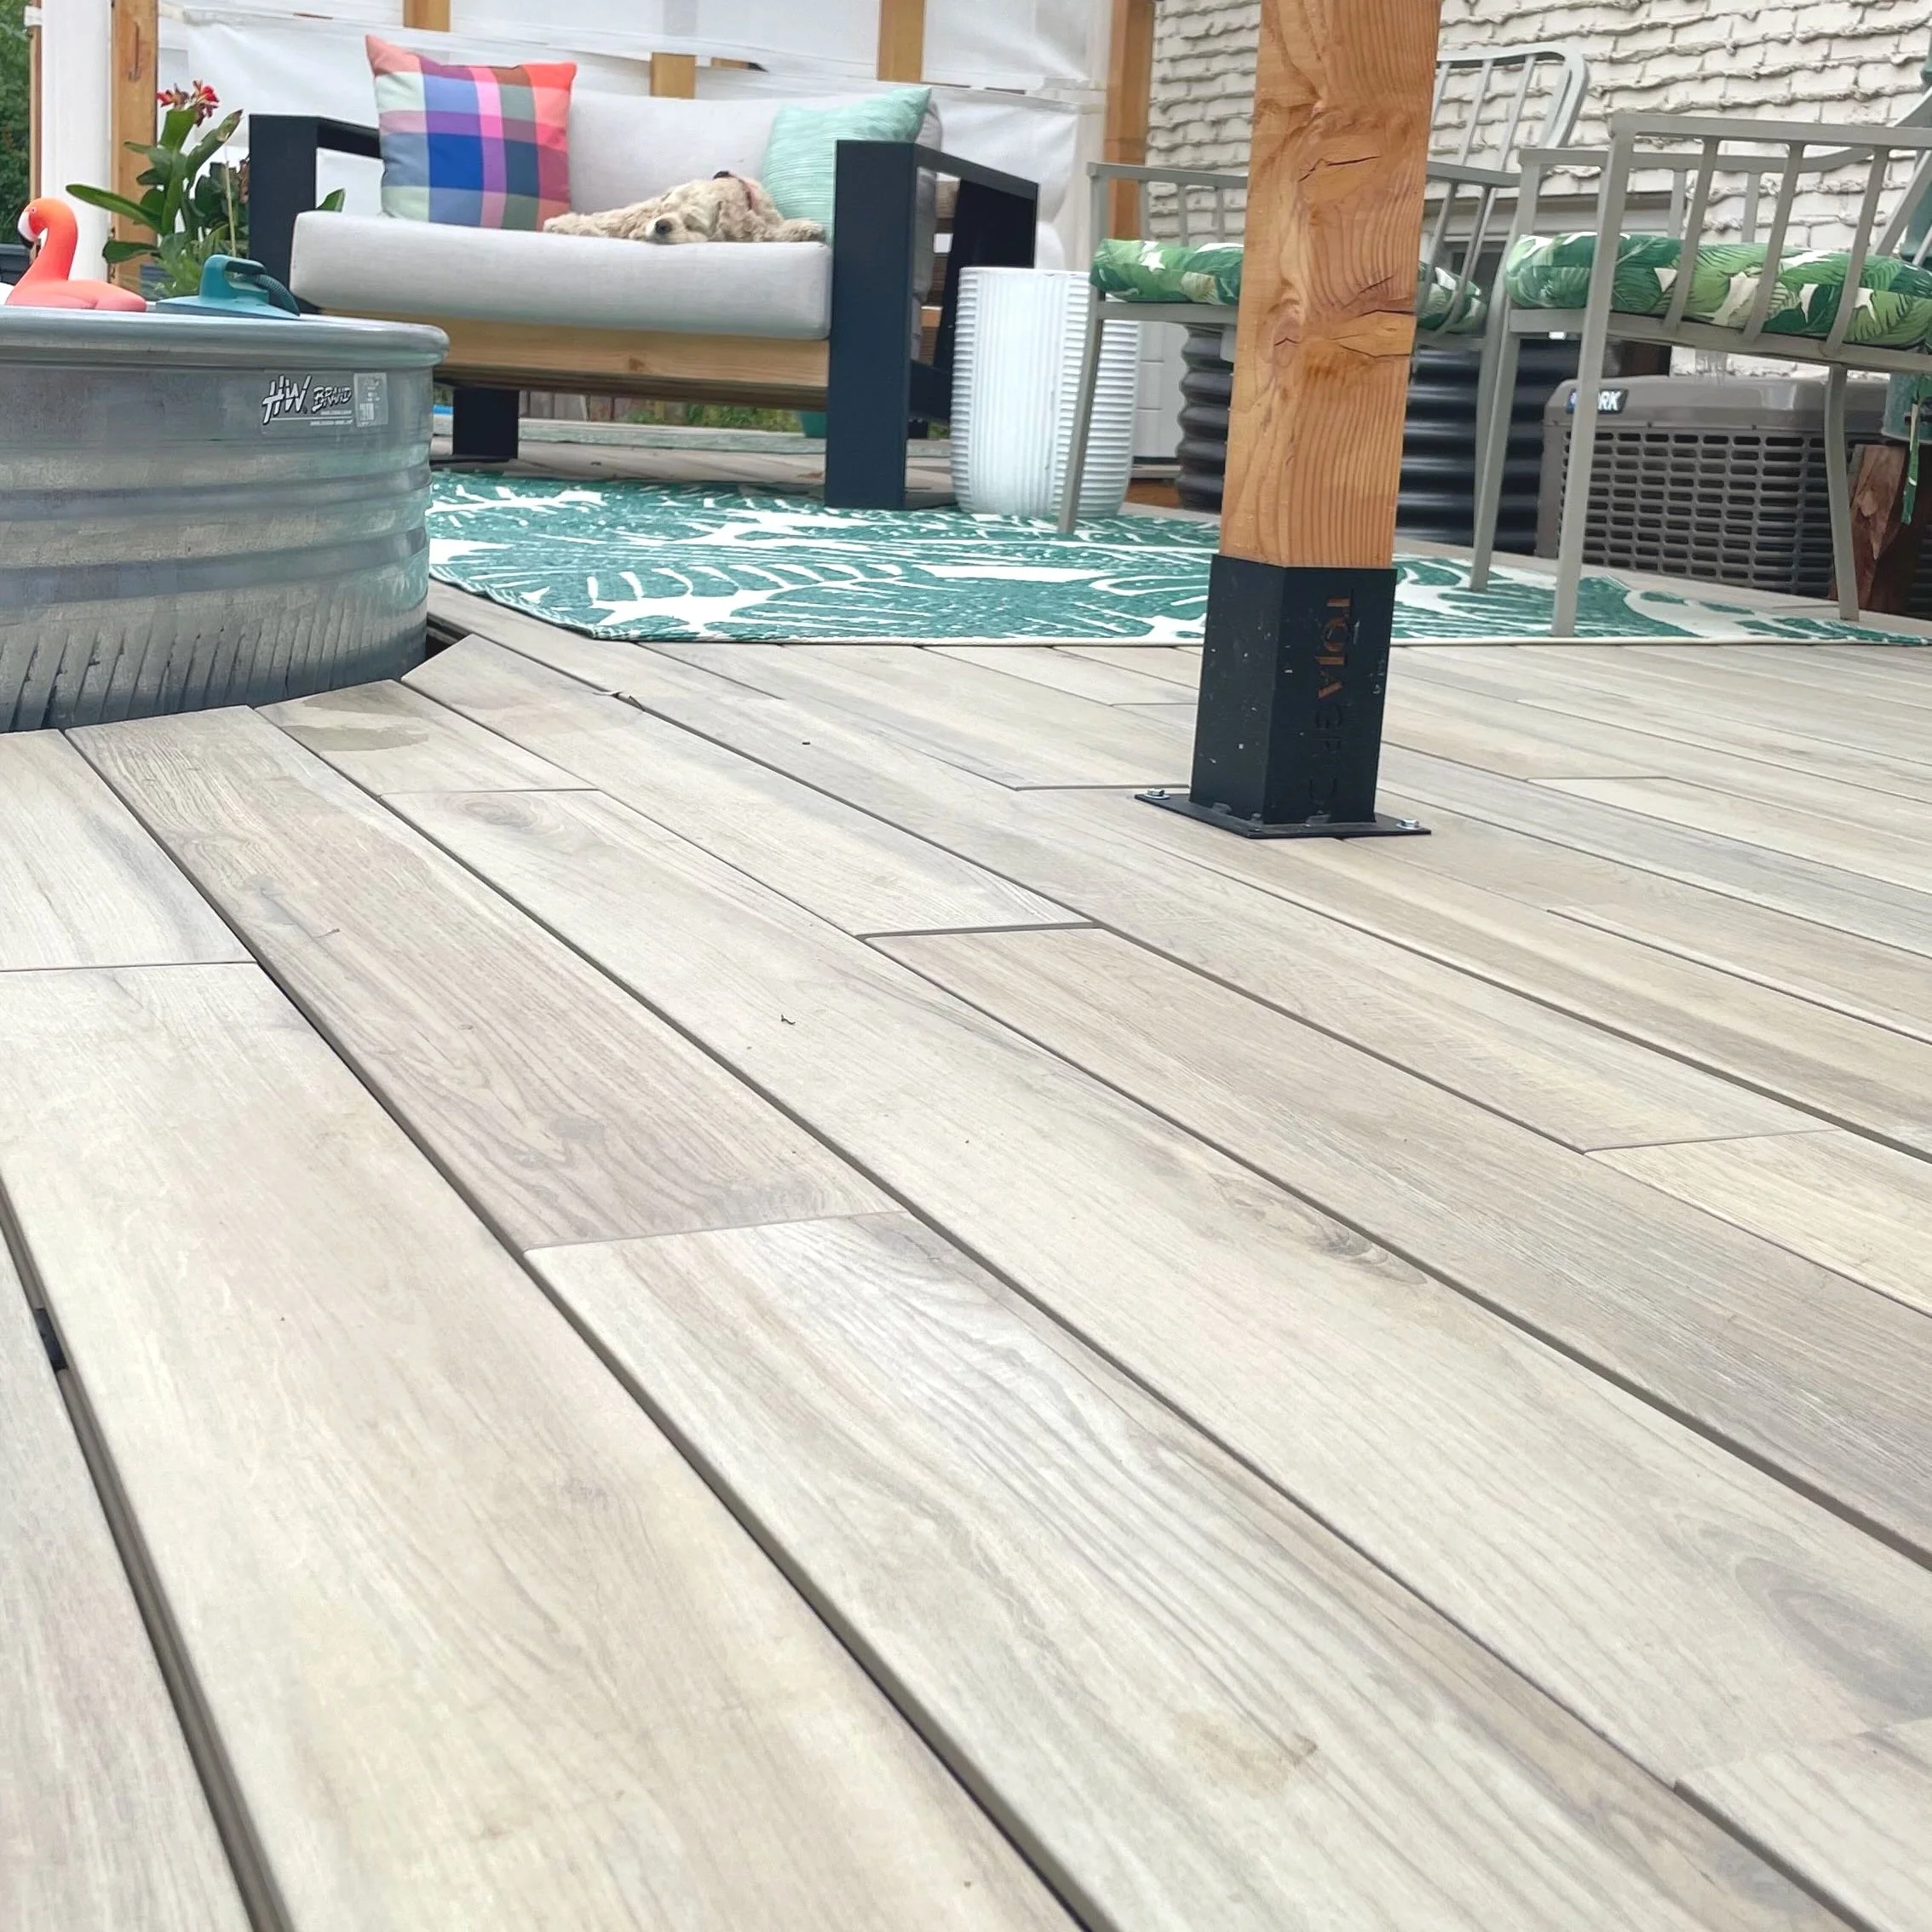
We chose Tanzite Stone Decking in the White Ash color from their Appalachian Collection.
Ultimately, Tanzite was the perfect choice for our new deck.
I did extensive research, trying to find the best DIY deck materials for this project. With everything we do, we look for materials that are durable, low-maintenance, and budget-friendly. After all, if you are going to build a deck, you want it to last for a long time, to be beautiful, and to be relatively low-maintenance.
We considered wood decking, composite decking, and Tanzite Stone Decking as well as several patio options.
Wood decking is the least expensive option, and it is the fastest to install with the least number of tools required. However, it requires the most maintenance over the life of the deck — with sanding and refinishing every 3-5 years. It also can be hard underfoot and full of splinters, and one of our primary design considerations was to be able to walk barefoot — especially around the pool area. And the lifespan of a wood deck here in Colorado is relatively short: 10-15 years.
Composite Decking (a product made of wood shavings and recycled plastic) is more expensive than wood and takes a little more time and expertise to install, though it is still a DIY product. It has a longer life span (20-30 years). However, it is reportedly very hot under foot which is one of the reasons we rejected it. And while it is relatively maintenance-free, it is not recyclable at the end of its use, and we have concerns about PFAS used in these products. For these same reasons, we also rejected Capped PVC Decking, another plastic decking product.
Patio Options:
A concrete patio was another durable, low-maintenance option we considered. It would have looked great in this application. However, because of the size of the project we were considering, it was cost-prohibitive. Additionally, our shifting soils make concrete crack prematurely.
Pavers are another patio option, and they can be a good DIY solution. However, they were also cost-prohibitive per square foot, and we would not have been able to level the area without moving a substantial amount of soil and rock adding significant cost and time.
Ultimately, we chose Tanzite Stone Decks.
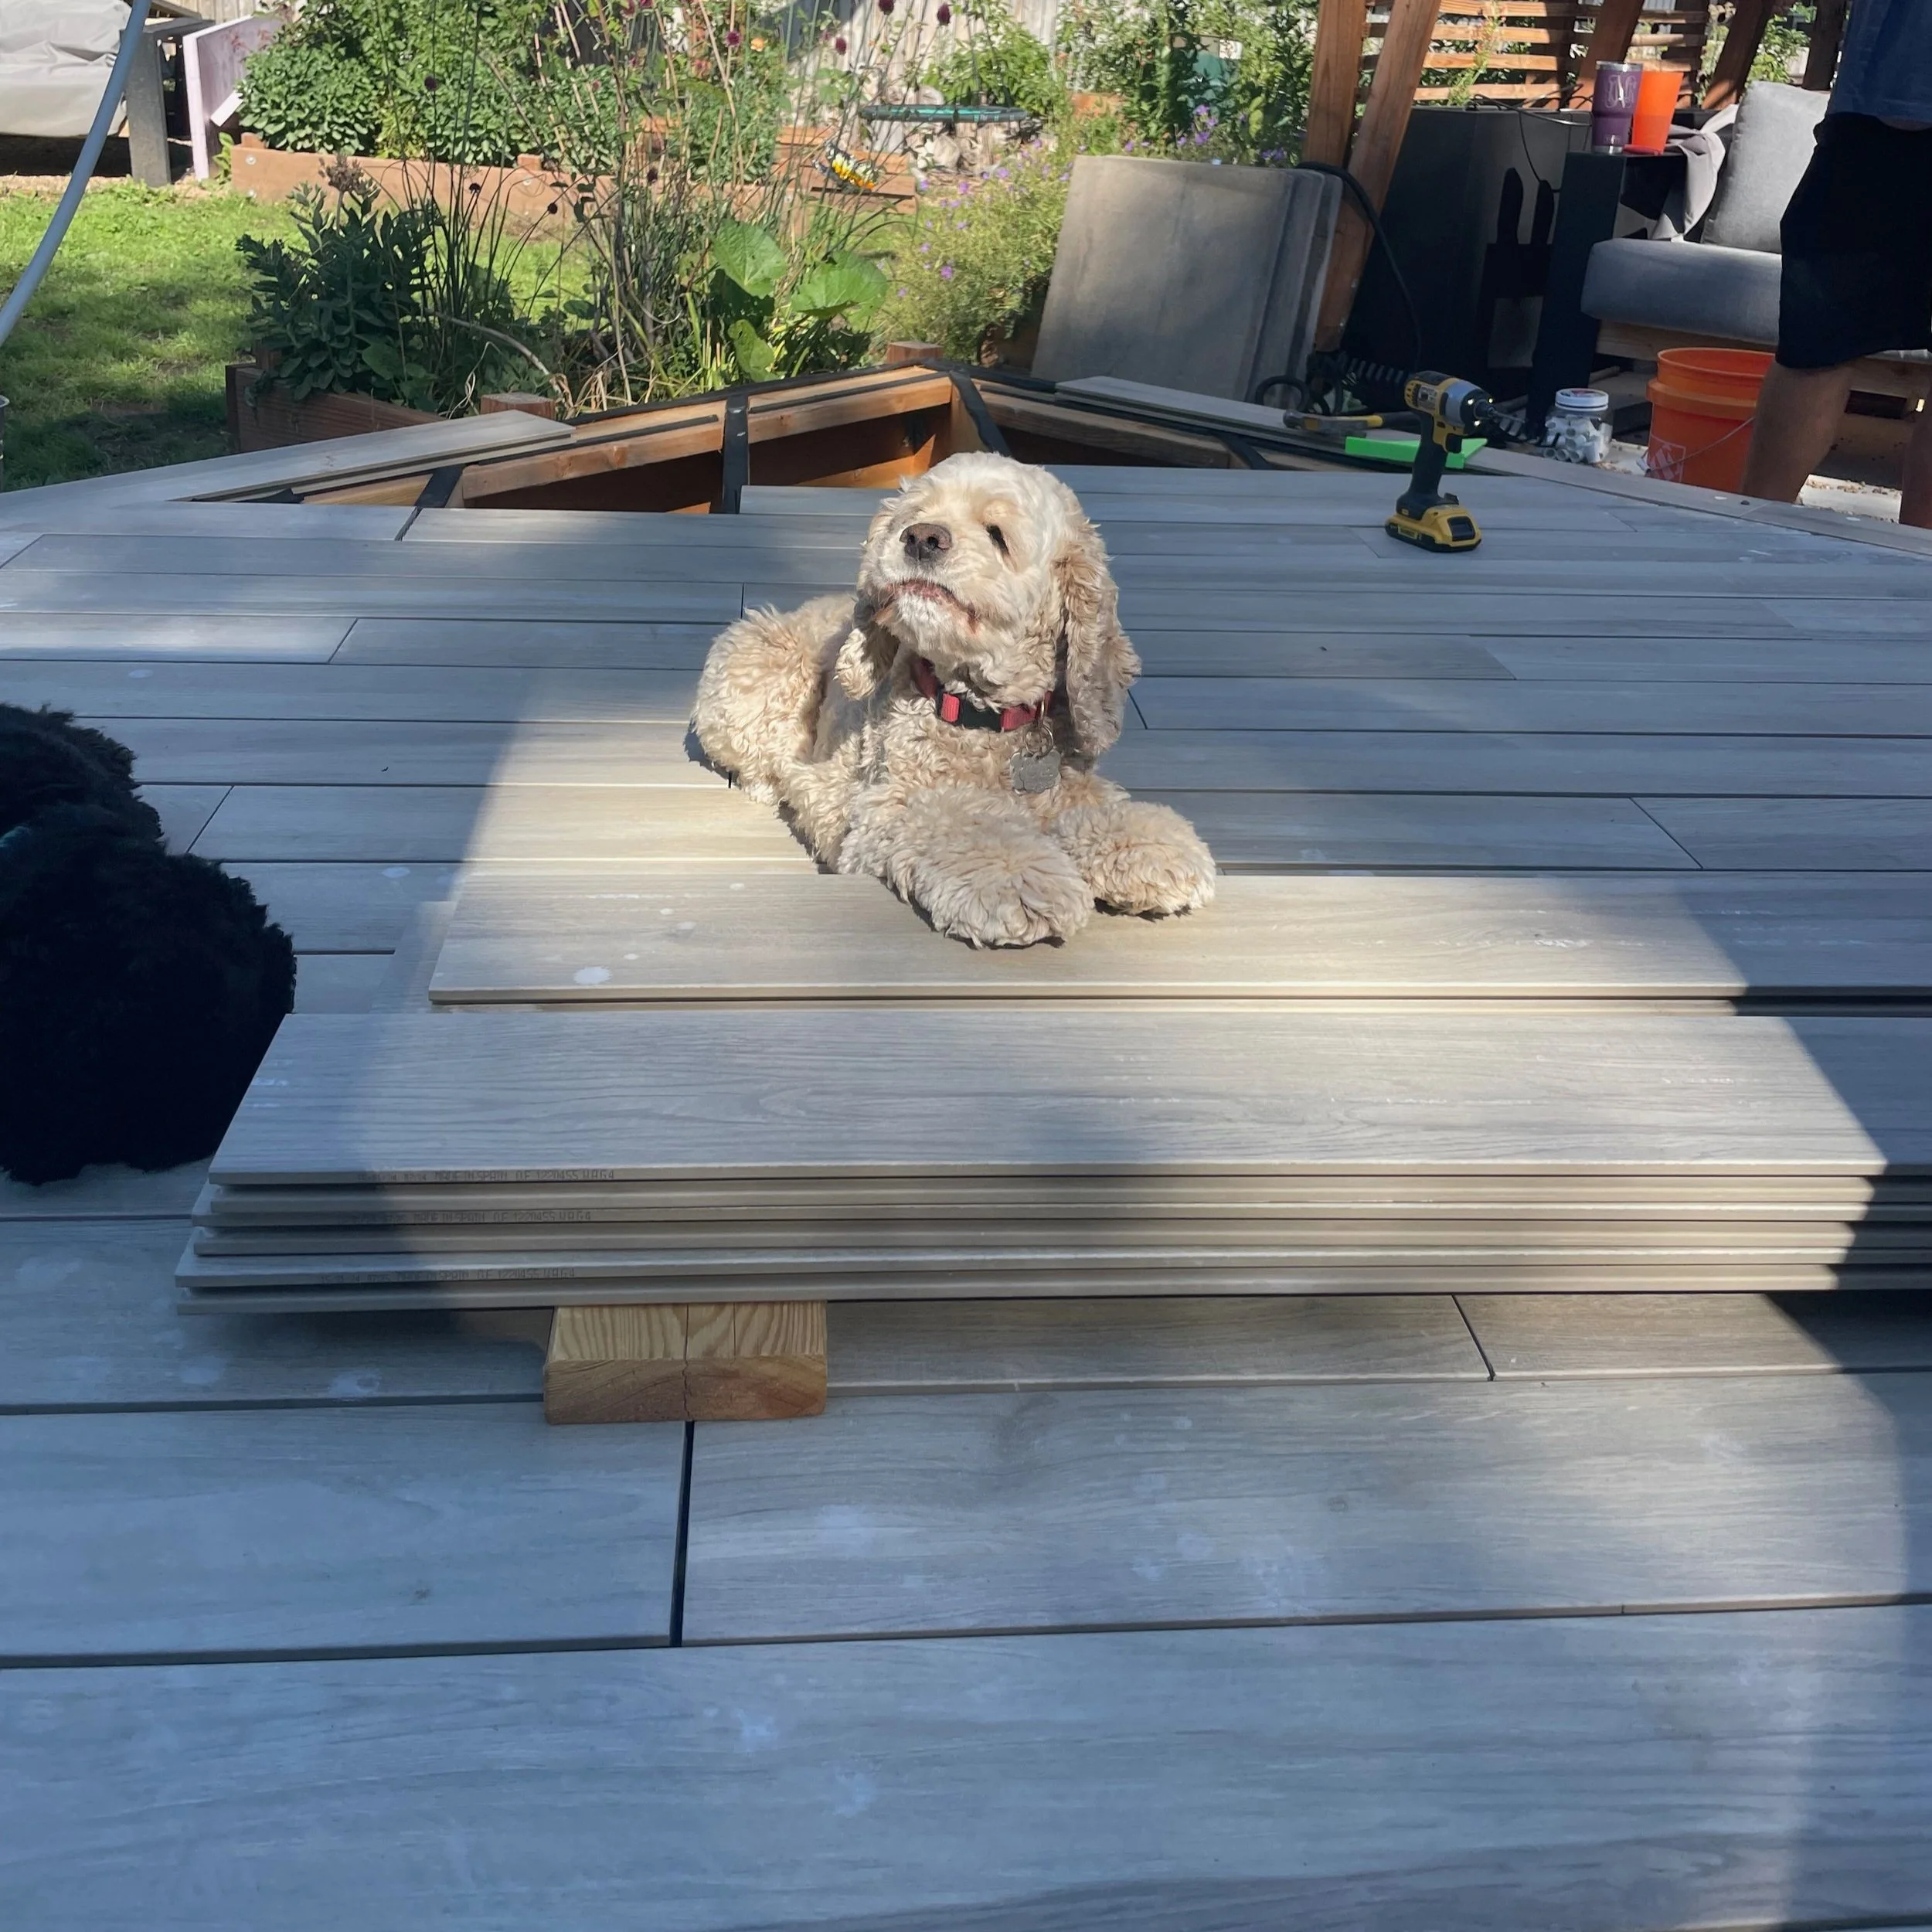
Our dogs give Tanzite five woofs! They love our new deck as much as we do!
Tanzite StoneDecking
Tanzite is a manufactured stone product that looks like wood. I don’t usually like artificial wood products, but this is a great application. The Tanzite comes in planks that are installed similarly to composite decking. However, it is more like tile underfoot. And unlike composite materials, it isn’t made of plastics so it won’t degrade in our high UV exposure.
We love how it looks, how it feels underfoot, and how easy it is to maintain, too. Read more about Tanzite, why we chose it and about our experience installing it here:
Tools and Materials Needed for a Successful Build

Framing our new deck took the biggest chunk of time during the construction process.
Any DIY project requires tools — some more than others! This project put our tools to the test, and they performed beautifully! We invested in a few new tools, too, and they made the job much easier and faster. This build is not small — nearly 600 square feet — so the framing was substantial.
Our most important tools turned out to be:
Framing
Pneumatic Framing Nailer: this was a new purchase, and it made driving nails a snap. Don’t forget your safety glasses and gear, however!
Pneumatic Palm Nailer: an incredible help in putting up the joist hangers! Our tween learned to use this and was the master of the Palm Nailer in no time.
Tanzite Installation
Long Level: we found that a 48” level was essential to level the framing. We took down the high spots with a handheld planer.
Wet Saw: a wet saw with a diamond blade is absolutely essential for cutting Tanzite cleanly. It can be cut with a circular saw, but not very precisely.
Mallet: tapping the Tanzite planks into place was much easier with a rubber mallet.
All of these tools including our recommended brands are available at the links above or at this shopping list:
Deck Building Construction Tips:
Call before you dig anywhere! You don't want to hit underground utilities, so call before you dig!
Find a recycling option for waste and demolition materials so they don't end up in the landfill. Even concrete can be recycled!
Demolition is a stressful process for pets, so plan for their comfort, too. The concrete rubble was hard on our dogs' paws. And the framing was an obstacle course for them. We could see their relief when we started to install the decking – finally they had a smooth surface again!
Be sure to consult your local building department for code requirements before you begin construction. They will have guidance on what kinds of footings you need for your deck.
Framing is the most important thing – invest your time and money here. You want your deck to be level and true. Spend the time to make it so.
Put up some temporary shade. The heat and the sun slowed us down, but I pulled out a big shade sail which made working a lot easier during the day. Choose the most durable materials you can afford.

Building our deck was truly a family project.
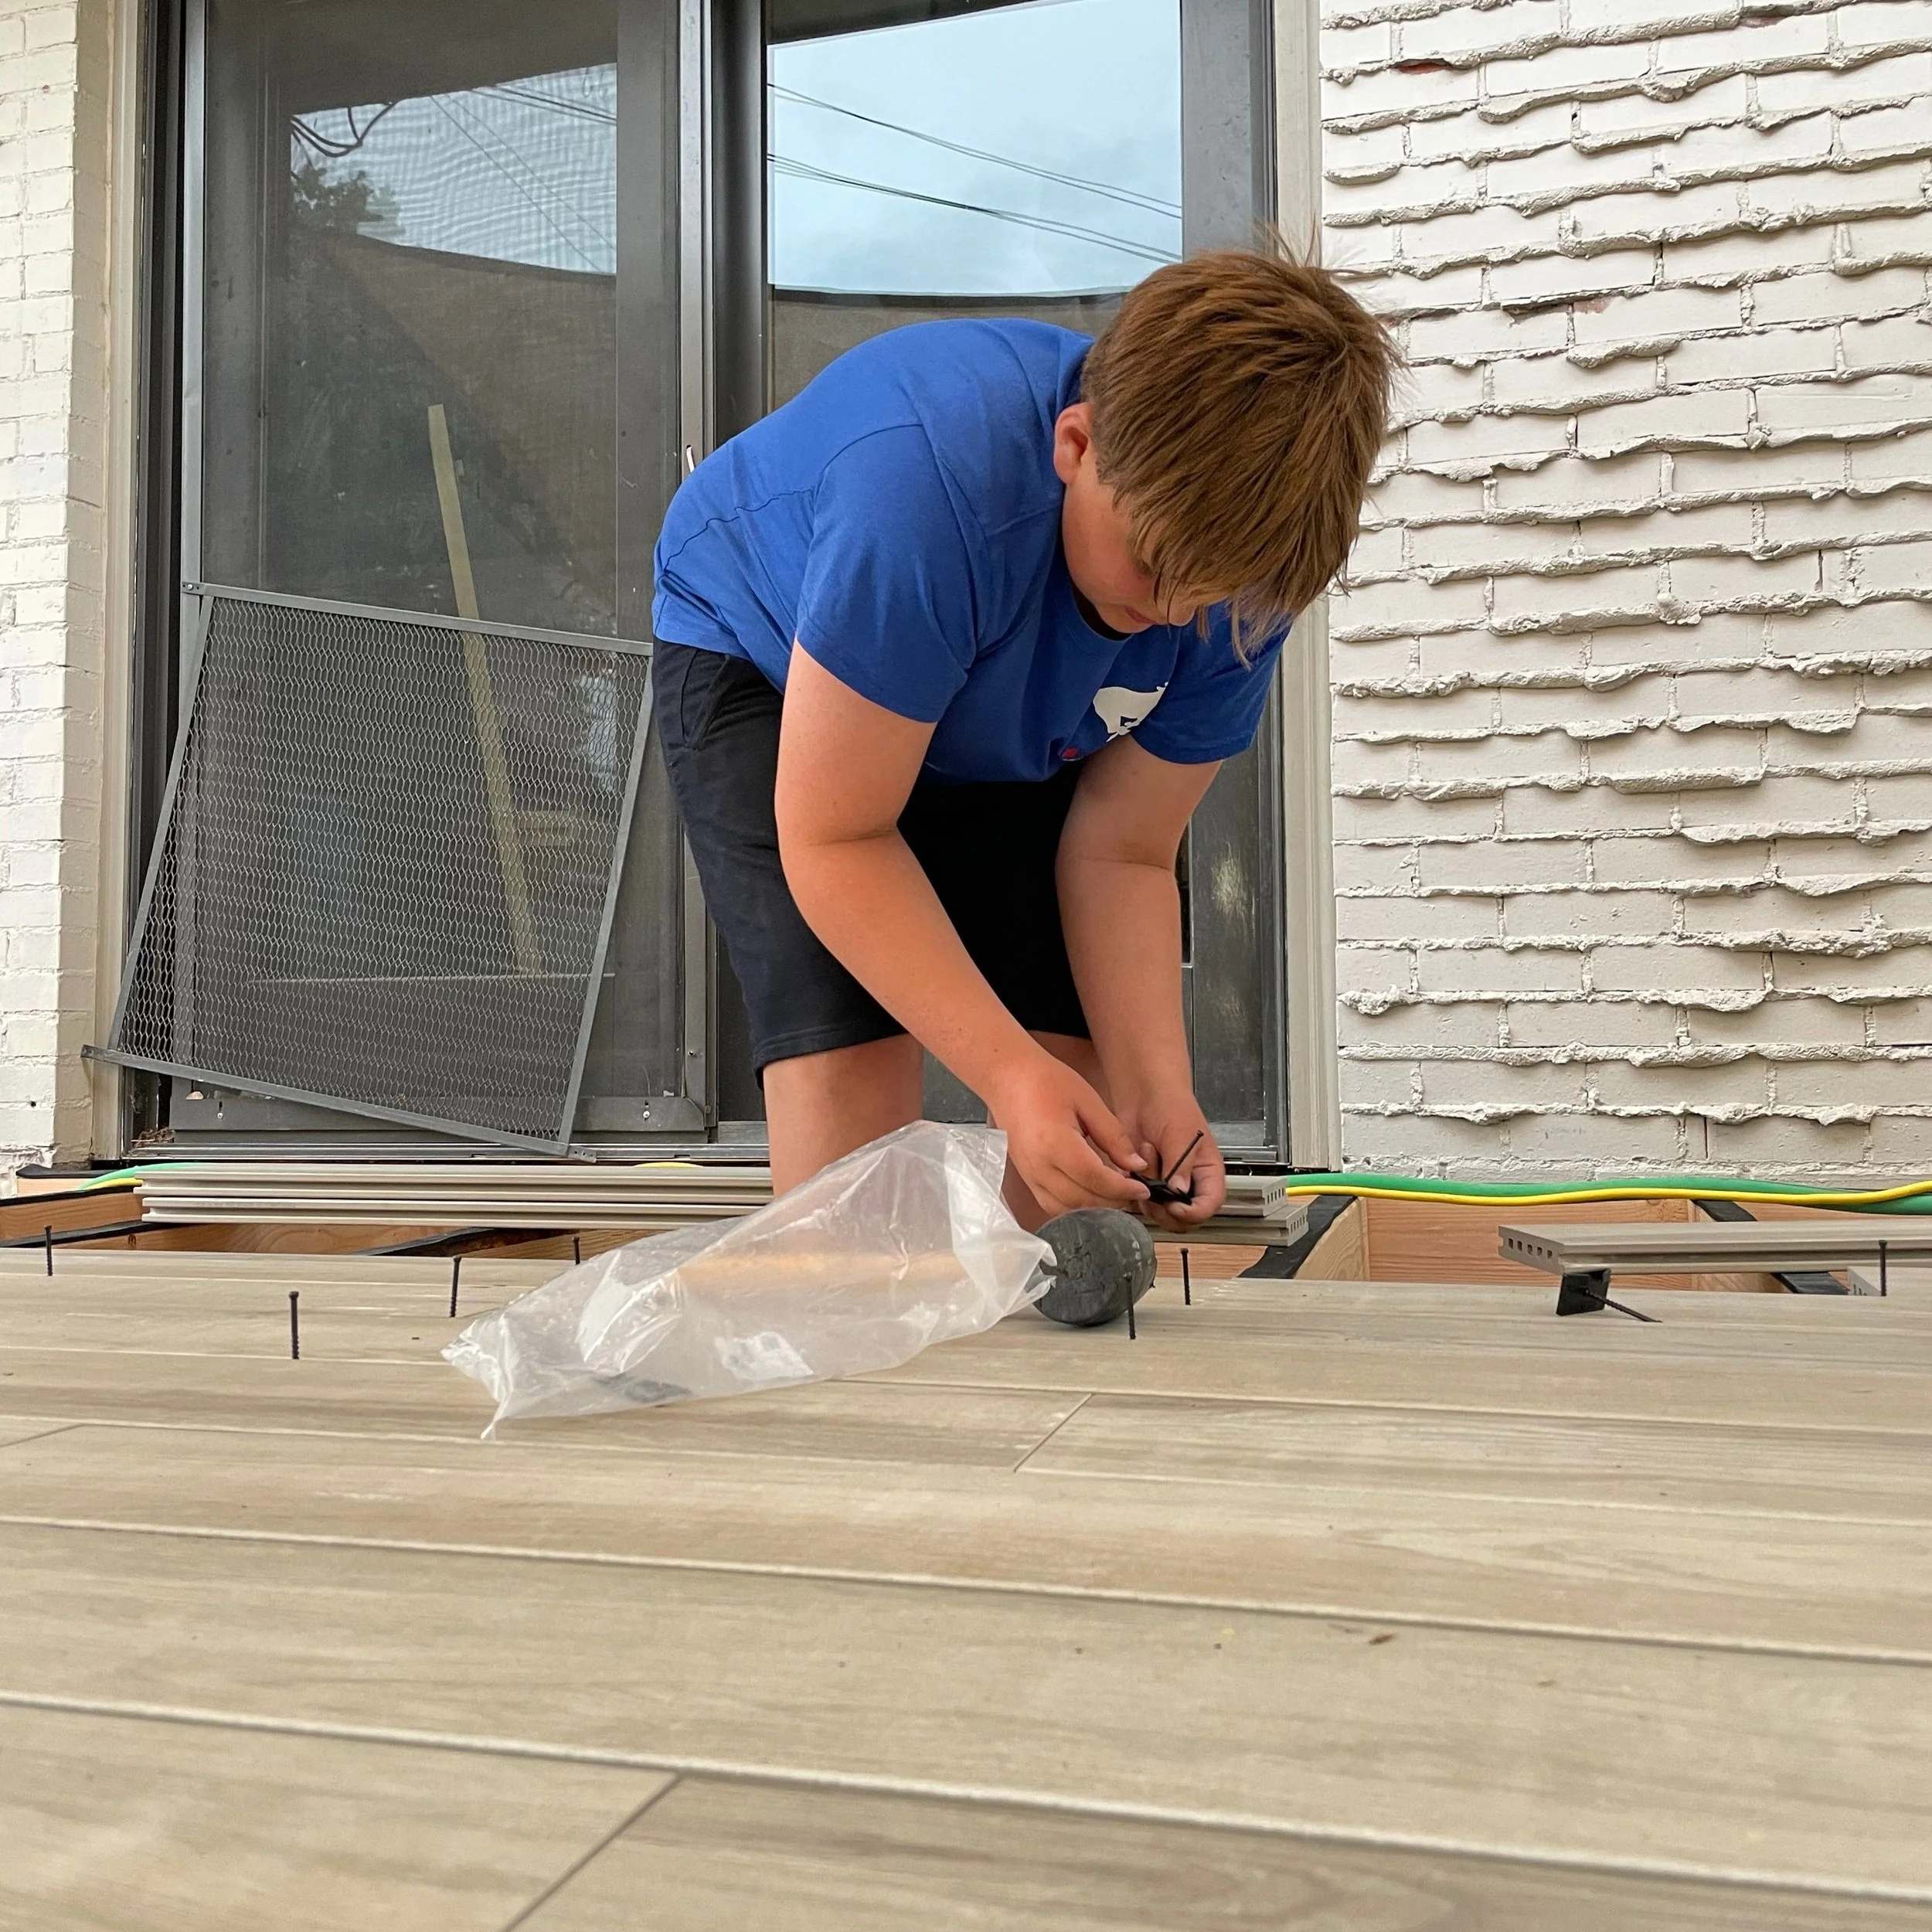
Our son was a huge help on this project, and he quickly learned how to install the Tanzite Stone Decking.
Creating Functional Zones on your Deck
Our design goals for the deck were ambitious, and we had multiple zones we wanted to include in the space: a generous seating area, a changing room for the pool, an outdoor kitchen, and walking paths as the deck is a crossroads in our backyard. So despite the large area of the deck, we carefully measured and designed each major area, planning out walkways and carefully measuring furniture — long before we even began demolition.
Our zones:
Cooking Zone: for an outdoor kitchen
Shaded Seating Zone: a conversation area for many people (or napping in the shade)
Sunny Seat: by the pool for chatting or basking
Changing Room: which also serves to block the deck from our neighbors’ house
Integrated Stock Tank Pool: we wanted the pool to be part of the deck space to enhance accessibility
You may not have an architect to do your design, but that doesn’t mean you can’t measure and draw your space, too. Think about what you want to do in your space, and measure any furniture you already have — or want to buy. Consider walkways — generally at least 3 feet wide. And traffic patterns: how will people usually move through the space. Put it all down on paper (I love graph paper) before you begin your project.
In the end, we decided to put the outdoor kitchen on wheels which makes that zone more flexible. We wanted to be able to move things around as needed. You can read all about about our outdoor kitchen solution here.
Design Tips:
Think about this space as if you are adding another room to your home. Because in many ways you are!
Consider what you want to do in the space – and measure. If you want a table, you'll need to build something big enough to accommodate the table, chairs, and room to walk around it.Think about it as a room.
Plan for all seasons. How will you use it in the winter? What do you need to make it usable in the summer? Even if you can't do it all at once, plan for it. And then build it out in stages over time.
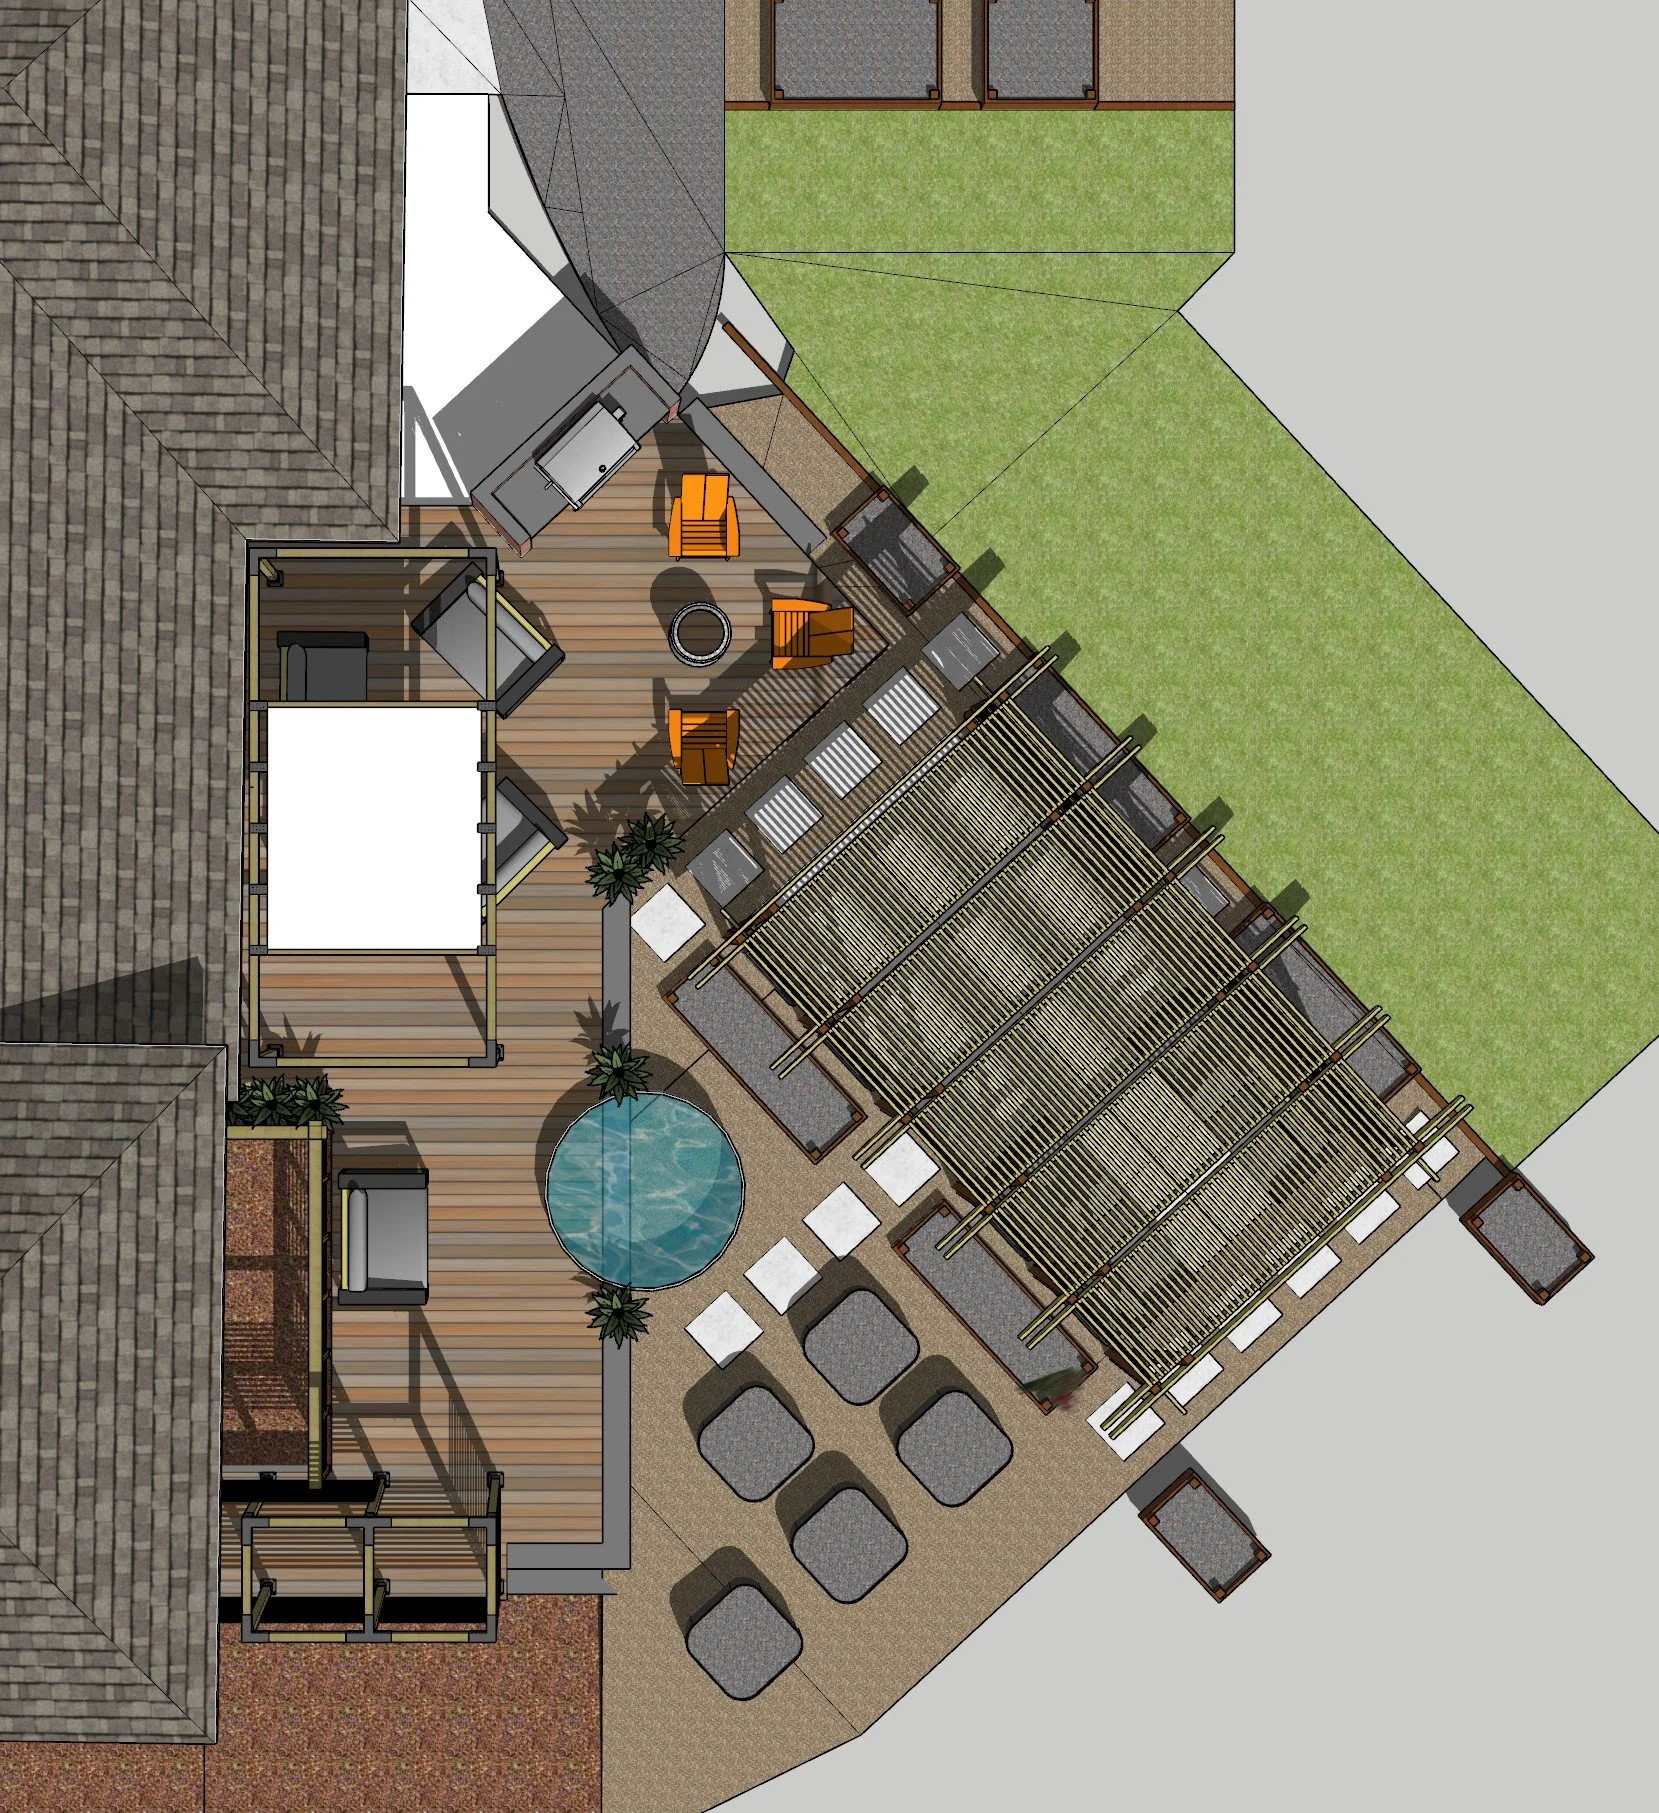
A portion of our backyard master plan featuring the Shade House, Stock Tank Pool, and the new deck.
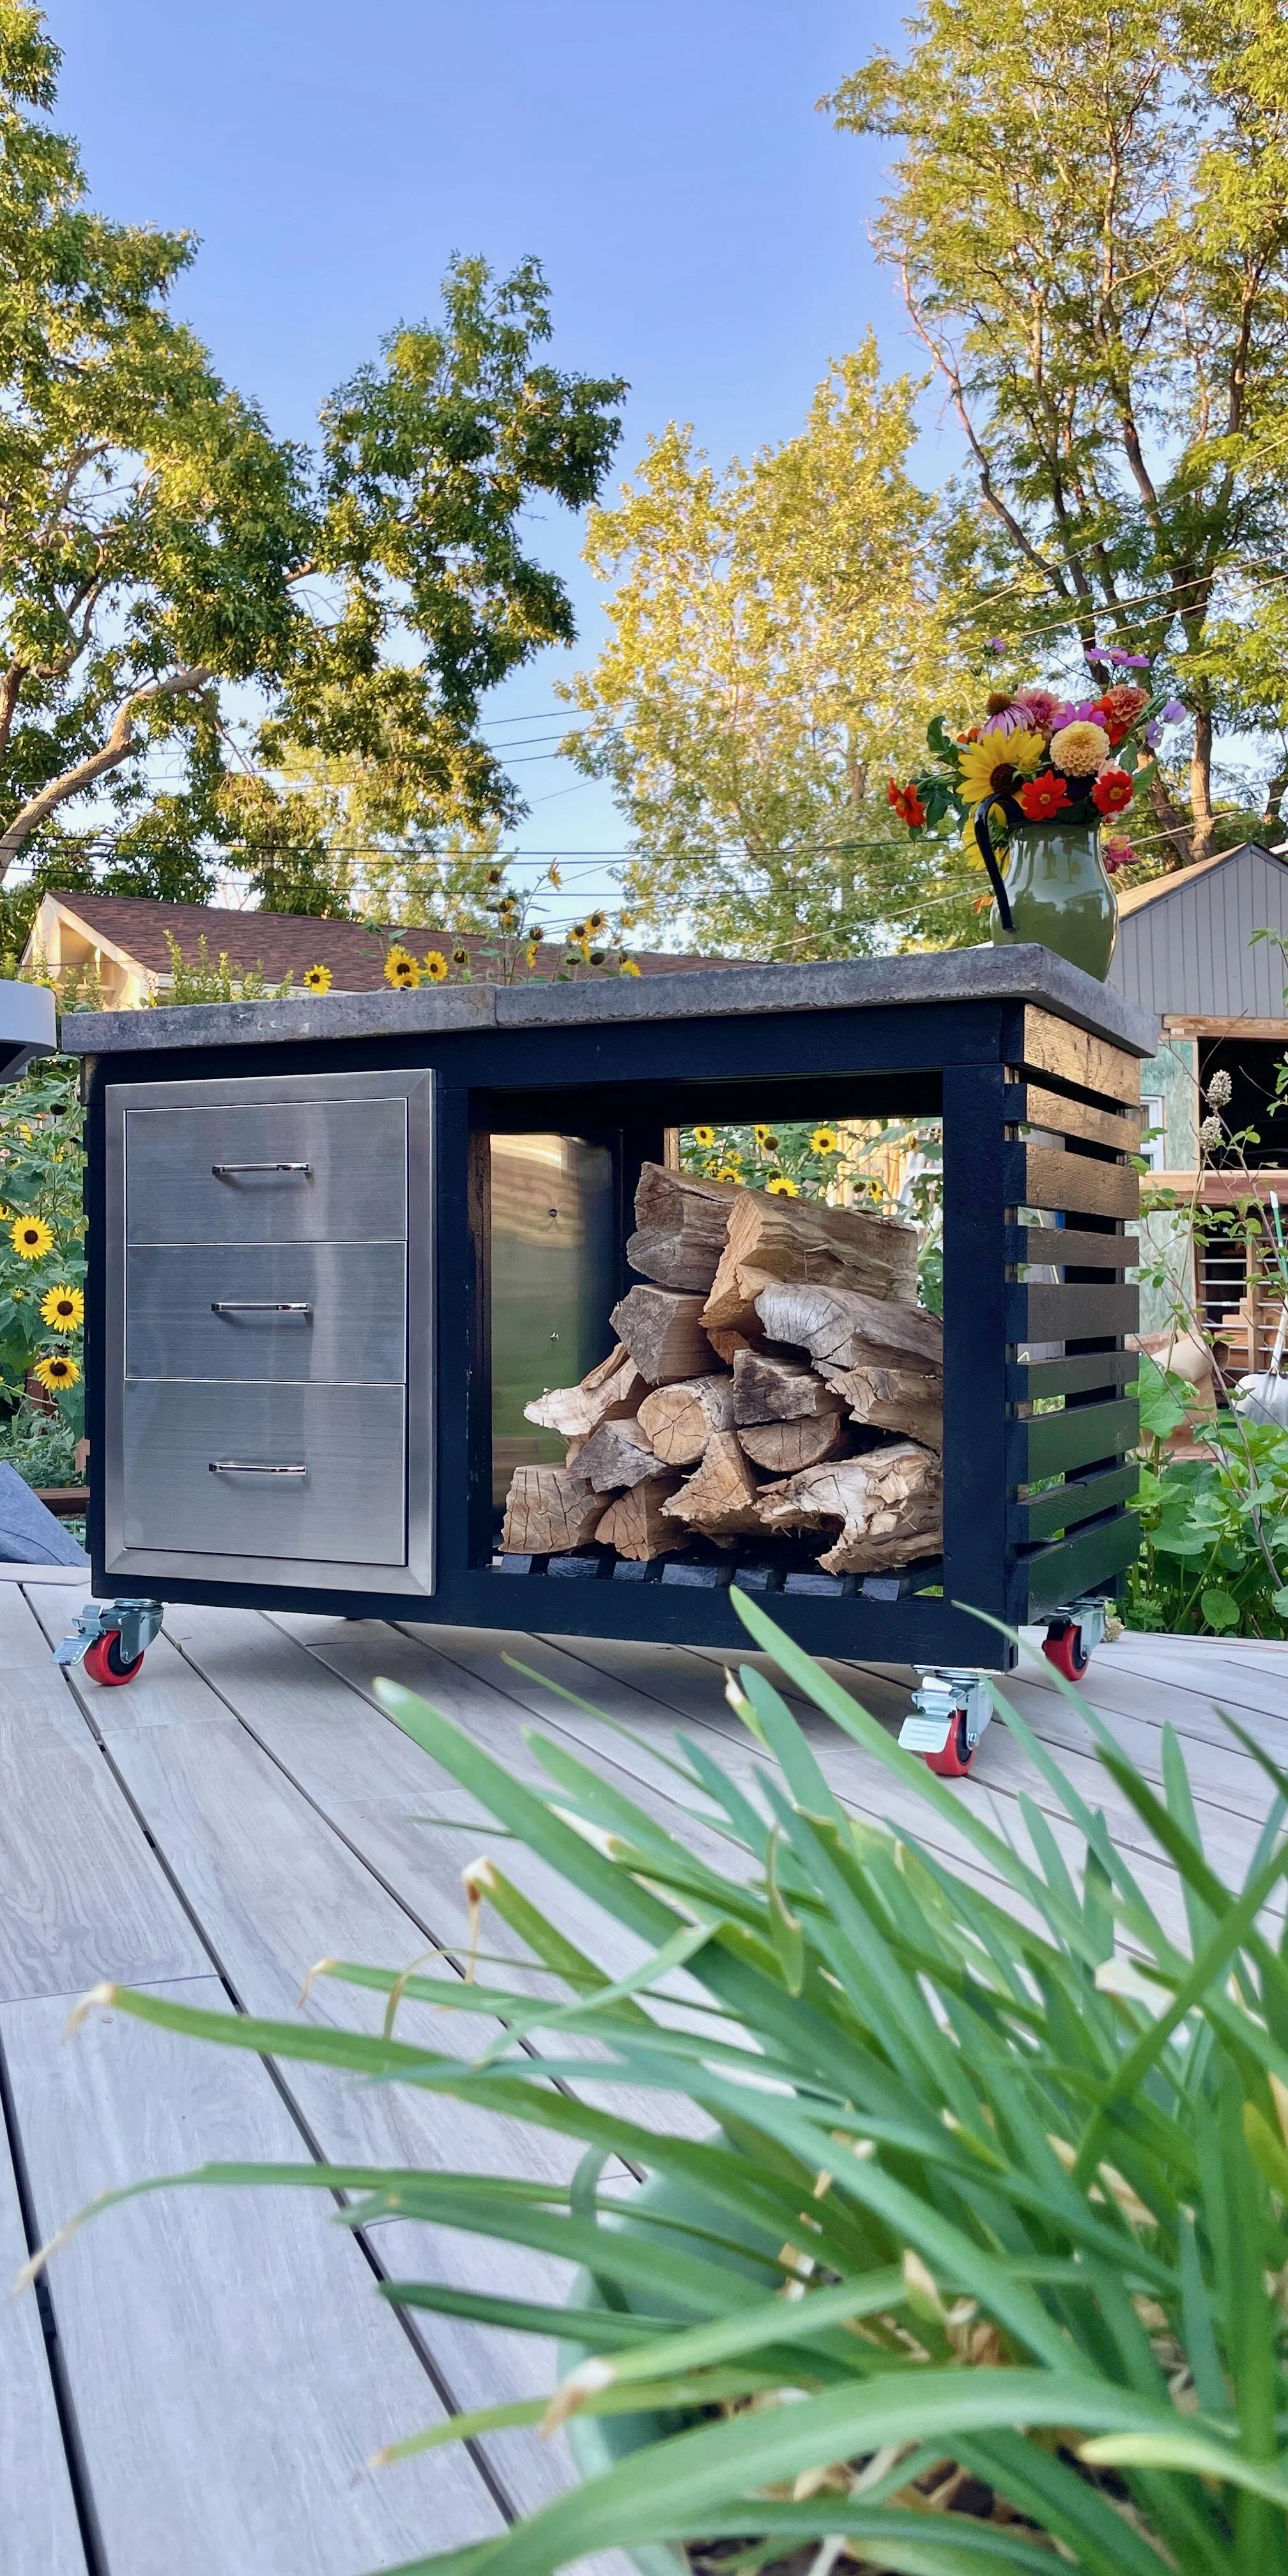
One of the rolling carts for our Outdoor Kitchen with firewood storage and drawers as well.
DIY OUtdoor Kitchen
Our Cooking Zone is also a great area for our firepit on cold nights. We put everything in the Outdoor Kitchen on wheels so that it can be moved around as needed, and the Cooking Zone can be reconfigured.
Furnishing Your Deck: Choosing the Right Furniture


Having a deck is wonderful, but to make it truly homey and functional, you need to have great furniture, too. There are wonderful outdoor furniture options, and you truly can set up a full living area outside. When we were considering outdoor furniture, we knew we wanted several things:
Durability: plastic degrades very quickly, so we wanted furniture that had few or no plastic parts
Comfort: we wanted to be able to entertain and to have comfortable places to sit outside
Flexibility: we wanted to be able to reconfigure our spaces if our circumstances changed over time.
In the end, we chose furniture and pergola kits from Toja Grid, and I have written extensively about both:
Of course, building a deck is expensive, so often furnishing it comes later — and that is just fine. If you aren’t going to be able to do everything at once, keep some key measurements in mind as you build your deck:
Desired table size
Number and placement of chairs
Desired sofa or chair sizes
Approximate furniture configuration.
When you are able to choose your new furniture, looking for items within these sizes will help to make sure that everything fits and functions perfectly!
Design Tips:
Create shade if you don't have some – you will use your outside space more often. This could be a pergola, shade sails, umbrellas, or any number of other solutions. Check out this video for some shade ideas for your project.
Plan for a storage spot for pillows and rugs in rain and snow. We have a trunk in the changing room for pillows and couch covers which keep the cushions dry.
Furniture on wheels makes everything more flexible! And you can add castors to lots of things even if they don't originally have castors.
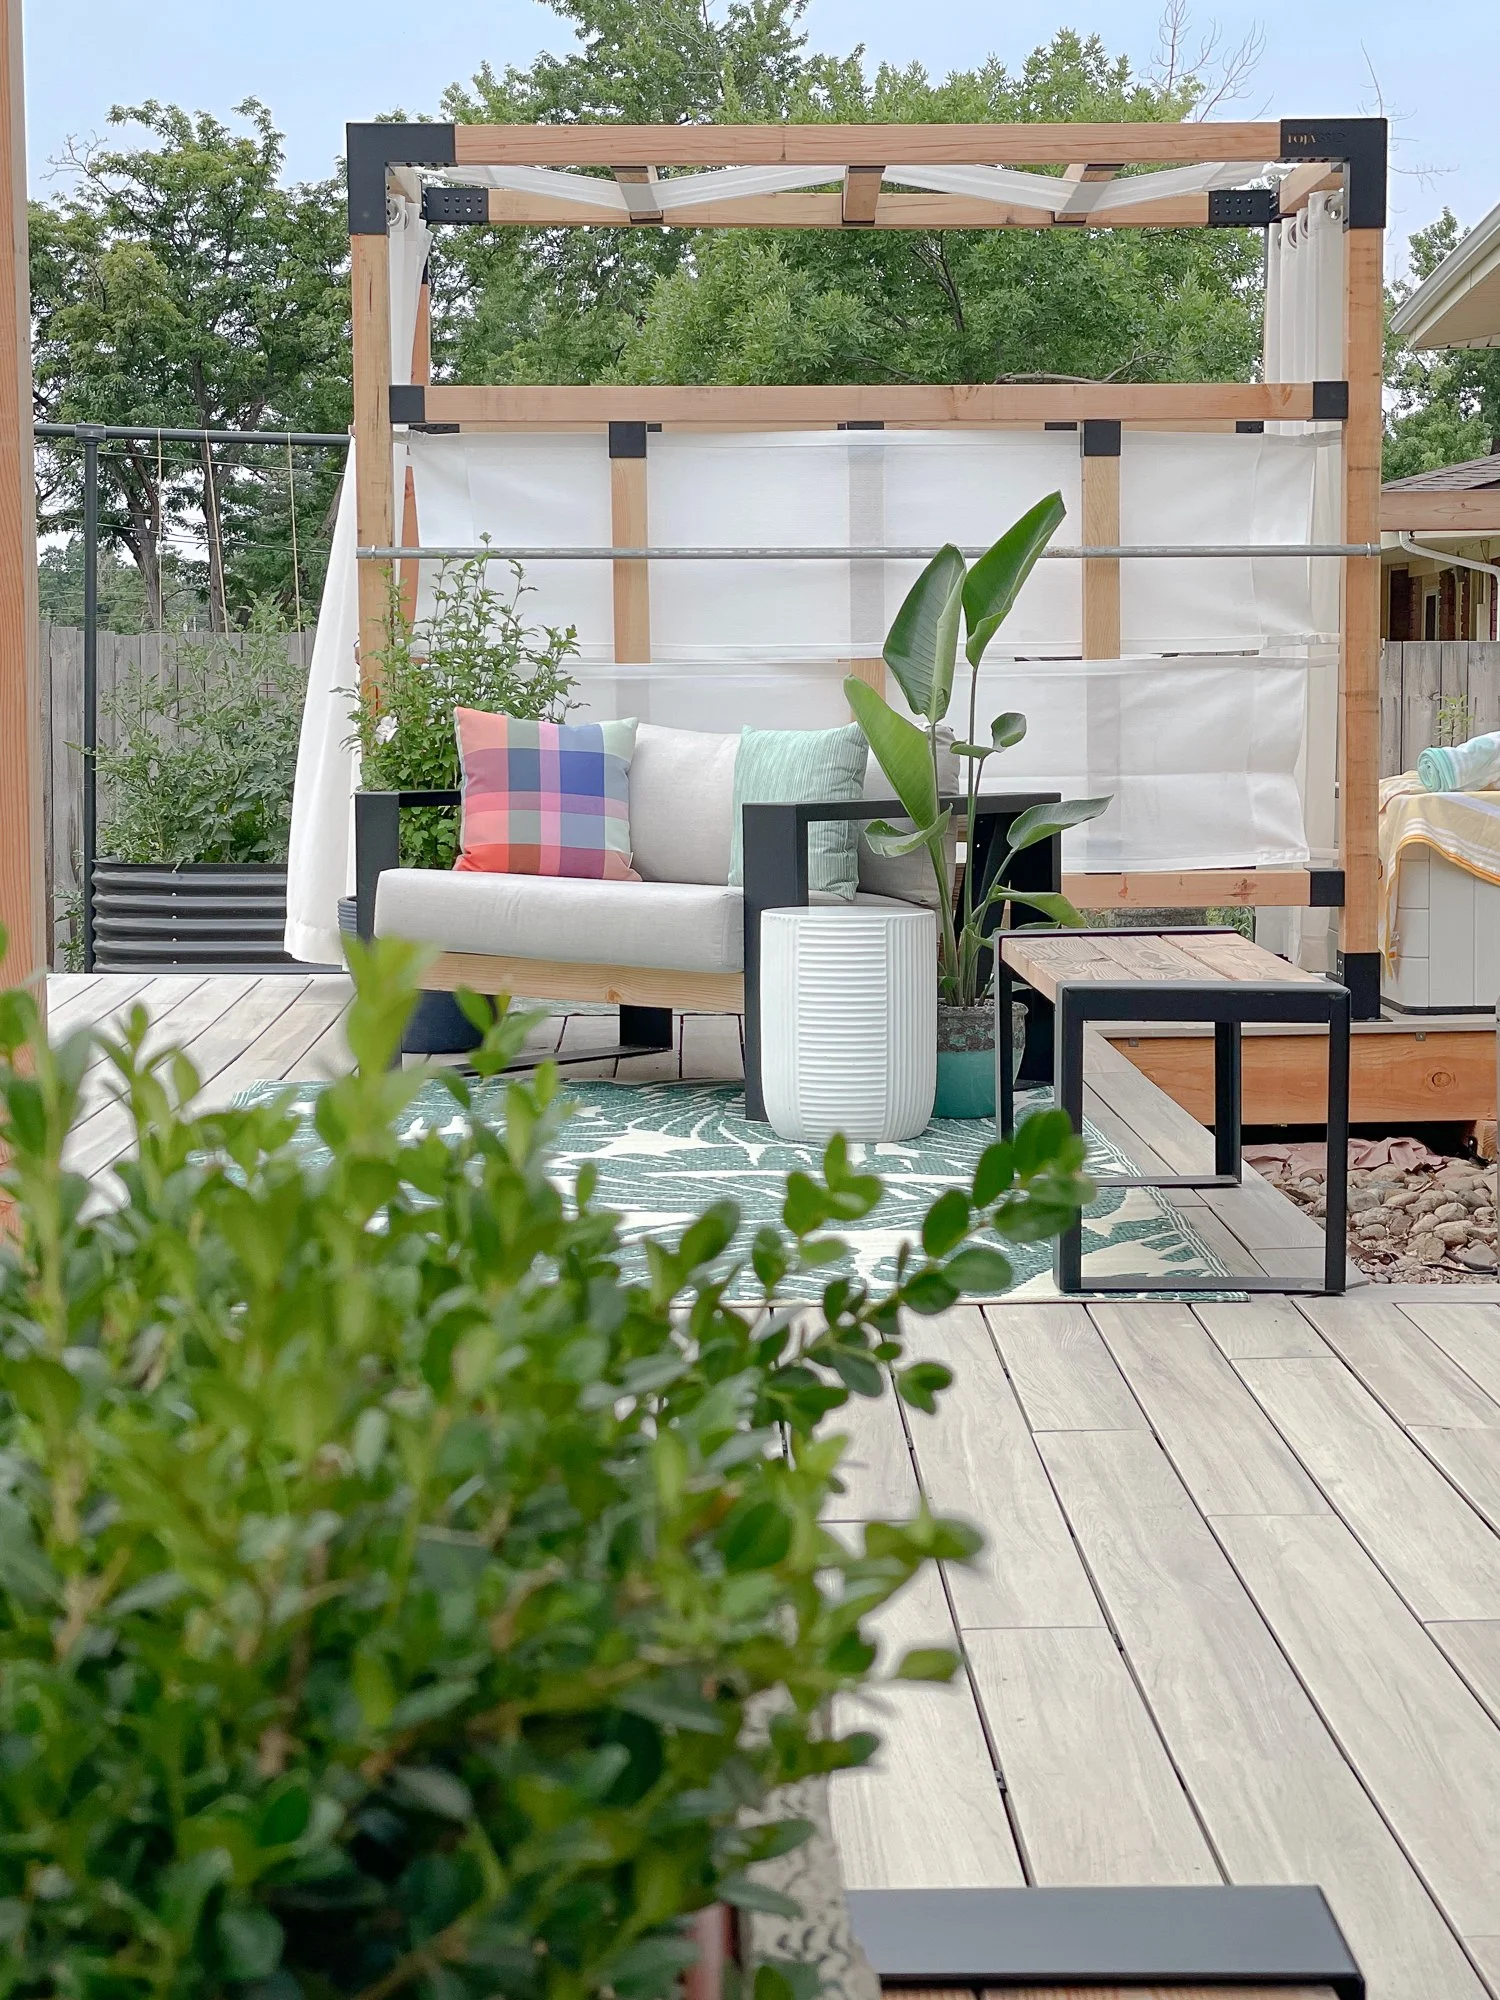
This chair sits in morning sun and afternoon shade making it a perfect place to sit by the pool. The pergola behind it functions as both a changing room for the pool and a screen from our neighbors.
Toja Grid
Pergolas & Furniture
Once the decking was installed, we needed to do two things: create shade and choose furniture. For both we turned to Toja Grid.
We used two of their pergolas: one as a changing room for the pool and the other as a shade structure over the seating area. We also chose their furniture for lounging.
Read more about what we used and why here:
Enhancing your Deck with Landscaping Ideas

Potted Bird of Paradise and Boxwood bring green texture to our space while lush hanging baskets of petunias provide color.
Plants are such a simple way to soften a space and to add color and texture, too. When everything was finished, I filled some of my favorite pots with tropical plants — bringing a little taste of the exotic to the space. Hanging baskets are also a simple and beautiful way to add color outside. Just be sure you have a good plan for watering them as they tend to dry out much faster than other pots.
We do not have landscaping around our deck, but that’s another beautiful way to soften a deck’s edges.
If you are adding plants, consider perennials which will survive year to year. Depending on your climate, potted evergreens might be a good option — giving year-round texture and color. For me: none of these plants will overwinter outside, but I will move many of them into The Greenhouse where they will overwinter to come out again in the spring. With the exception of the hanging baskets, they are all perennial plants. But they will not survive our cold winters here.
DIY Deck Maintenance: Seasonal Checklists

Our Outdoor Kitchen on casters!
As with any part of your home, maintenance of a deck is essential. And when you build a deck, creating a maintenance checklist helps so that you know what needs to be done and when.
Things to consider:
Regular sweeping and cleaning
Regular visual inspections
Maintenance of steps or stairs
Cleaning and clearing off the deck for maintenance
Sanding and refinishing/repainting
Replacing damaged boards
Preventing mildew, mold, and moss
Regular inspection of furnishings
One of the advantages of using Tanzite Stone Decks is that there is very little seasonal maintenance to be done. And that’s one of the reasons we chose to use Tanzite. Our maintenance checklist looks like this:
Weekly:
Sweep debris from deck
Wash off any stains, dirt, or mud
Quarterly:
Spray off entire deck with water to remove any built-up dirt and dust
Annually:
Inspect steps for safety
Inspect furnishings
Because Tanzite never needs to be refinished, the only other maintenance task will be to replace planks if they crack. But we haven’t had any issues with that so far.
As you consider building a deck — or replacing an older one — I wish you all the best! Be creative! Think about your space and what will make it livable for you in your climate. And let me know if you have any questions!