Video Tour | Mid Modern Mudroom Makover
Take a peek into my latest One Room Challenge project: the Mid Modern Mudroom Makeover
For the Spring 2021 One Room Challenge I am taking on our Mudroom. This is the workhorse of the house. It has to be filled with functional storage for all seasons, and ours is an unusual, dark room which needs more light, too. I’ll let you in on the inspiration board as well as plans for this welcoming room where organization and storage are critical — all infused with some Mid Modern style. Be sure to check in on all of the other ORC projects on the ORC blog here.
Here we are. Finally. At the end of the One Room Challenge. And I will tell you: earlier this week I wasn’t sure I would be done. But I am. Things are different than I had planned — the room is blue, not green; several items never arrived. But the Mid Modern Mudroom is done, and I am excited to share it with you!
We first saw this house on Facetime when we lived in LA. Our realtor walked us through several houses, and when she opened the door to the Mudroom she said, “I have no idea what this room is…” But I knew. It could be a mudroom — a room I had wanted for years. I knew this strange, ugly, and awkward space had so much potential. We just had to unearth it.
So here’s where we began: the Mudroom is an L-shaped room. I divided it into two separate zones with distinct functions: the Storage Room and the Mudroom.
And this project had three big design priorities:
Function and Storage: there’s a lot to fit into this strange little room without allowing it to look crammed. We’ll see if I can accomplish that!
Light and Lighting: this room has no windows, so we will be replacing the exterior door with something that will let in some natural light. We will also replace all of the light fixtures in the space, too.
Mid Century Style: it all has to work together, and the room needs some style, too. I’ll be using a combination of new and vintage items to give it a Mid Century vibe — I’m thinking Mid Modern Milan, personally.
I did a live tour on Amazon Live of the finished room, and I wanted to share it with you as well! I am so pleased with how it turned out! It is functional, bright, and beautiful. I hope you enjoy!
Sources
If you see something that you like in this room, I have all of the sources available for you here:
My Amazon Storefront: for organizational items, hardware, rugs, and accessories
The shelving is the Elfa collection available at The Container Store.
Most of the furniture is vintage.
The light fixtures came from Illuminate Vintage.
The cabinetry is from Ikea customized and reconfigured by us.
Questions or comments? Just let me know! I’d love to hear from you!
Thanks to my sponsors for this project! Interested in being a sponsor? Let me know!
Don’t miss a single update!
Sign up and each installment of the One Room Challenge will come directly to your email on Thursdays! And be sure to stop by the One Room Challenge Blog to check out the other creative renovations happening across the country. You can also follow #oneroomchallenge and #bhgorc on Instagram for more inspiration! Be sure to follow me as well!
Pin it!
Week Eight | June 27 | Mid Modern Mudroom Makover Reveal
Take a peek into my latest One Room Challenge project: the Mid Modern Mudroom Makeover
For the Spring 2021 One Room Challenge I am taking on our Mudroom. This is the workhorse of the house. It has to be filled with functional storage for all seasons, and ours is an unusual, dark room which needs more light, too. I’ll let you in on the inspiration board as well as plans for this welcoming room where organization and storage are critical — all infused with some Mid Modern style. Be sure to check in on all of the other ORC projects on the ORC blog here.
Here we are. Finally. At the end of the One Room Challenge. And I will tell you: earlier this week I wasn’t sure I would be done. But I am. Things are different than I had planned — the room is blue, not green; several items never arrived. But the Mid Modern Mudroom is done, and I am excited to share it with you!
We first saw this house on Facetime when we lived in LA. Our realtor walked us through several houses, and when she opened the door to the Mudroom she said, “I have no idea what this room is…” But I knew. It could be a mudroom — a room I had wanted for years. I knew this strange, ugly, and awkward space had so much potential. We just had to unearth it.
So here’s where we began: the Mudroom is an L-shaped room. I divided it into two separate zones with distinct functions: the Storage Room and the Mudroom.
And this project had three big design priorities:
Function and Storage: there’s a lot to fit into this strange little room without allowing it to look crammed. We’ll see if I can accomplish that!
Light and Lighting: this room has no windows, so we will be replacing the exterior door with something that will let in some natural light. We will also replace all of the light fixtures in the space, too.
Mid Century Style: it all has to work together, and the room needs some style, too. I’ll be using a combination of new and vintage items to give it a Mid Century vibe — I’m thinking Mid Modern Milan, personally.
Part One: The Mudroom
Since this is the entrance we use coming and going from our home, it is an important space. The Mudroom entrance was nondescript and prefunctory before — with no character or style. It used to be a one-car garage which was enclosed by a previous owner. Additionally, there were no windows into the room, and the door was an old metal door for a garage.
I have been on the hunt for Mid Century doors for this house for several years. Finally, this spring I found two doors — a matched set — at a local architectural salvage place. I had been quoted $12,000 to replace both the front and Mudroom doors with new ones, but this pair of vintage Mid Modern doors cost $650 total.
The doors came out of a church and are heavy and fabulous, but they needed some work. So I spent more than a week sanding and painting in the back yard. And here’s the finished result.
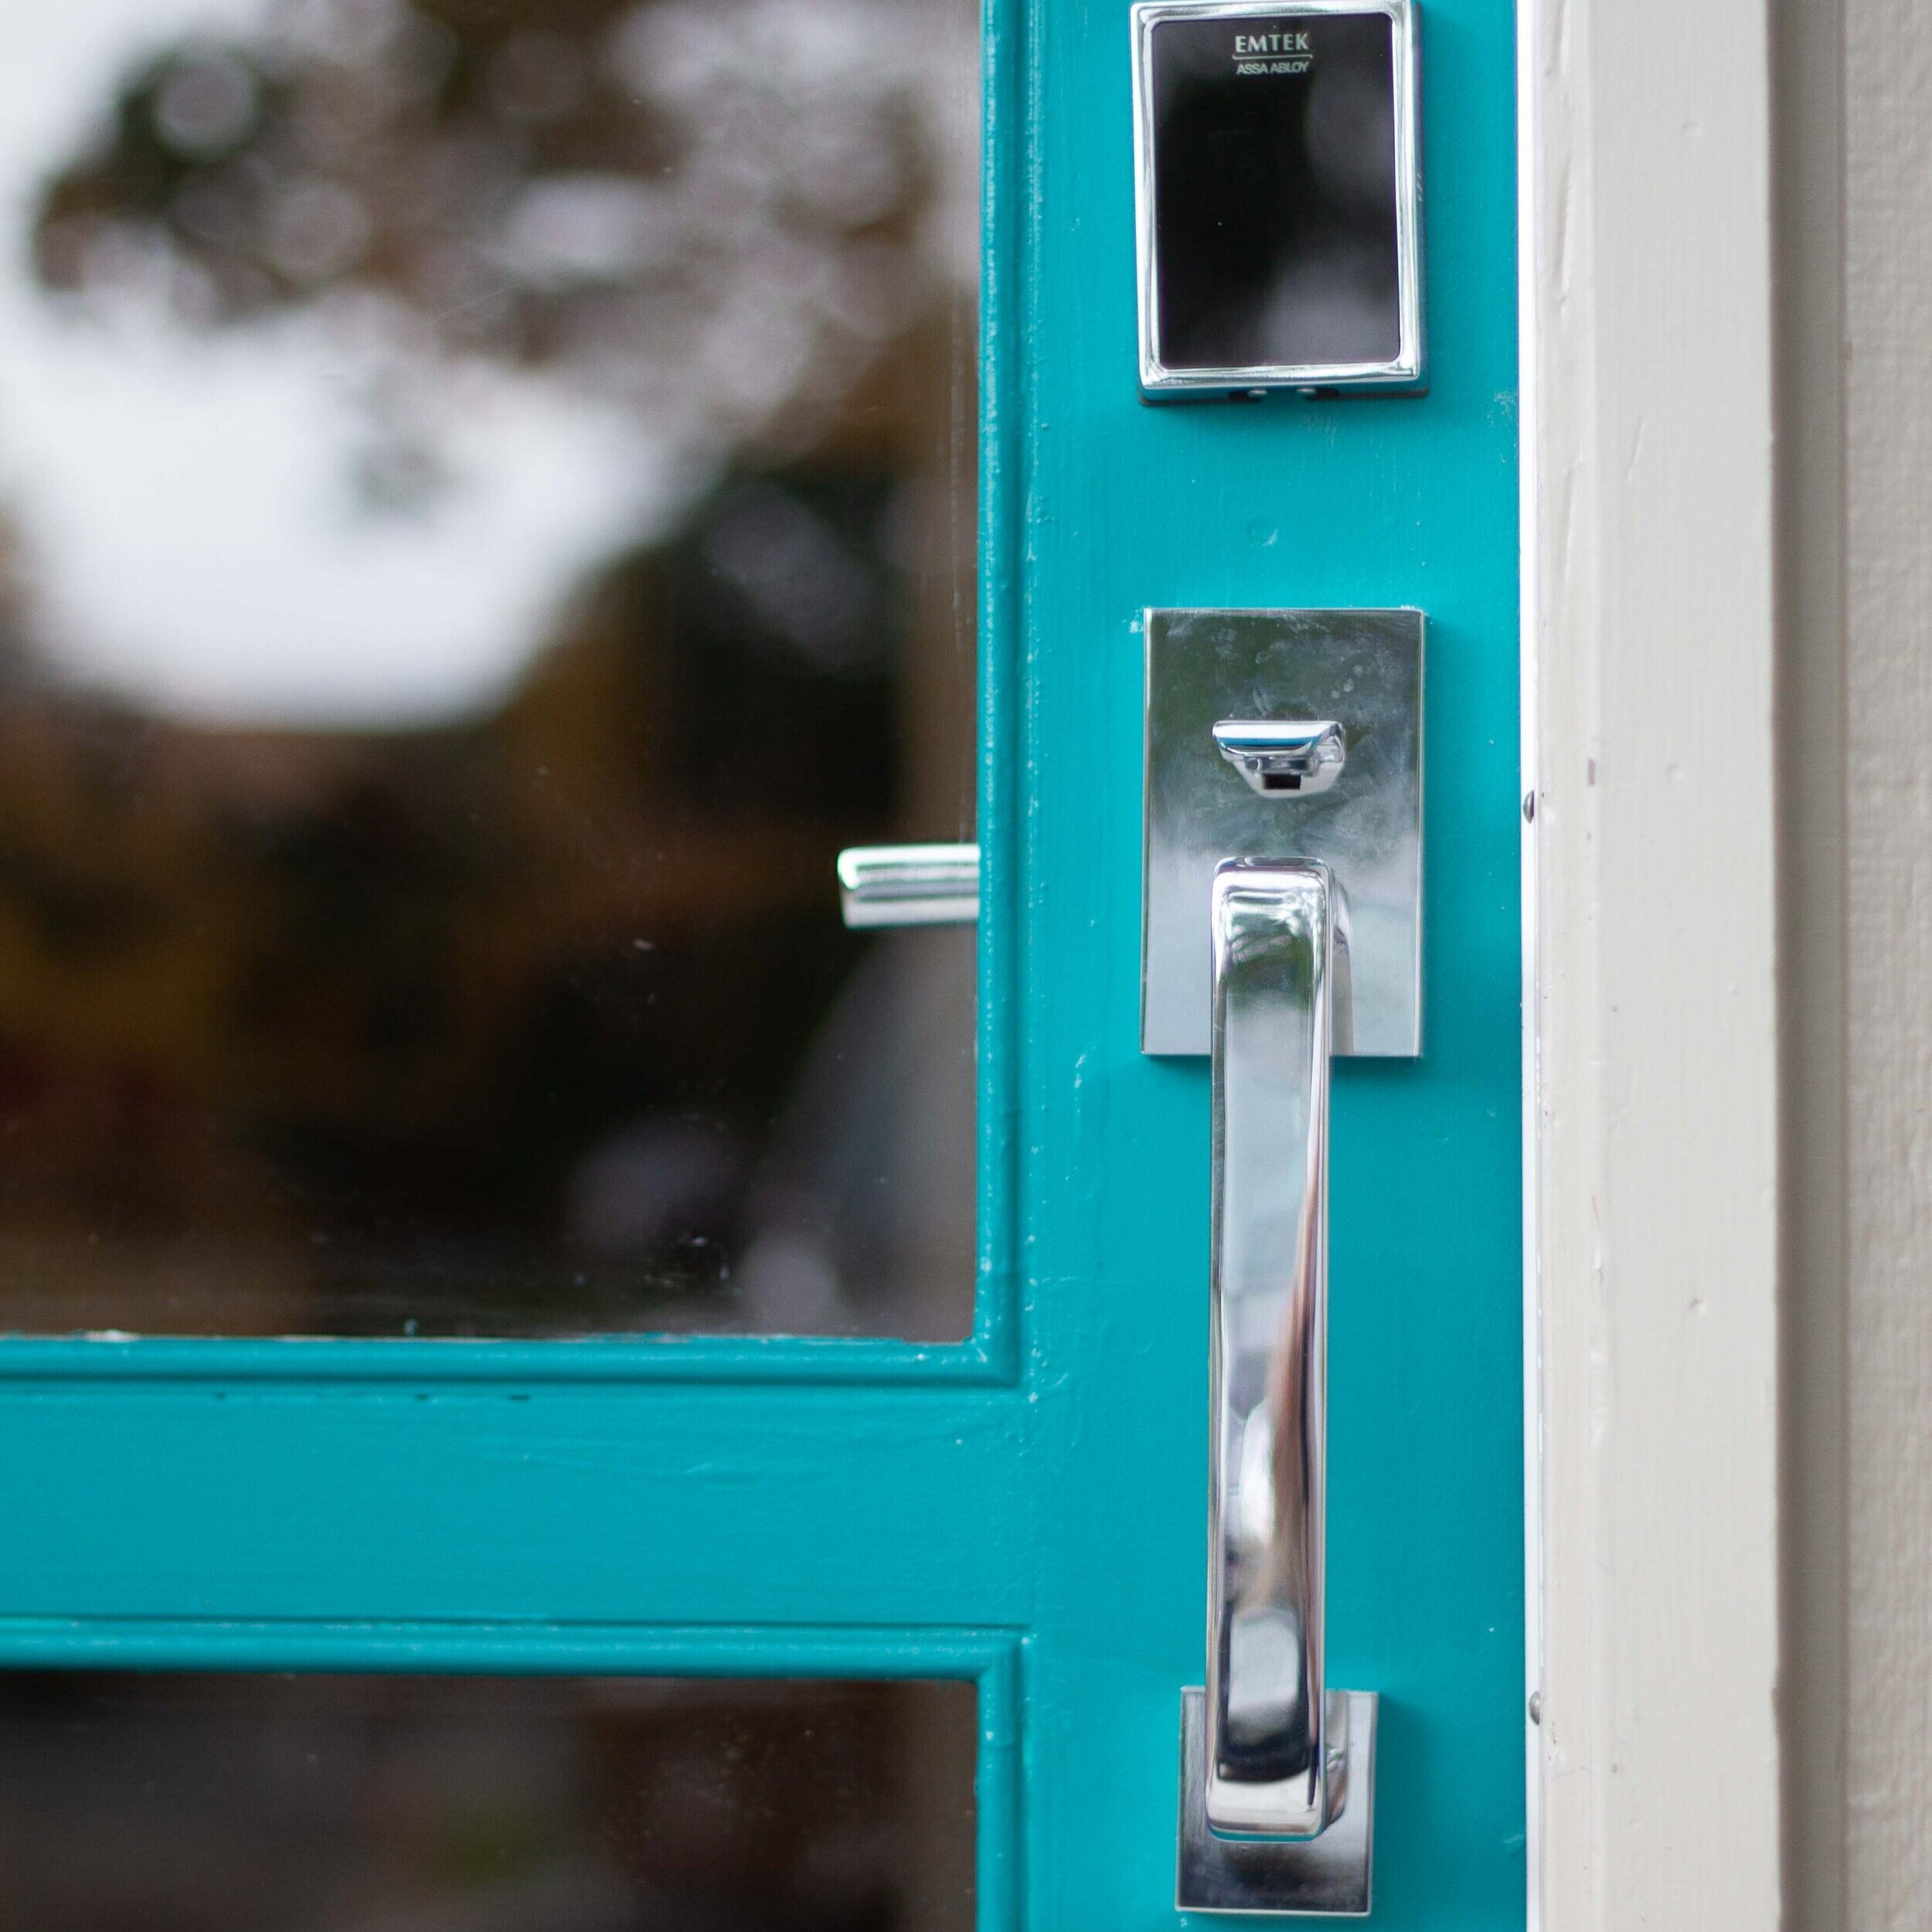
Emtek sent this gorgeous door hardware to use on our vintage door. We now have keyless entry and chrome handles that are absolutely perfect. I chose Emtek because they offer amazing hardware customization. I was able to mix and match the features and look that I wanted for each door. I can’t wait to show you the front door — once we get that one hung, too!
But for now, let’s just go inside! Welcome to our new Mudroom!
Perhaps a refresher on where we began… dark, windowless, and lacking any sort of function.
And here’s the finished product!
Part One: The Mudroom
A good Mudroom functions as the drop zone for the comings and goings of a household. We live in Colorado where we need good winter clothing and accessible storage. We are also a shoe-free household, so the Mudroom needed to accommodate all of our shoes as well.
My husband designed a very functional cubby system from several Ikea Billy bookcases and a countertop. He started this two years ago and nearly finished it — and then life got in the way. So it has been functional but unfinished for two winters. It was time to take it to functional and finished.
Each of us has a series of smaller bins for hats, gloves and mittens, and scarves. We also have designated places to hang coats and jackets as well as bags and purses. Shoe storage is underneath. And I positioned hooks for longer items like dog leashes and snowpants on the wall to the side.
The storage bins at the top are for items we don’t use as frequently, and the top is dressed with vintage books and globes. But if we need more storage space eventually, we can place more bins at the top, too.
It’s customary to show Mudroom storage when it is staged — hardly full and tastefully appointed with the obligatory straw hat and basket. But that’s not life with a Mudroom, frankly — not at our house, anyway. So, bucking the trend, here is a real-life Mudroom with everything put away in its place. There are just two jackets missing — they are at the dry cleaners.
This room was supposed to be green. But the rug, which had been described as being green and blue, arrived and is definitely blue. I didn’t really have time to make a change, so… now it is a turquoise room. Just inside the door — which was originally supposed to be stained — I placed a chair which I’d bought for the Fall 2019 One Room Challenge. This Mid Century piece was a Facebook Marketplace steal and feels very Camelot. It never worked in my office, though, and has been in the living room for the last 18 months. Now it has the perfect home.
Next to it is a chunk of the maple tree we had to cut down in our backyard this spring. We saved many of the tree’s branches, and I was glad to use a piece in the Mudroom. I used a draw knife and peeled the bark, sanded it a bit, and voila! Free table!
The mirror is an old window that I found by the side of the road about 25 years ago. I had a mirror cut for it and added some hooks. We have used it for our car keys and a quick inspection before leaving for many years.
The dresser and the lamp are both Mid Century pieces — Facebook Marketplace finds. Emtek sent some glass pulls which dress the drawers beautifully. The rabbit art piece is a Japanese noren — a doorway curtain. It’s hung from a thin scrap of walnut with a simple end detail.
One of the design priorities was to bring better light into this room. Not only does the new door provide more light, but I also replaced the truly terrible original fixture with a Sputnik-style light from Illuminate Vintage (the Houston in chrome). With five lights, it makes the room bright and cheery even at night — a shocking difference given the lack of light to which we had become accustomed.
Part Two: The Room of REquirement
While doing the One Room Challenge, my family and I started to call this storage section The Room of Requirement, a Harry Potter reference. And here’s the thing: we live in a house without a garage, a basement, or an attic, so this little, skinny room is truly “the place where everything is hidden,” just like the Room of Requirement.
Before, it was a hot mess. We had just thrown in some cheap mental shelves and a leftover cabinet, and all the clutter landed in this room. The lighting was terrible — two sconces each with a single bulb. And there was absolutely no character to this room.
But here’s the after…
I chose the Elfa shelving system from The Container Store for the storage wall which worked beautifully. It is not the cheapest storage system out there, but it is incredibly flexible. We cut shelves to the right sizes, placed them close together to maximize the space, and used drawers to hold smaller items, too.
The whole wall is organized into zones: cleaning, kitchen, tools, holiday storage, seasonal items. I emptied the entire room and KonMari’d everything taking loads of items to be donated. So everything here has been thoughtfully considered and deserves a place on the shelves.
Because the shelves are open, items will inevitably get dusty. I used plastic bins for seasonal decor, loose items, and things which can be grouped easily like vacuum cleaner attachments. Each like group has its own plastic bin with a lid. Each bin is labeled with a custom label from Owl and Ember. I sent Holly a list of what I needed, and she provided vinyl labels which will last a long time — but will also be relatively easy to remove if needed. She even sent blanks!
I created several rules for myself while organizing this wide range of disparate items:
No cardboard boxes. Everything is in a clear or visible container so I can see what’s inside.
No stacking. Even when I needed to use more shelves that are close together, nothing is stacked.
Every item gets a designated place in its zone.
Don’t keep things for “someday.” If we hadn’t needed it in the last year, out it went. We just don’t have the luxury of hanging on to things for someday.
By strictly employing those rules, I was able to create enough room in the Room of Requirement for a small refrigerator, our two dog kennels, and a treadmill with a TV.
Since The Room of Requirement is part of the Mudroom and doesn’t have a door, this room also needed to have some Mid Century style. My husband devised a paneling scheme with simple birch plywood and a walnut detail at each seam. This warmed up the room significantly and was quite simple to install.
I chose the Sedona chrome bowtie light fixtures from Illuminate Vintage. With two bulbs, they immediately doubled the available light in the Room of Requirement which makes finding things a lot easier — even at night. One of the most important changes in this project was bringing more light — and better quality light — into this space. And these fixtures do that with some fun Mid Modern style, too.
And since this is the Room of Requirement, I added a sign to that effect. I made this using my Cricut, and I have a full tutorial for how to make this — or any sign using vinyl and a scrap of wood. In this case, it is made from a scrap of the plywood from the paneling.
This was a project done in fits and starts, and it is so nice to finally have this room done! It’s functional and filled with light — all with some Mid Century style.
My husband, Romano, deserves thanks and love. He is my carpenter and construction teacher. Every project we do is a partnership, and I’m always thankful to be working with him. And our child, Bambino, was a great help, too. He worked with me sorting, purging, and organizing not to mention dusting and cleaning. So truly this was a family affair, and I’m thankful to have two such capable partners.
And a big thank you to Emtek who gifted me with door hardware, hinges, and drawer pulls. I’m so thankful for your sponsorship!
To Linda Weinstein, the creator of the One Room Challenge, I offer my most sincere thanks. Thank you for offering this kind of opportunity and for opening it up to anyone. And to Better Homes and Gardens, the ORC media sponsor: thank you for making this possible! And to all of the other ORC participants: I’ll be sure to stop by to admire your work! It is always fun to do this together!
Thanks for following along!
Cheers!
Angela
Thanks to my sponsors for this project! Interested in being a sponsor? Let me know!
Don’t miss a single update!
Sign up and each installment of the One Room Challenge will come directly to your email on Thursdays! And be sure to stop by the One Room Challenge Blog to check out the other creative renovations happening across the country. You can also follow #oneroomchallenge and #bhgorc on Instagram for more inspiration! Be sure to follow me as well!
Pin it!
Week Seven | June 17 | Garages and Roses
Take a peek into my latest One Room Challenge project: the Mid Modern Mudroom Makeover
For the Spring 2021 One Room Challenge I am taking on our Mudroom. This is the workhorse of the house. It has to be filled with functional storage for all seasons, and ours is an unusual, dark room which needs more light, too. I’ll let you in on the inspiration board as well as plans for this welcoming room where organization and storage are critical — all infused with some Mid Modern style. Be sure to check in on all of the other ORC projects on the ORC blog here.
So, it has become customary for me to begin with an update on the garden.
It is blisteringly hot here. We don’t usually get this kind of heat in Colorado -- not this much for this long this early in the summer. It’s a bit of a shock, frankly. So I have been coddling my plants, watering them in the mornings to cool their roots for the day. Tonight I need to feed them all once the temperature cools down a bit.
But the roses! Let’s talk about the roses! June is busting out all over! If you’ve been around awhile, you may remember the story of our rose bushes. According to our neighbor, each house in this area was given several rose bushes as part of the landscaping in 1958 when the homes were built. We have three that might be some of those originals, at least that’s what our neighbor thinks. And their roots are huge and strong, so I think it is possible.
Well, this week those buds opened, and we have been treated to a gorgeous flush of pink, magenta, and crimson. That these fleeting, living poems now thrive out my back door brings such joy.
A Note about the One Room Challenge… and before we go on, I’m going to tell you something that’s really important to me. Unlike a lot of ORC participants, I don’t save it all for the big reveal. Some people want to keep their readers guessing, and that’s a choice. I actually hate that approach, though. I feel like it gives people unrealistic expectations for home renovations.
I also am not going to stage this room for the big reveal. Part of this project is a storage room. We don’t have a garage, attic, basement — this is it. And it would be disingenuous to only put the pretty stuff in, dress a few shelves with plants, and tell you it was done. That’s not real. I will make this room as beautiful as it can be, but you’ll also see a lot of toilet paper, mis-matched plastic bins, and the real stuff it takes to run a house because that’s what will always be in this room.
And now for an update on the progress…
The Last Mudroom Update
For those of you who are new: the Mudroom is an L-shaped space with two functions: the entryway and the storage room.
I am writing this sitting outside on my patio, guarding my precious vintage doors. They are sanded and repaired, and I just put the first coat of primer on one side. I checked the weather today: no chance of rain. But as I was working, the wind picked up, the clouds moved in. It’s hot. Dry. And just plain odd. In Texas where I grew up this would be tornado weather. Here in Colorado, this kind of weather often means hail. So I am sitting watch, ready to throw something over the tops of the doors to protect them if needed.
Living without a garage is ok most of the time, but there are a few times each year -- a few projects or weather systems or something -- which make me long for a garage. Ironically, we ended up getting this house because a sale fell through: the other buyers decided they wanted a garage. We have lived without a garage in many of our houses, so we figured we could make it work. And we do, most of the time, but today I am sitting and waiting.
Of course, this house used to have a garage. It is now the Mudroom and part of our living room. It was a one-car garage and a small one at that. Most of the houses in our neighborhood with the same garage style have converted them over the years -- some into living space like our house, some into two-car garages with an addition. Time marches on.
The vintage doors seem to be a project that will never end! I sanded and sanded and sanded. And then we had to repair the places where the original handles were attached. My husband turned some plugs for each hole which we then glued in, shaved off, and sanded down. Then all of the holes and marks had to be filled with wood putty which then needed to dry. In total, this actually isn’t all that much work, but there’s a lot of waiting for things to dry — and then working and parenting. It just all slowed down this week.
But the scariest part of the project happened today: we cut each door to fit their new openings. Eek! Measure twice. Cut once. Breathe. I was terrified and left it to my husband’s more-than-capable hands. But now they are cut and primed. Hopefully the first coat of paint will go on this afternoon.
The paint color is a gorgeous peacock blue from Kelly Moore called Barbados Bay (KM5051). It is so yummy! I am painting both sides, so the color will carry through from the outside in both in the Mudroom and in the front entryway. I am not usually a blue person — green is my color — but this has just the right balance of blue and green, and hopefully it will pop both outside and inside, too.
I have a bunch of small projects in the works, but I have very little to report this week. We spent a lot of time this weekend working in the backyard and playing in the pool. It has been really hot here as it has been across the country which makes getting work done very slow. But I have the punch list ready, and I just have to pick off the small projects one by one to get them done. A dab of paint here. A few screws there. And a large-scale art project -- that one will be fun, but a good challenge! There isn’t much left to do!
Ok. I have a date with a paint brush, so that’s all for today! Follow me on Instagram where I’ll post about the doors as I work on them. I am soooo in love with them!
The Design Priorities
So where are we on the project plan? Well, I’ve distilled this project down to three big design priorities:
Function and Storage: there’s a lot to fit into this strange little room without allowing it to look crammed. We’ll see if I can accomplish that!
Light and Lighting: this room has no windows, so we will be replacing the exterior door with something that will let in some natural light. We will also replace all of the light fixtures in the space, too.
Mid Century Style: it all has to work together, and the room needs some style, too. I’ll be using a combination of new and vintage items to give it a Mid Century vibe — I’m thinking Mid Modern Milan, personally.
This week was all about the doors. Now I just have to pull it all together!
Clean and crisp. White and wood. The Mid-Modern Mudroom Makeover will bring functional design and organization into one of the hardest-working rooms of our home. With a combination of vintage pieces, easy-to-clean fabrics, and storage solutions for every season, the result will be a mudroom that nods to our home’s Atomic Ranch roots while making space for our 21st century family.
To Linda Weinstein, the creator of the One Room Challenge, I offer my most sincere thanks. Thank you for offering this kind of opportunity and for opening it up to anyone. And to Better Homes and Gardens, the ORC media sponsor: thank you for making this possible! And to all of the other ORC participants: I’ll be sure to stop by to admire your work! It is always fun to do this together!
Thanks for following along! I’m so excited for the next phase!
Cheers!
Angela
Thanks to my sponsors for this project! Interested in being a sponsor? Let me know!
Don’t miss a single update!
Sign up and each installment of the One Room Challenge will come directly to your email on Thursdays! And be sure to stop by the One Room Challenge Blog to check out the other creative renovations happening across the country. You can also follow #oneroomchallenge and #bhgorc on Instagram for more inspiration! Be sure to follow me as well!
Pin it!
Week Six | June 10 | A Date with a Sander
Take a peek into my latest One Room Challenge project: the Mid Modern Mudroom Makeover
For the Spring 2021 One Room Challenge I am taking on our Mudroom. This is the workhorse of the house. It has to be filled with functional storage for all seasons, and ours is an unusual, dark room which needs more light, too. I’ll let you in on the inspiration board as well as plans for this welcoming room where organization and storage are critical — all infused with some Mid Modern style. Be sure to check in on all of the other ORC projects on the ORC blog here.
So, it has become customary for me to begin with an update on the garden.
First and foremost: my roses have started to bloom! The houses in our neighborhood were built in 1958, and each house was, according to our neighbor, given 3 rose bushes. Our red roses may be one of the original bushes planted in 1958 — at least that’s what our neighbor thinks. And all of the roses have begun to bloom! Prepare yourself for flower photos on Instagram!
We spent a lot of time this weekend doing unglamorous things like hauling gravel and moving river rock from one place to the next. Previous residents of this house used gravel and river rock with abandon — and sometimes just dumped it for no good reason. So we keep having to move it! Good thing it isn’t heavy or anything. We are using it to line paths between raised beds and to keep plantings away from the new fence as well. Someday we will cover the ugly gravel with a layer of pea gravel to make it prettier, but this makes a good substrait.
I am also experimenting with an ancient garden watering system: the olla. Sometimes called a Roman Pot, ollas have been used for millennia on multiple continents for watering crops in dry areas. If this is successful, I’ll create a tutorial for how to make them — they are really easy! I’ve placed them in the beds with our pumpkins and melons to keep these water-hungry plants happy.
We worked a bit on the pergola last weekend. When we had to take down our 70 year-old maple tree a few months ago, we lost all of the true shade in our yard. So we are building some. The pergola structure is nearly done which means I will need to sew the shades soon. And we built several of the planter boxes which flank the pergola as well. The hard work is yet to come: digging out the ground underneath and filling it with decomposed granite. That will happen soon, though.
A Note about the One Room Challenge… and before we go on, I’m going to tell you something that’s really important to me. Unlike a lot of ORC participants, I don’t save it all for the big reveal. Some people want to keep their readers guessing, and that’s a choice. I actually hate that approach, though. I feel like it gives people unrealistic expectations for home renovations.
I also am not going to stage this room for the big reveal. Part of this project is a storage room. We don’t have a garage, attic, basement — this is it. And it would be disingenuous to only put the pretty stuff in, dress a few shelves with plants, and tell you it was done. That’s not real. I will make this room as beautiful as it can be, but you’ll also see a lot of toilet paper, mis-matched plastic bins, and the real stuff it takes to run a house because that’s what will always be in this room.
And now for an update on the progress…
Part One: The Storage Room
For those of you who are new: the Mudroom is an L-shaped space with two functions: the entryway and the storage room.
I did exactly nothing in this part of the room this week except retrieve some toilet paper for one of the bathrooms. That’s it. More yet to do, but it is in pretty good shape.
Part Two: The Mudroom
This week we had to do a lot of waiting. Last week we installed the new light fixtures, but in doing so we discovered a wiring problem which required an electrician. But now the fixtures are in, the proper lightbulbs arrived, and the room is lit at last! It’s astonishing what a difference this makes! Before, even with the light on, I had to open the door to be able to take a photograph in this room. We have been so used to this being a dark room, it’s going to take some time adjusting.
What’s the difference? We went from a fixture with two bulbs and a frosted glass shade, to one with five bulbs and no shades. We did the same in the storage area where we went from two single-bulb fixtures with frosted shades to dual-bulb sconces with no shade — doubling the light in that little room.
Overhead lighting shouldn’t be the primary lighting source in lots of living spaces — a bedroom for example. It is too harsh and casts lots of shadows. But in a utilitarian space like the Mudroom, it’s essential. Now finding things will be so much easier, and flipping on a light when coming home will be much more welcoming on a cold winter night.
And I can’t wait to get the new door in…
The rug I ordered arrived, but it is much more blue than I had hoped. It was described as being green and looked green in the photos, but it tends toward blue. I am on the fence about keeping it.
I am hard at work on the vintage door for this room. This is one of those times when I really miss having a garage. We set up a temporary work space under the pergola which is great unless it rains, so I am hustling to get the doors sanded and finished.
If you are just joining me, these doors came out of a Mid Century church. I got them from a local architectural salvage yard, and they were a tiny fraction of what a new door would have cost! Added bonus: there are two! So I’ll be replacing both the mudroom door and the front door — both of which are on the same side of the house and visible from the street. Emtek sent me some gorgeous hardware, too. I can’t wait to install it!
In removing the hardware, I found big holes which will need to be patched. That sealed it: I am going to paint both sides of the doors rather than staining one side. I am excited about bringing another pop of color into the room, too.
The doors still had their original finish and are in amazing shape. I started sanding with 100 grit sand paper which took most of the finish off. Then I followed with 120 grit. I’m nearly done with one side of each door — just have to finish the fine sanding of the trim around each window. Then I will flip them and do the other side the same way.
Ok. I have a date with a sander, so that’s all for today! Follow me on Instagram where I’ll post about the doors as I work on them. I am soooo in love with them!
The Design Priorities
So where are we on the project plan? Well, I’ve distilled this project down to three big design priorities:
Function and Storage: there’s a lot to fit into this strange little room without allowing it to look crammed. We’ll see if I can accomplish that!
Light and Lighting: this room has no windows, so we will be replacing the exterior door with something that will let in some natural light. We will also replace all of the light fixtures in the space, too.
Mid Century Style: it all has to work together, and the room needs some style, too. I’ll be using a combination of new and vintage items to give it a Mid Century vibe — I’m thinking Mid Modern Milan, personally.
I said it last week, but it’s true this week, too: light and style. The function and storage are largely in place now. Having functional light fixtures makes a huge difference, and that new door will be bringing all the MCM glam when it is done! I can’t wait!
Clean and crisp. White and wood. The Mid-Modern Mudroom Makeover will bring functional design and organization into one of the hardest-working rooms of our home. With a combination of vintage pieces, easy-to-clean fabrics, and storage solutions for every season, the result will be a mudroom that nods to our home’s Atomic Ranch roots while making space for our 21st century family.
To Linda Weinstein, the creator of the One Room Challenge, I offer my most sincere thanks. Thank you for offering this kind of opportunity and for opening it up to anyone. And to Better Homes and Gardens, the ORC media sponsor: thank you for making this possible! And to all of the other ORC participants: I’ll be sure to stop by to admire your work! It is always fun to do this together!
Thanks for following along! I’m so excited for the next phase!
Cheers!
Angela
Thanks to my sponsors for this project! Interested in being a sponsor? Let me know!
Don’t miss a single update!
Sign up and each installment of the One Room Challenge will come directly to your email on Thursdays! And be sure to stop by the One Room Challenge Blog to check out the other creative renovations happening across the country. You can also follow #oneroomchallenge and #bhgorc on Instagram for more inspiration! Be sure to follow me as well!
Pin it!
Week Five | June 3 | Let There be Lights!
Take a peek into my latest One Room Challenge project: the Mid Modern Mudroom Makeover
For the Spring 2021 One Room Challenge I am taking on our Mudroom. This is the workhorse of the house. It has to be filled with functional storage for all seasons, and ours is an unusual, dark room which needs more light, too. I’ll let you in on the inspiration board as well as plans for this welcoming room where organization and storage are critical — all infused with some Mid Modern style. Be sure to check in on all of the other ORC projects on the ORC blog here.
It has been a week! Last week was the last week of school, and since we were still online, all the last week festivities happened at home. It was more than a bit chaotic, frankly! But hooray! The school year is done, and we have moved on to summer fun (safe at home, still, but fun nonetheless)!
We also had a glorious, rainy weekend! It was perfect for working outside and inside while the rain fell. Outside, I finished planting out around the pool. I used 55 gallon barrels to create big planters for the pool area, and I am in love with how they turned out. I’ll have a tutorial for that soon. I wanted something really inexpensive but large, and these planters are perfect!
The rain barrels are full, too. I will also do a tutorial for how to make these — again from 55 gallon barrels which I found on the Facebook Marketplace for $15 each. They were so easy, and super inexpensive. And now we have water for gardening on the side of the house where there isn’t a hose bib. It makes watering over there so much simpler.
And the Kitchen Garden has expanded from four raised beds to a total of nine. I’m delighted to have the extra space, and I’m eagerly awaiting the emergence of the seedlings I’ve planted! We have more gravel to haul back for the paths between the beds, and then I will put together a whole update on the garden expansion.
Lastly, we put in two raised beds at the back of the yard for rhubarb! There is a local rhubarb farm that sells their plants each year. I got two each of two different varieties. It will be a few years before we can harvest them, but I’m thrilled to have rhubarb eventually. It’s one of my favorite tastes of summer!
Ok. Back to the One Room Challenge… and before we go on, I’m going to tell you something that’s really important to me. Unlike a lot of ORC participants, I don’t save it all for the big reveal. Some people want to keep their readers guessing, and that’s a choice. I actually hate that approach, though. I feel like it gives people unrealistic expectations for home renovations.
I also am not going to stage this room for the big reveal. Part of this project is a storage room. We don’t have a garage, attic, basement — this is it. And it would be disingenuous to only put the pretty stuff in, dress a few shelves with plants, and tell you it was done. That’s not real. I will make this room as beautiful as it can be, but you’ll also see a lot of toilet paper, mis-matched plastic bins, and the real stuff it takes to run a house because that’s what will always be in this room.
And now for an update on the progress…
Part One: The Storage Room
For those of you who are new: the Mudroom is an L-shaped space with two functions: the entryway and the storage room.
This week we worked on the paneling — it is nearly done! But we had to wait for the light fixtures to arrive before we can finish it. They came yesterday, and we put them up last night. I’m thrilled with how they look! Now I just need the right light bulbs to arrive!
The fixtures are from Illuminate Vintage — a small lighting company in Texas. Since the two wall sconces are the only fixtures in the room, I chose sconces with two bulbs instead of one — and doubled the light in the room. The difference is amazing, actually. I love the fixtures, and I can’t wait to see them with proper lightbulbs!
I also now have labels for each of the plastic bins in The Room of Requirement, as we call the Storage Room. Holly of Owl and Ember custom made these cute MCM-style labels. They are vinyl and are super-durable. I just need to spend an evening putting them all on this week — and taking off all of the old moving labels and tags, too. Some of these bins have really put on the miles over the years!
That’s about all that happened in the Storage Room this week.
Part Two: The Mudroom
Traditionally the day after school gets out Bambino and I do a huge clothes try-on for summer. So last week we did just that — pulling out all of his outgrown clothing and determining what he needs for summer. I also went through all of the winter gear in the Mudroom and tidied up the storage. Hopefully this week I’ll be able to get the top of the Mudroom storage finished so I can accessorize that area.
As in the Room of Requirement, we have a new light fixture! It’s also from Illuminate Vintage — a Sputnik-style fixture. I love it! Originally, I wanted a true Sputnik fixture, but with the door swing, the bigger fixture I wanted just wouldn’t fit, so it had to be scaled back. This is a great compromise! But again, I need those light bulbs to come!
I also found some hooks which will be helpful for wet winter gear. I really wanted an Eames Hang-it-All from HermanMiller, but I just couldn’t afford the nearly $300 for a coat hook. I did find something similar at The Container Store, and at $30 it was in my budget. So those need to be hung this week, too.
But the big work will be on the new door for this room. It needs to be sanded and refinished. I think I’ll be painting the exterior side and oiling the interior, but we will see. It’s oak, and I don’t want it to be too yellow… I need to try a few things out before I decide. But we should have sunshine for the next few days, so it will be safe to work on it outside.
The Design Priorities
So where are we on the project plan? Well, I’ve distilled this project down to three big design priorities:
Function and Storage: there’s a lot to fit into this strange little room without allowing it to look crammed. We’ll see if I can accomplish that!
Light and Lighting: this room has no windows, so we will be replacing the exterior door with something that will let in some natural light. We will also replace all of the light fixtures in the space, too.
Mid Century Style: it all has to work together, and the room needs some style, too. I’ll be using a combination of new and vintage items to give it a Mid Century vibe — I’m thinking Mid Modern Milan, personally.
This week was really about light — new light fixtures! And they are also bringing that MCM style that we have been missing! But after several loads of donations and tidying up, I also made some progress on the function and storage front. Things are coming along, but I’m thankful we have eight weeks this round instead of just six!
Clean and crisp. White and wood. The Mid-Modern Mudroom Makeover will bring functional design and organization into one of the hardest-working rooms of our home. With a combination of vintage pieces, easy-to-clean fabrics, and storage solutions for every season, the result will be a mudroom that nods to our home’s Atomic Ranch roots while making space for our 21st century family.
To Linda Weinstein, the creator of the One Room Challenge, I offer my most sincere thanks. Thank you for offering this kind of opportunity and for opening it up to anyone. And to Better Homes and Gardens, the ORC media sponsor: thank you for making this possible! And to all of the other ORC participants: I’ll be sure to stop by to admire your work! It is always fun to do this together!
Thanks for following along! I’m so excited for the next phase!
Cheers!
Angela
Thanks to my sponsors for this project! Interested in being a sponsor? Let me know!
Don’t miss a single update!
Sign up and each installment of the One Room Challenge will come directly to your email on Thursdays! And be sure to stop by the One Room Challenge Blog to check out the other creative renovations happening across the country. You can also follow #oneroomchallenge and #bhgorc on Instagram for more inspiration! Be sure to follow me as well!
Pin it!
Week Four | May 27 | Pivot!
Take a peek into my latest One Room Challenge project: the Mid Modern Mudroom Makeover
For the Spring 2021 One Room Challenge I am taking on our Mudroom. This is the workhorse of the house. It has to be filled with functional storage for all seasons, and ours is an unusual, dark room which needs more light, too. I’ll let you in on the inspiration board as well as plans for this welcoming room where organization and storage are critical — all infused with some Mid Modern style. Be sure to check in on all of the other ORC projects on the ORC blog here.
Every day I think: “Why didn’t I just make our garden the One Room Challenge room this time?” Certainly there is more visible progress outside right now, but this has been a week of work inside as well. It’s also the last week of school, so there has been just a little bit going on at our house! Yowza!
And I’m just going to pause here to say… if you are a teacher who has been teaching online this year: Bravo! If you have been in the classroom or in a hybrid model: Bravo! You all deserve medals and a big raise! And thank you!
Ok. Here’s a peek into our garden projects this week before I get to the Mudroom… we have been building raised flower beds in the Potting Garden and planting in the Kitchen Garden.
I also cleaned out the Stock Tank Pool and filled it this week, but the water is still too chilly for swimming. It is warming slowly, though. Thinking about installing a Stock Tank Pool this summer? I have a whole guide for how to do it. We love ours!
Ok. Back to the One Room Challenge… and before we go on, I’m going to tell you something that’s really important to me. Unlike a lot of ORC participants, I don’t save it all for the big reveal. Some people want to keep their readers guessing, and that’s a choice. I actually hate that approach, though. I feel like it gives people unrealistic expectations for home renovations.
I also am not going to stage this room for the big reveal. Part of this project is a storage room. We don’t have a garage, attic, basement — this is it. And it would be disingenuous to only put the pretty stuff in, dress a few shelves with plants, and tell you it was done. That’s not real. I will make this room as beautiful as it can be, but you’ll also see a lot of toilet paper, mis-matched plastic bins, and the real stuff it takes to run a house because that’s what will always be in this room.
And now for an update on the progress…
Part One: The Storage Room
For those of you who are new: the Mudroom is an L-shaped space with two functions: the entryway and the storage room.
I am still fine-tuning the shelves in the Storage Room — or as we call it — The Room of Requirement. Open shelves like these create some challenges: everything gets dusty over time, and it all needs to be neat and tidy or it looks terrible. But clear plastic bins are a great solution, and the items that aren’t used regularly are all stored away in bins. They don’t all match, but once I get them labeled that won’t matter. Decorations are sorted by holiday and will be labeled appropriately.
I’ve organized the room into zones — grouping like items together and placing the things we use most often at the front and middle of the room.
We have adapted the Elfa system to our needs, too. A good hint: you can cut the Elfa shelves and other components with a Sawzall or hack saw. I ordered more pieces than I needed for this project so that I would have flexibility, and there have been several times when I have taken a whole section apart and reconfigured it. I think I am done configuring things now, and the leftover pieces will be returned. Overall, I am very happy with the layout!
I set a few rules for myself when organizing everything:
Use the zones. Kitchen items are together in one area, for example.
Group like items. All of the candles, for example, are together into a drawer.
No stacking. With the exception of a few small bins, nothing is stacked. Every item has its own space.
These rules were helpful in organizing items, but they also will help to keep things tidy as time goes on, our needs change, and the room changes, too.
It’s a really small room, but we did squeeze a treadmill in at the back with a small TV, too. The treadmill folds up when not in use, so we can access the shelves at the end of the room. And I’m thankful we didn’t have to put it in the living room! I will tell you, though, putting it together and getting it into the room… it was more than a bit like that scene from Friends where Ross and Rachel and Chandler attempt to take a couch up a stair well… Pivot!
Part Two: The Mudroom
I spent time this week tidying the Mudroom portion of this project as well. It’s time to make some big and small changes in this room, and I’m excited to get going!
A few years ago, we created a storage solution for coats, hats, mittens, etc. But we never finished it! So, project one is to finish the mudroom built-ins. And I will have a tutorial for creating this storage solution — it is an IKEA hack made from counter top and Billy bookcases. It shouldn’t take long to finish, but it must be done! I have never been crazy about the bins I ended up using here, either. They are too farmhouse for our home, but they work really well. So I will be giving them a bit of a makeover, too.
This dresser is a MCM vintage piece which I found on the Facebook Marketplace. It is so functional here! I reorganized the drawers so that the top drawer now holds all of the necessities for getting out of the house: sunscreen, hand sanitizer, wipes, bug spray, poop bags. Everything has a place and should be easy to find.
The rug is now listed to sell. It is a great wool rug that we bought years ago at Crate & Barrel, and it is the right size for the room. However, since this is the place for muddy shoes, snow gear, and wet paws, I need a rug that can go into the washing machine. So that’s on order.
And after months of fruitlessly searching for the right secondhand light fixtures, I have given up and ordered new lighting for this room, too. I am so committed to buying secondhand when I can that it is a little painful to buy new, but I just couldn’t find anything that was quite right. And I’m excited about what is coming!
The Design Priorities
So where are we on the project plan? Well, I’ve distilled this project down to three big design priorities:
Function and Storage: there’s a lot to fit into this strange little room without allowing it to look crammed. We’ll see if I can accomplish that!
Light and Lighting: this room has no windows, so we will be replacing the exterior door with something that will let in some natural light. We will also replace all of the light fixtures in the space, too.
Mid Century Style: it all has to work together, and the room needs some style, too. I’ll be using a combination of new and vintage items to give it a Mid Century vibe — I’m thinking Mid Modern Milan, personally.
This week was largely about function and storage — fine-tuning the Storage Room, tidying the Mudroom, and repurposing some storage. But I also ordered new lighting which is bringing some MCM style with it. And this weekend I’ll start stripping and restoring that beautiful door! So I’m on track, but we are at the halfway point. Eek!
Clean and crisp. White and wood. The Mid-Modern Mudroom Makeover will bring functional design and organization into one of the hardest-working rooms of our home. With a combination of vintage pieces, easy-to-clean fabrics, and storage solutions for every season, the result will be a mudroom that nods to our home’s Atomic Ranch roots while making space for our 21st century family.
To Linda Weinstein, the creator of the One Room Challenge, I offer my most sincere thanks. Thank you for offering this kind of opportunity and for opening it up to anyone. And to Better Homes and Gardens, the ORC media sponsor: thank you for making this possible! And to all of the other ORC participants: I’ll be sure to stop by to admire your work! It is always fun to do this together!
Thanks for following along! I’m so excited for the next phase!
Cheers!
Angela
Thanks to my sponsors for this project! Interested in being a sponsor? Let me know!
Don’t miss a single update!
Sign up and each installment of the One Room Challenge will come directly to your email on Thursdays! And be sure to stop by the One Room Challenge Blog to check out the other creative renovations happening across the country. You can also follow #oneroomchallenge and #bhgorc on Instagram for more inspiration! Be sure to follow me as well!
Pin it!
Week Three | May 20 | Ticking All the Boxes
Take a peek into my latest One Room Challenge project: the Mid Modern Mudroom Makeover
For the Spring 2021 One Room Challenge I am taking on our Mudroom. This is the workhorse of the house. It has to be filled with functional storage for all seasons, and ours is an unusual, dark room which needs more light, too. I’ll let you in on the inspiration board as well as plans for this welcoming room where organization and storage are critical — all infused with some Mid Modern style. Be sure to check in on all of the other ORC projects on the ORC blog here.
I will be honest: working inside on the One Room Challenge has been a challenge. We have had lovely, cool weather here for the last few weeks, and we have so many projects outside including getting the garden ready for summer, building new garden beds, and other planting projects — well, it is has been hard to be inside working!
Thankfully, this isn’t a huge, ambitious project! It is just perfect to balance with the outside work we are doing, and I am making slow, steady progress.
Step One: Storage Bins galore
The Mudroom is an L-shaped space with two functions: the entryway and the storage room. We started with the storage part of the room. Once this is done, we will tackle the entryway, but the storage room is the really hard part, so that’s where we began.
So last week was the grand emptying of the room. I pulled everything out and cleaned. We installed an Elfa shelving system along one wall. And then the fun began: bringing all of the newly-sorted and cleaned bins back in to put everything away.
I created the Elfa layout myself and, frankly, over-ordered on components so that I would have enough shelves, brackets, and drawers to fully kit out the room. I started with the largest bins at the ceiling — holiday decorations which only need to come out infrequently.
With like items already gathered together as part of the KonMari process, I created spaces for each kind of item. Frankly, it looks a bit like a store! The drawers are for overflow from the kitchen, and I’ll be installing more shelves very close together for platter and tray storage.
The Elfa system is easy to configure and rearrange which is so nice! I am still fussing with the layout of the shelves, but I am nearly there. Sometime soon I will give you a tour of the zones I have established which makes finding everything really easy, too!
And those tubs: well, they have been moved and used for years. They don’t all match. But not a single one is new! I was able to consolidate and condense things while using the KonMari method, so I didn’t have to buy anything new for storage — huge bonus!
Step Two: Let there be Light!
Remember one of the design goals for this project is to bring more light into the Mudroom portion of this room. Currently we have a cheap metal utility door from the exterior, but soon that will change!
I found these (there are two) Mid Century doors at an architectural salvage place, and I can’t wait to get them installed! These doors came out of a local church and are made of oak. One will become our front door and the other will be the door into the Mudroom. They need to be refinished, but they will bring light into this dark space, and I’m so excited to get them done!
We priced new doors from several companies, but buying a vintage door and retrofitting it cost about 10% of the cost of buying a new door. I have a little work and elbow grease ahead of me, but even with that, the cost savings is enormous. These doors were $300 each — largely because they are really unique and heavy. Salvaged doors are a great way to save money on a project, even if you have to wait and wait to find something exactly right! And using salvaged materials is always the eco-friendly choice!
Emtek sent me shiny new hardware for these doors which also arrived this week. I can’t wait to show you that gorgeousness!
The Design Priorities
So where are we on the project plan? Well, I’ve distilled this project down to three big design priorities:
Function and Storage: there’s a lot to fit into this strange little room without allowing it to look crammed. We’ll see if I can accomplish that!
Light and Lighting: this room has no windows, so we will be replacing the exterior door with something that will let in some natural light. We will also replace all of the light fixtures in the space, too.
Mid Century Style: it all has to work together, and the room needs some style, too. I’ll be using a combination of new and vintage items to give it a Mid Century vibe — I’m thinking Mid Modern Milan, personally.
This week has ticked all three boxes! Lots of storage, a new door to bring in natural light — and it’s a MCM door bringing a bit of style, too!
Clean and crisp. White and wood. The Mid-Modern Mudroom Makeover will bring functional design and organization into one of the hardest-working rooms of our home. With a combination of vintage pieces, easy-to-clean fabrics, and storage solutions for every season, the result will be a mudroom that nods to our home’s Atomic Ranch roots while making space for our 21st century family.
Thanks for following along! I’m so excited for the next phase!
Cheers!
Angela
Thanks to my sponsors for this project! Interested in being a sponsor? Let me know!
Don’t miss a single update!
Sign up and each installment of the One Room Challenge will come directly to your email on Thursdays! And be sure to stop by the One Room Challenge Blog to check out the other creative renovations happening across the country. You can also follow #oneroomchallenge and #bhgorc on Instagram for more inspiration! Be sure to follow me as well!
Pin it!
Week Two | May 13 | Paneling? Yep!
Take a peek into my latest One Room Challenge project: the Mid Modern Mudroom Makeover
For the Spring 2021 One Room Challenge I am taking on our Mudroom. This is the workhorse of the house. It has to be filled with functional storage for all seasons, and ours is an unusual, dark room which needs more light, too. I’ll let you in on the inspiration board as well as plans for this welcoming room where organization and storage are critical — all infused with some Mid Modern style. Be sure to check in on all of the other ORC projects on the ORC blog here.
For those of you who have been following along as I have done other One Room Challenge rooms, this next step will sound very familiar. If you are new here — first, welcome! — I am a devotee of the KonMari Method. And while generally you are supposed to KonMari your entire house at once (which I have done twice before), I also apply the same principles when decluttering and reorganizing a room. That’s where I began with the Mudroom project.
Step One: empty the whole room.
The Mudroom is an L-shaped space with two functions: the entryway and the storage room. We started with the storage part of the room. Once this is done, we will tackle the entryway, but the storage room is the really hard part, so that’s where we began.
People! There was sooo much stuff in this room. And… I am embarrassed to admit this, but let’s be real: we had a mouse problem in this room last fall. So when it was time to empty everything, I also cleaned EVERYTHING again. We chose a pretty weekend a few weeks ago and pulled everything out of the room. Anything the mice had touched went outside to be evaluated and/or disinfected again. I cleaned the carpet and disinfected everything thoroughly.
Once the gross part was done, the KonMari-ing could begin.
I grouped like items together — cleaning supplies, Christmas decorations, Easter decorations, kitchen overflow. I took several carloads of items to be donated or properly recycled including several expired carseats, luggage, bags, and purses. Every single item was evaluated carefully, and we were ruthless about getting rid of things we haven’t used, don’t like, and don’t need.
The mess has taken over our living room and dining room, but it is important to have space where you can spread out and to keep things organized.
Step Two: Install Paneling & Shelving
I took on the cleaning and sorting. And once the room was empty, my husband started on the exciting bits: installing the paneling and putting up the shelving.
Paneling, you ask? Yep! We are putting up Baltic Birch plywood on two walls for a little warmth and style — a modern take on a design detail that is right at home in our 1958 Atomic Ranch. At each seam we are putting in a small slice of walnut, too, as an accent. So far, it looks amazing! It’s a cheap, Mid Century touch that is bringing style to this small part of the room. Once we are done, I’ll create a project page tutorial showing exactly how to do this in case you are interested!
On the opposite wall, we started to install the shelving. I chose the Elfa shelving system from The Container Store. The entire system hangs from a top rail which makes it so easy to install and incredibly flexible, too. I used Elfa in my Workroom for the 2019 One Room Challenge, and given that I have LIVED in that room during the pandemic, I can tell you: it was absolutely the right choice! I am excited to use it here, too. However, I know that there is an IKEA system which is similar. If we lived closer to an IKEA, I would have been tempted to use that.
Elfa isn’t cheap, but every January The Container Store has a big Elfa sale. It is worth waiting for! That’s what I did. I bought it all in January. They have great curbside pickup service, but for this order it was all shipped directly to our house. Super easy!
This isn’t a glamorous room by any stretch, but it is going to look so much better with a little warm wood and very tidy shelving installed. I’m excited to get it all done — and to get the stuff out of the living room, too!
You may notice that we aren’t painting in here. The paint was done 4 years ago, so it is still in fine shape. And it is one of the neutrals that run through the whole house. So painting this part of the room was unnecessary.
The Design Priorities
So where are we on the project plan? Well, I’ve distilled this project down to three big design priorities:
Function and Storage: there’s a lot to fit into this strange little room without allowing it to look crammed. We’ll see if I can accomplish that!
Light and Lighting: this room has no windows, so we will be replacing the exterior door with something that will let in some natural light. We will also replace all of the light fixtures in the space, too.
Mid Century Style: it all has to work together, and the room needs some style, too. I’ll be using a combination of new and vintage items to give it a Mid Century vibe — I’m thinking Mid Modern Milan, personally.
So far the paneling is a big part of the Mid Century Style — a little Scandinavian Modern in what is essentially a giant closet! But it’s a lot of bang for very few bucks. The Elfa shelving is bringing the Function and Storage in a big way. Next week I should be able to give you a tour of that storage in all of its multi-functional wonder!
Clean and crisp. White and wood. The Mid-Modern Mudroom Makeover will bring functional design and organization into one of the hardest-working rooms of our home. With a combination of vintage pieces, easy-to-clean fabrics, and storage solutions for every season, the result will be a mudroom that nods to our home’s Atomic Ranch roots while making space for our 21st century family.
Thanks for following along! I’m so excited for the next phase!
Cheers!
Angela
Thanks to my sponsors for this project! Interested in being a sponsor? Let me know!
Don’t miss a single update!
Sign up and each installment of the One Room Challenge will come directly to your email on Thursdays! And be sure to stop by the One Room Challenge Blog to check out the other creative renovations happening across the country. You can also follow #oneroomchallenge and #bhgorc on Instagram for more inspiration! Be sure to follow me as well!
Pin it!
Week One | May 6 | Mid Modern Mudroom
Week One | May 6 | The Mudroom Before
Take a peek into my latest One Room Challenge project: the Mid Modern Mudroom Makeover
For the Spring 2021 One Room Challenge I am taking on our Mudroom. This is the workhorse of the house. It has to be filled with functional storage for all seasons, and ours is an unusual, dark room which needs more light, too. I’ll let you in on the inspiration board as well as plans for this welcoming room where organization and storage are critical — all infused with some Mid Modern style. Be sure to check in on all of the other ORC projects on the ORC blog here.
We first saw this house about four years ago over FaceTime. We were living in Los Angeles at the time and planning a move to Colorado. Our real estate agent opened the door, walked in, and said, “I don’t even know what this strange room is.” But I knew exactly what it COULD be. I had wanted a mudroom for years, and here it was at last!
But any room that leaves a real estate agent puzzled has some issues, and our mudroom is no exception. Once upon a time our Atomic Ranch home had a one-car garage. At some point, a previous homeowner enclosed the garage, added part of the space to the living room and the remainder became a workshop. That remainder was then remodeled into the strange, windowless L-shaped room which puzzled our real estate agent.
Our house does not have a garage, attic, or basement. So, the Mudroom also functions as our primary storage space. And right now “functions” is a relative term. It’s not terribly functional.
The Before
When we moved in, the Mudroom had two doors — an exterior door and a door into the living room. It is dark and windowless and, frankly, lacks style.
We filled the storage part of the room with shelving from our garage in Los Angeles — a temporary measure. But the shelves aren’t adjustable, and we never put any thought or effort into organizing this space. It was a jumble that just seemed to get messier and messier over time. We put a curtain up to hide the mess, but that’s ineffective!
I kept saying, “Someday, we will tackle the Storage Room…”
Well, SOMEDAY has arrived!
A Functional Mudroom
So, let’s talk about the plan! This room presents several critical challenges:
Storage: because we don’t have a garage, attic, or basement, this room must accommodate storage of several types
Holiday storage: all things Christmas and other holidays
Seasonal gear: coats, mittens, boots, etc all year round
Bulk and Backstock: cleaning supplies, toilet paper, paper towels — all the things!
Cleaning tools: the vacuum and other cleaning tools also need a dedicated spot
Kitchen Overflow: our kitchen storage is lacking, too, so small appliances, platters, and seasonal kitchen items all need a storage solution here
Seating and Dressing Space: we live in Colorado, so this room needs to accommodate boots and coats, and we need a place to get geared up before heading out
Drying Space: we also need a place for snowy and wet gear to dry out which means boot trays and hanging space
Shoe Storage: we are a shoe-free house. It helps keep the floors cleaner! So all of our shoes need a home in the Mudroom.
Backpacks, Purses, and Bags: we also need functional storage for backpacks, purses, bags, etc — all the gear for coming and going.
Dogs: I also want to make room for both dog kennels as well as leashes and other dog gear.
That’s a lot of function to fit into a small-ish space, but I do think it is possible.
Bonus: And… if I can, I would like to create a place for a treadmill in this room, too. With some careful space-planning, I think I can do it! Fingers crossed!
Here’s a quick sketch of the space plan. It’s not to scale, but it gives you an idea of the area and the kind of space I am working in.
The Design Priorities
Given ALL of that, I’ve distilled this project down to three big design priorities:
Function and Storage: there’s a lot to fit into this strange little room without allowing it to look crammed. We’ll see if I can accomplish that!
Light and Lighting: this room has no windows, so we will be replacing the exterior door with something that will let in some natural light. We will also replace all of the light fixtures in the space, too.
Mid Century Style: it all has to work together, and the room needs some style, too. I’ll be using a combination of new and vintage items to give it a Mid Century vibe — I’m thinking Mid Modern Milan, personally.
It doesn’t matter how pretty this room is if the room doesn’t work. So practicality will win every day. But light is really important to me, and I’m looking for solutions to let the light in, too.
I am using a palette of my favorite color — green — together with lots of beautiful wood tones. That will balance out and warm up the white storage solutions. More to come on all of that in the next few weeks.
And one more thing: while this project is unrolling over eight weeks, we did some of this work starting in March. We knew with the end of school and gardening projects beginning that it couldn’t unroll in real time. However, I’m presenting all of the work in the order it happened. And the room isn’t done yet, so the race to the finish will be very real, but I’ll be working on our garden as well.
Clean and crisp. White and wood. The Mid-Modern Mudroom Makeover will bring functional design and organization into one of the hardest-working rooms of our home. With a combination of vintage pieces, easy-to-clean fabrics, and storage solutions for every season, the result will be a mudroom that nods to our home’s Atomic Ranch roots while making space for our 21st century family.
I am so excited to get started on this project, and I’m thrilled to share all of the details with you!
Cheers!
Angela
Thanks to my sponsors for this project! Interested in being a sponsor? Let me know!
Don’t miss a single update!
Sign up and each installment of the One Room Challenge will come directly to your email on Thursdays! And be sure to stop by the One Room Challenge Blog to check out the other creative renovations happening across the country. You can also follow #oneroomchallenge and #bhgorc on Instagram for more inspiration! Be sure to follow me as well!